Exercises (1800)
Push-up position and jump to the side alternating ► burpee & box jump over / side jump
Power
Individual work
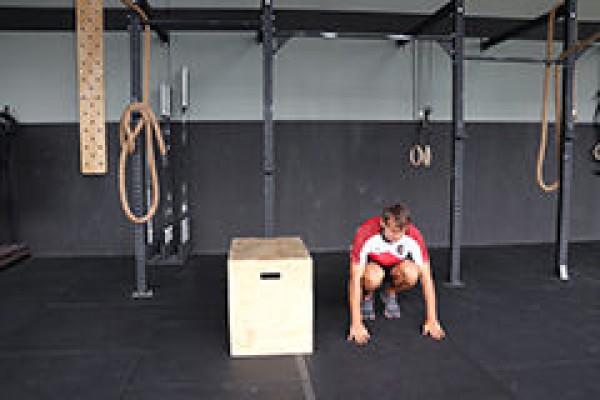

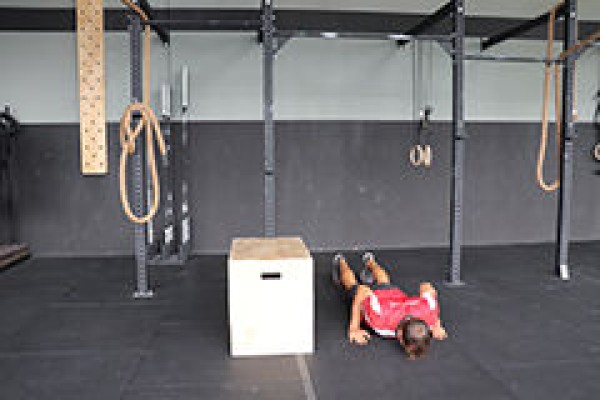
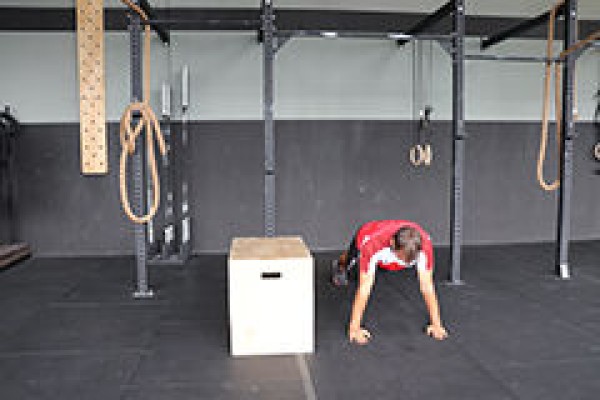
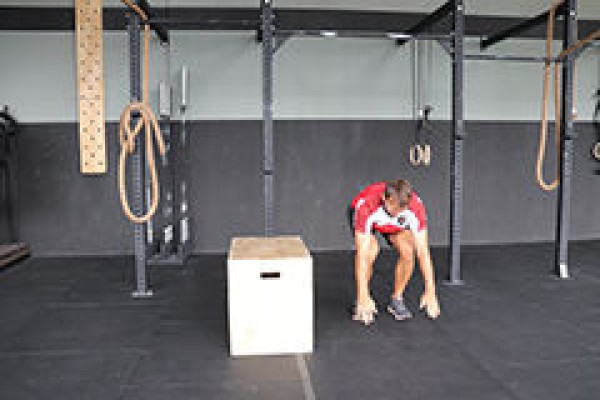

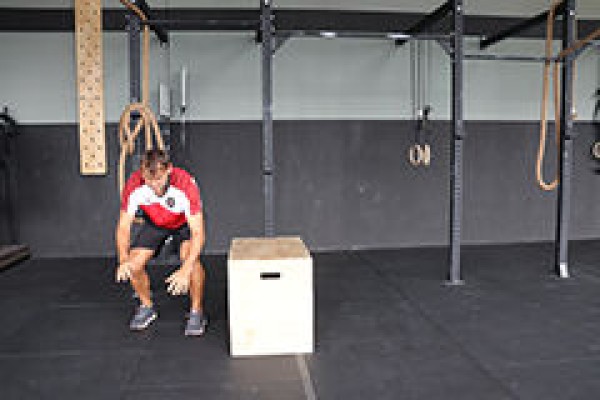

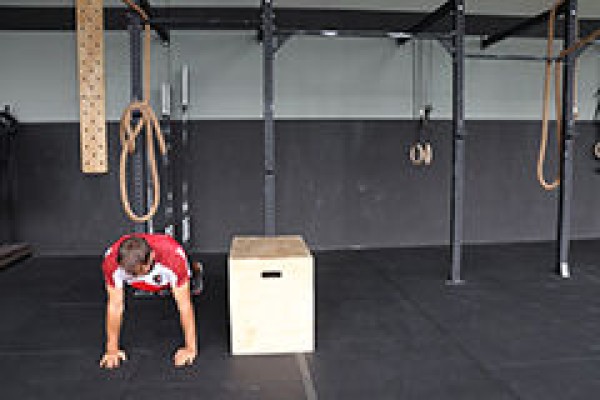
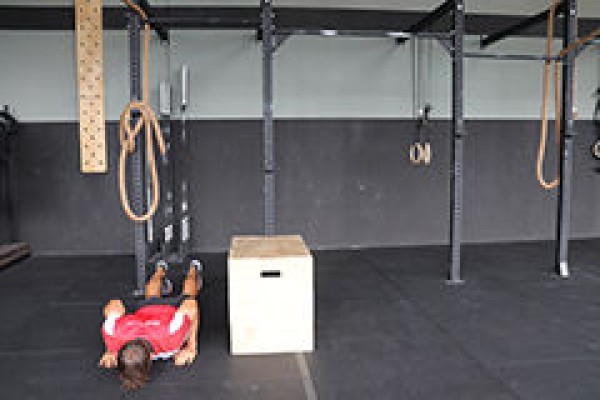
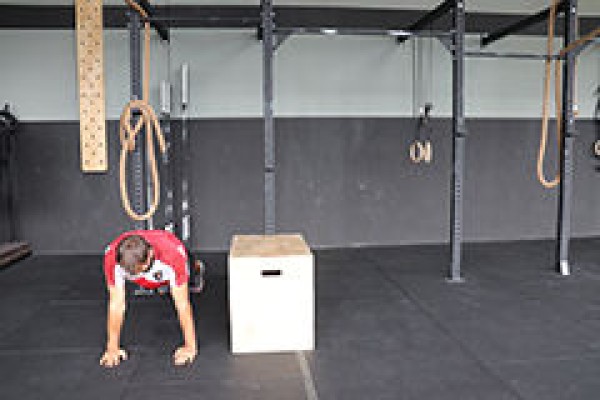
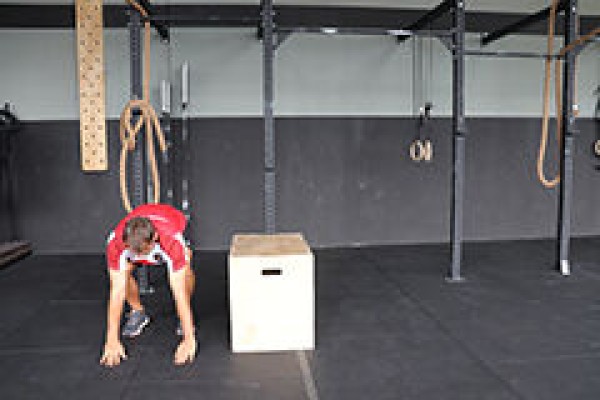
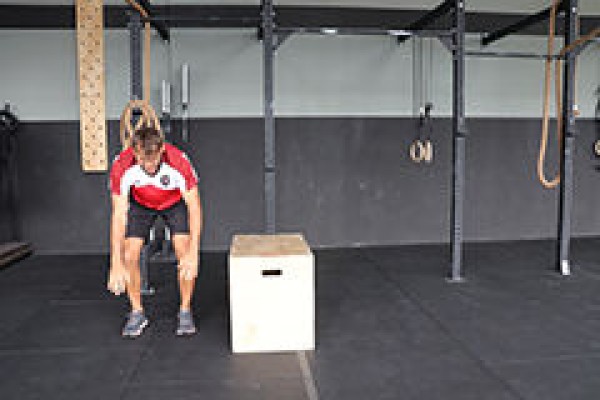
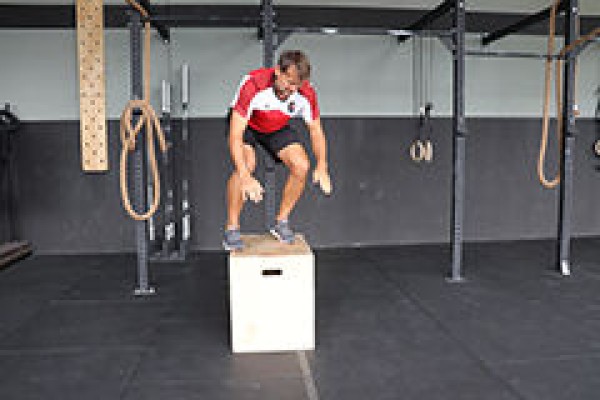
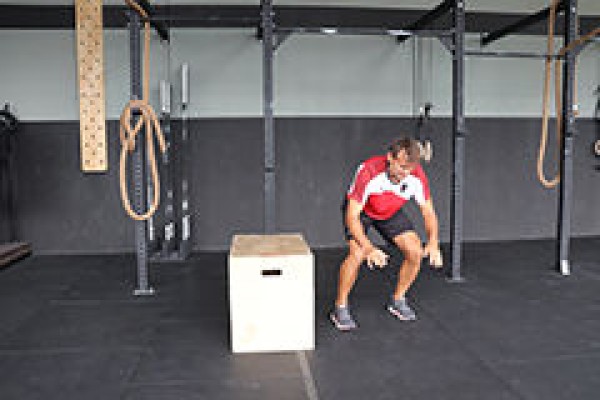
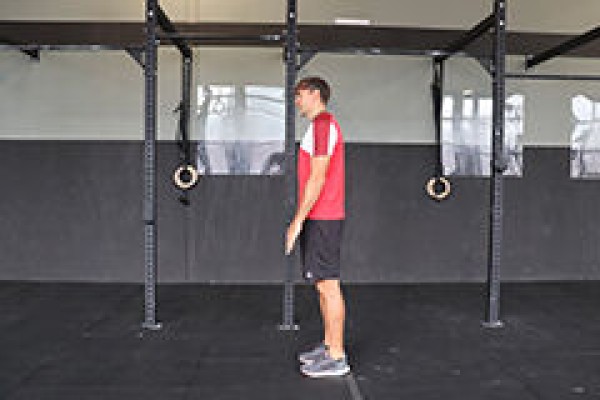
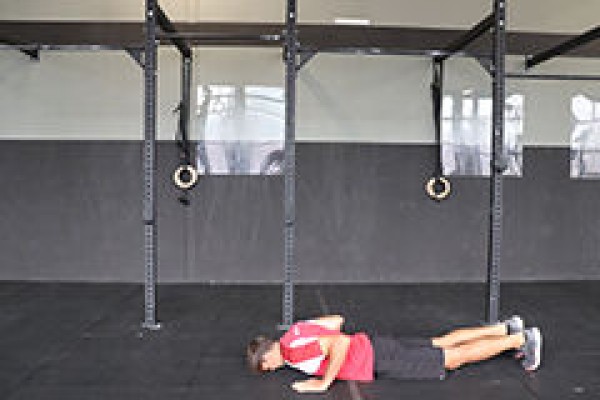
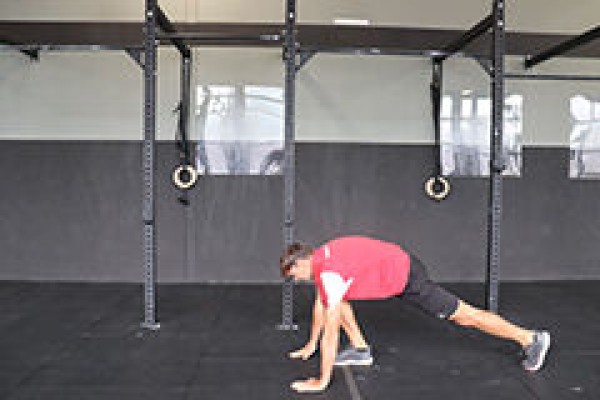
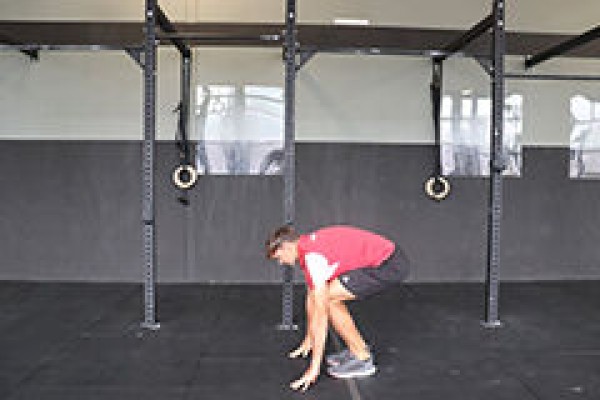
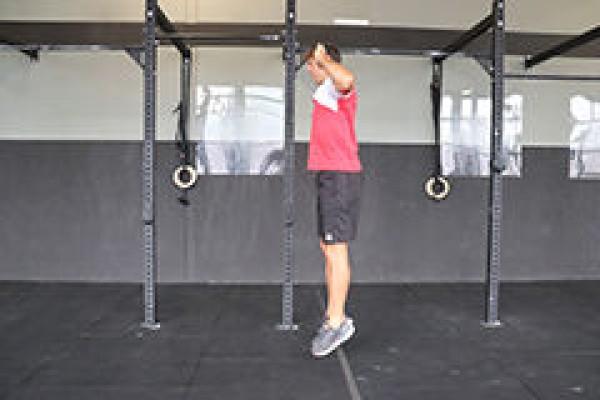
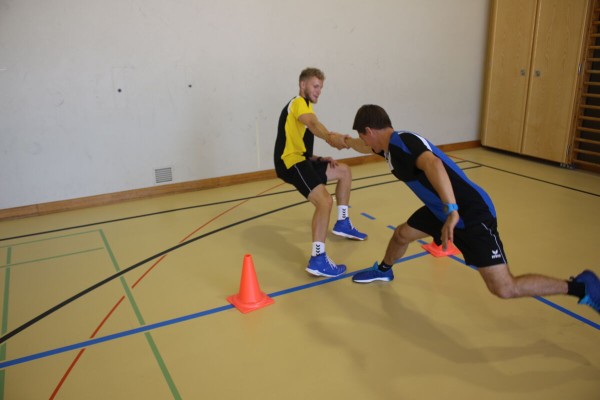
Stand upright and stand next to a raised object (plyo box or vaulting box element incl. top). From a standing position, bend your legs and place your hands next to your feet to get into a squat position. Support yourself with your hands, jump backwards with both legs to get into the push-up position. Bend your arms to fully lower your upper body (prone position). From the prone position, push back into the push-up position with both arms and jump back into the squat position. From the squat position, powerfully push your legs off the floor to perform a sideways jump onto the raised object (use the momentum of your arms). Without straightening the upper body and stretching the legs (again in the squat position), immediately jump again to the other side of the raised object. After landing (no need to stand upright), restart the exercise sequence from the squat position and then jump back to the starting position.
Attention:
Land as softly as possible on the box and then immediately jump again.
Lighten:
Lower intensity between each execution; lower height to jump over.
Harden:
Additional weight; higher object to jump over.
Variation:
Frontal jumps up and down from the object.
1 flat bench/plyo box/swivel box
2-4 weight cuffs/1 weight waistcoat ► Make the exercise more difficult (additional weight)
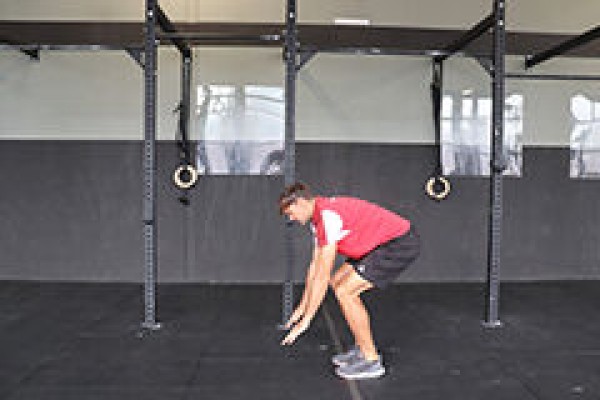
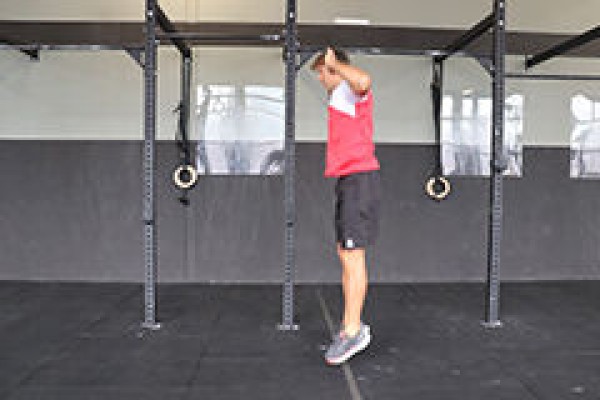
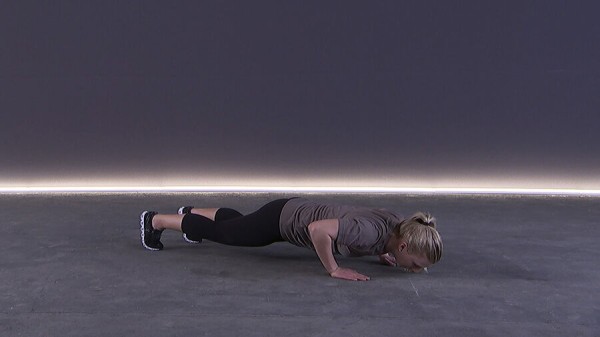
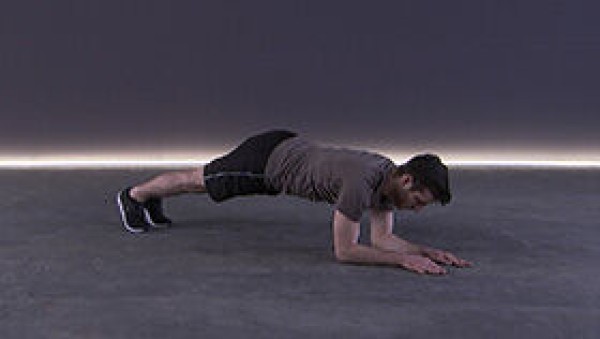
Push-up position and stretch jump alternating ► half burpee
Power
Individual work
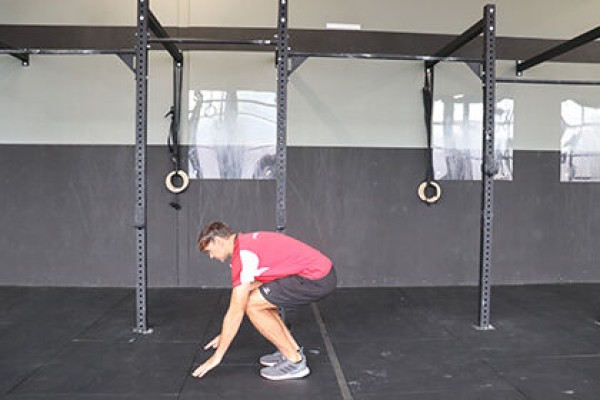
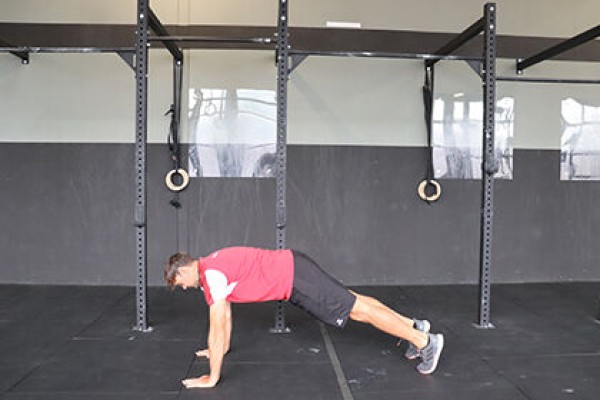
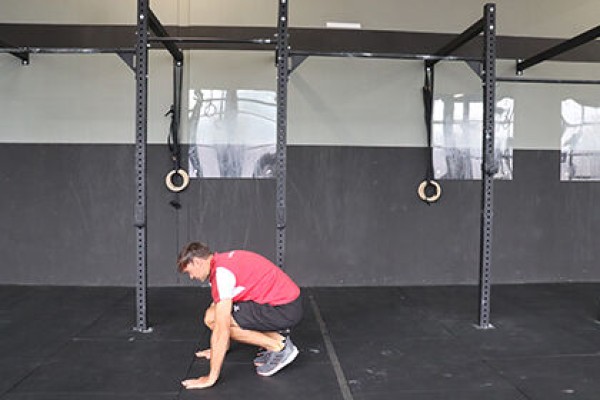
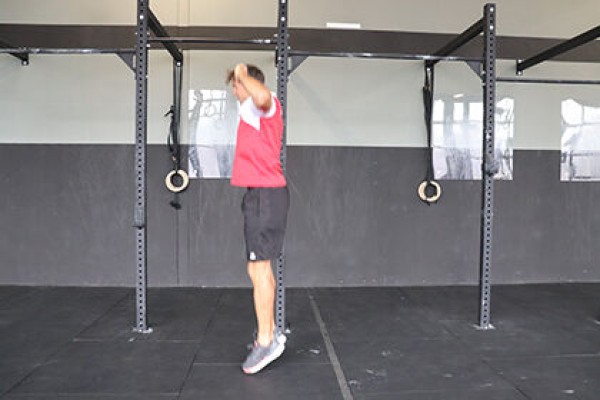
From a standing position, bend your legs, place your hands in front of your feet and jump backwards with both legs at the same time to get into a push-up position. Then jump back forwards with both legs to the starting position of the legs, perform a stretch jump from this crouching position (optionally cross your arms briefly behind your head during the flight phase) and land back in the starting position to begin the exercise again.
Attention:
No hollow back in the push-up position (body tension).
Lighten:
Lower intensity between the individual exercises; lower height during the stretch jump (or only straighten the upper body).
Harden:
Additional weight.
2-4 weight cuffs/1 weight waistcoat ► Make the exercise more difficult (additional weight)
Alternating push-up position and stretch jump ► scaled burpee
Power
Individual work
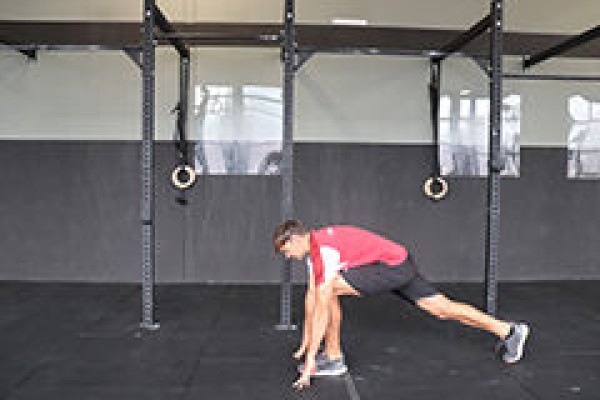
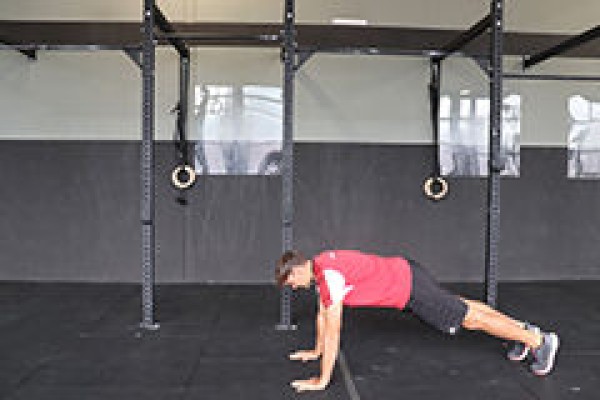

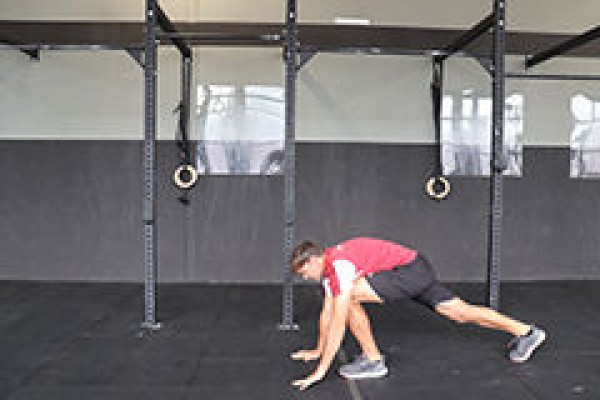
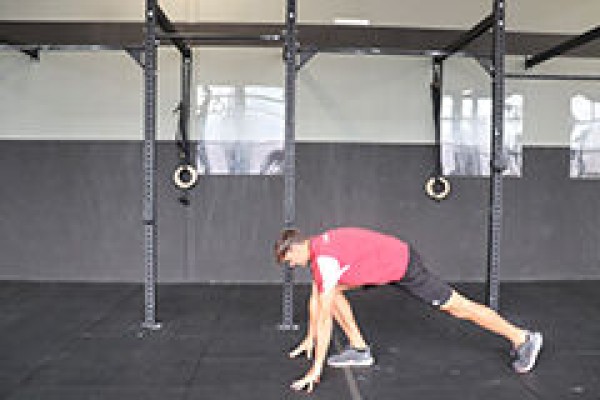
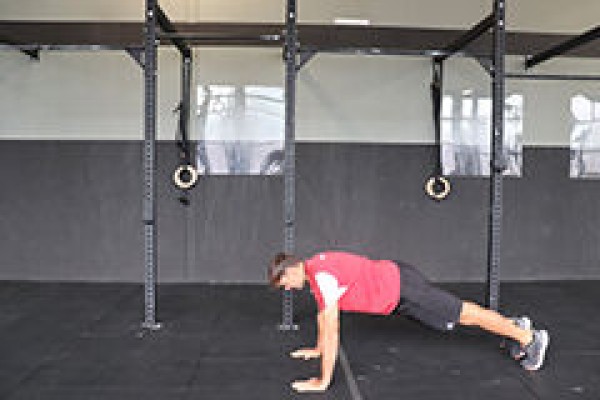
From a standing position, bend your legs and place your hands next to (in front of) your feet to assume the squat position. Support yourself with your hands and alternately move one leg backwards to reach the push-up position. Bend your arms to fully lower your upper body (prone position). From the prone position, use both arms to push yourself back into the push-up position, then alternately move one leg back into the squat position. From this squatting position, perform a stretch jump (optionally cross your arms briefly behind your head during the flight phase) and land back in the starting position to begin the exercise again (change which leg is moved backwards or forwards first for each exercise).
Attention:
No hollow back in the push-up position (body tension).
Lighten:
Lower intensity between the individual exercises; lower height during the stretch jump (or only straighten the upper body).
Harden:
Additional weight.
2-4 weight cuffs/1 weight waistcoat ► Make the exercise more difficult (additional weight)
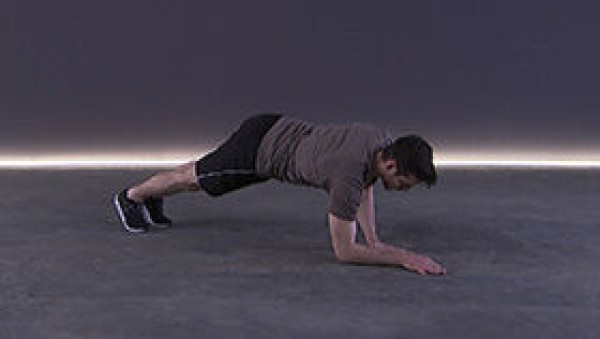
Deep push-up position
Power
Individual work
Deep push-up position, hold position.
Attention:
No hollow back, elbows bent approx. 45° from upper body ("A" shape with arms), shoulders are fixed and pulled down towards hips.
Lighten:
Place knees on floor (feet in high position); lower upper body less (arms barely bent); support arms on raised surface.
Harden:
Additional weight (on the back); place legs on a raised surface; unstable surface for the arms and/or legs.
Variant:
Vary the position of the hands/arms (e.g.: wide, narrow, together).
1 weight vest/weight disc/sandbag ► Make the exercise more difficult (additional weight)
1 ball/1-2 balance cushion/balance board ► Make the exercise more difficult (unstable surface)
1 raised surface Make the exercise easier or ► Make the exercise more difficult (position)
Push-up position and forearm support alternating ► push up position & elbow plank / push up position & front plank / push up position to elbow plank / push up position to front plank
Power
Individual work
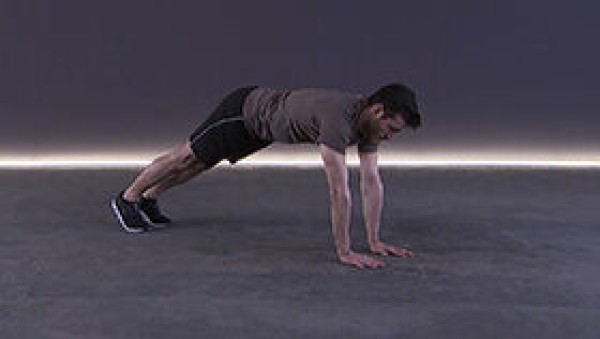
Switch from the push-up position to the forearm support and back (bend and stretch one arm at a time).
Attention:
Head, torso, hips and knees practically form a line (do not stretch your buttocks upwards or let them sag, tense your stomach).
Lighten:
Knees on the floor.
Harden:
Additional weight (on the back); unstable base for the legs.
1 weight vest/weight disc/sandbag ► to make the exercise more difficult (additional weight)
1 ball/balance cushion/balance board ► to make the exercise more difficult (unstable surface)
Liegestützposition und Unterarmstütz alternierend ► push up position & elbow plank / push up position & front plank / push up position to elbow plank / push up position to front plank
Power
Individual work
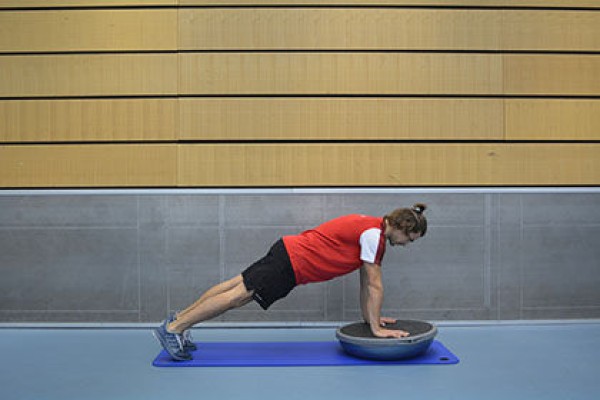
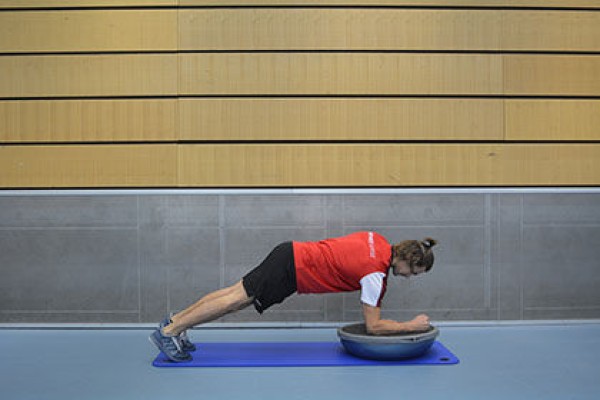
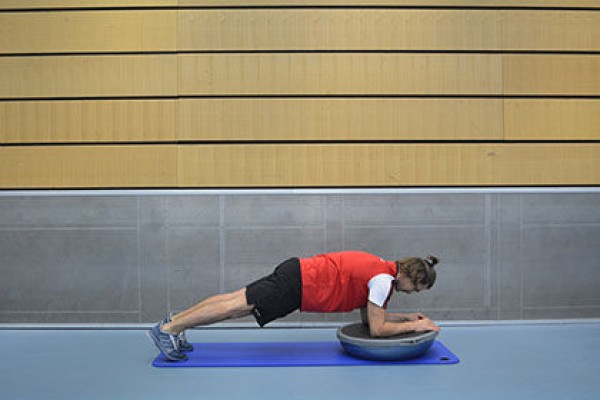
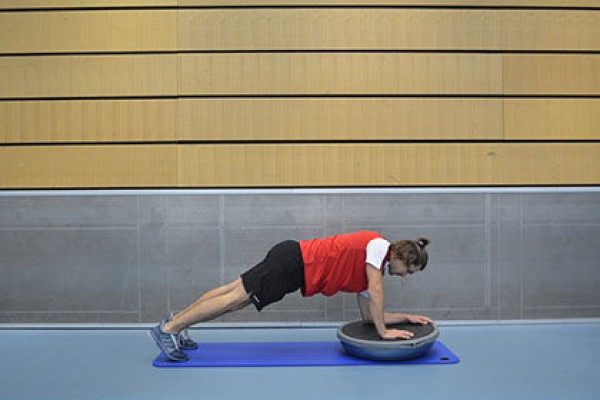
Switch from the push-up position to the forearm support and back (bend and stretch one arm at a time), placing the hands or forearms on a balance ball.
Attention:
Head, torso, hips and knees practically form a line (do not stretch your buttocks upwards or let them sag, tense your stomach).
Lighten:
Perform the exercise without the balancing hemisphere; knees on the floor.
Harden:
Additional weight (on the back); unstable base for the legs.
1 balance hemisphere
1 weight vest/weight disc/sandbag ► to make the exercise more difficult (additional weight)
1 ball/balance cushion/balance board ► to make the exercise more difficult (unstable base)
Liegestützposition und Unterarmstütz alternierend ► push up position & elbow plank / push up position & front plank / push up position to elbow plank / push up position to front plank
Power
Individual work
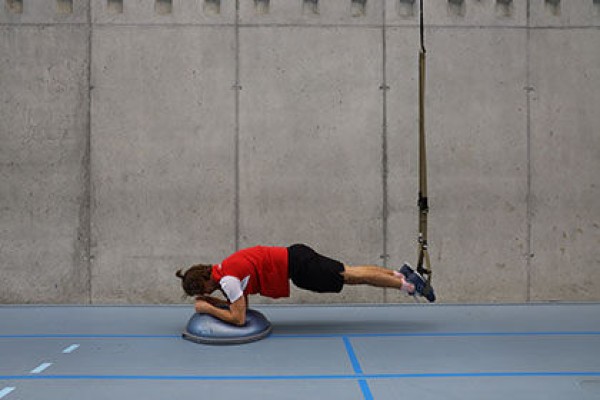
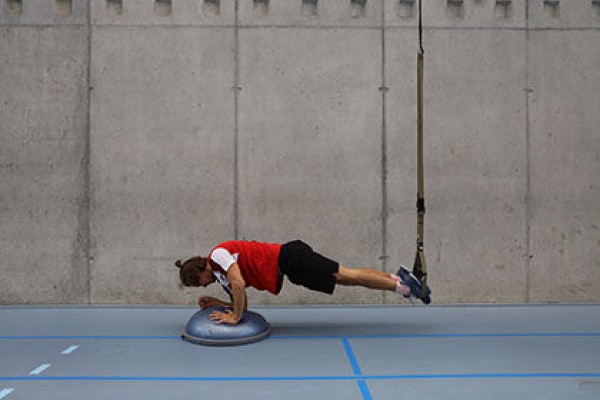
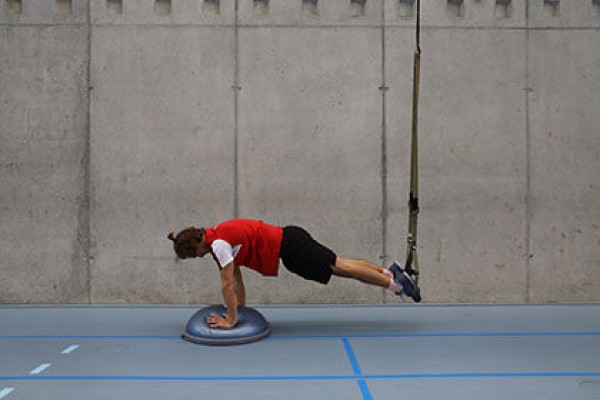
Switch from the push-up position to the forearm support and back (bend and stretch one arm at a time), with the hands or forearms placed on a balance hemisphere and the feet in the sling trainer (adjust the sling trainer to the length of the centre of the lower leg - while standing; feet vertically under the attachment point).
Attention:
Head, torso, hips and knees practically form a line (do not stretch your buttocks upwards or allow them to sag, tense your stomach).
Lighten:
Perform the exercise without the sling trainer and/or balance half-ball.
1 balance hemisphere
1 sling trainer
Push-up competition
Fighting and roughhousing games
Partner work
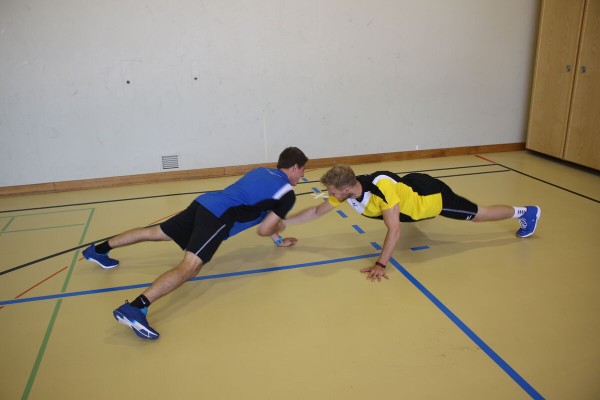
Two participants assume the push-up position (facing each other). The participants try to unbalance each other by pulling their arms away (or dodging). Whoever leaves the push-up position first (e.g. knees touch the floor) loses.
No material required
Push-up competition
Fighting and roughhousing games
Group work
The participants assume the push-up position and try to make another participant fall (knees on the floor) (pull hands away, push, dodge, unbalance, etc.). Whoever leaves the push-up position is eliminated and performs an additional exercise (e.g. wall sit, push-ups, forearm support). Which participant remains in the push-up position until the end?
No material required
Line drawing
Fighting and roughhousing games
Partner work
Two participants stand opposite each other on a line and grab each other by one hand or forearm. The participants try to pull their opponent over the line. Whoever crosses the line first loses.
Variant:
Whoever has to lift one leg off the ground first loses.
2 marking cones/caps (optional) ►Pitch marking
Post setup:
Caps mark the centre line.
Mat disposal
Fighting and roughhousing games
Group work
2-4 groups with 6-14 participants each
The group lines up behind a starting marker. There is a large soft mat in front of the group. On the start command, a binomial (possibly holding hands) or a single participant jumps onto the mat. After the jump, the next pair/participant is handed over, who in turn jumps onto the mat. The aim of mat jumping is to jump onto the soft mat in such a way that the mat is propelled as far forwards as possible. The winner is the group that gets their soft mat over a line or against a wall first. To ensure that the mat is not pushed further forwards when climbing down, the mat must always be left in the direction of the goal.
Per group:
1 soft mat (large)
1 marking cone/cap/painting stick
Mat fight
Fighting and roughhousing games
Group work
Groups of 2 (groups of 4-8 for the variation of the exercise)
Multiple groups of 2 try to push down the mats of the opposing teams with their mats held above their heads. Which team can hold their mat up the longest?
Variant:
Replace larger groups and the small ones with large mats.
Per group:
1 soft mat (small)
4 soft mats (large) ►Variation of the exercise
Mat pushing
Fighting and roughhousing games
Group work
2 groups with 3-5 participants each
Two teams try to push a mat over an agreed opponent's boundary. The point of attack is only the mat and not the opponent.
1 soft mat (large)
Wall displacement
Fighting and roughhousing games
Group work
2 groups with 6-10 participants each
Two groups line up back to back along a line. The participants in both groups hook each other with their arms. The teams try to push each other over a previously agreed line.
No material required
4 marking cones/caps (optional)
Avoidance artist
Light-Contact
Partner work
Regular change of roles and partners
.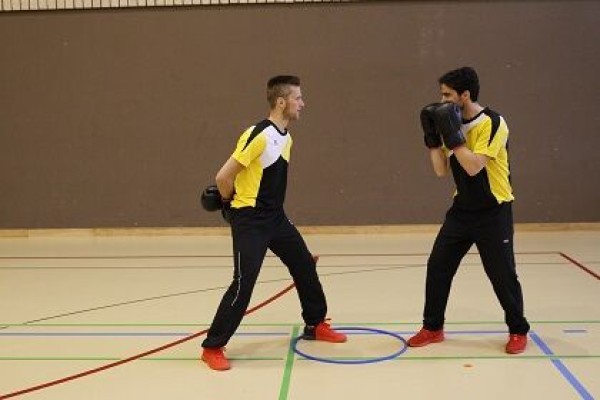

Participant A stands in a stepping position with their arms crossed behind their back and their front foot in a tyre. Participant B stands in box position and is allowed to move freely. Participant B now tries to hit A on the forehead with single straights (no series, combinations or feints). A tries to prevent these hits by avoiding them. Each hit scores one point. If B hits too hard, all points are lost. Roles change after a set time or after reaching a certain number of points.
Variations:
- Feint allowed;
- Do not perform as a competition form. B deliberately hits slower so that A can practise avoidance;
- Avoidance to the back not allowed, only to the side and downwards;
- Cover/block allowed.
Participant:
1 pair of boxing gloves
Participant:
1 tyre
Carrot pulling
Fighting and roughhousing games
Group work
6-10 participants
The participants lie on their stomachs, form a circle and hold hands (or interlock arms). Depending on the size of the group, two to four "farmers" are nominated who now have to grab as many of the participants lying on the floor (carrots) by the feet and pull them out of the circle (time limit may apply). If they succeed in doing this with one of the participants, this person automatically becomes a "farmer". The aim is to have harvested all the "carrots" at the end.
No material required
Move your arms upwards while standing
Power
Individual work
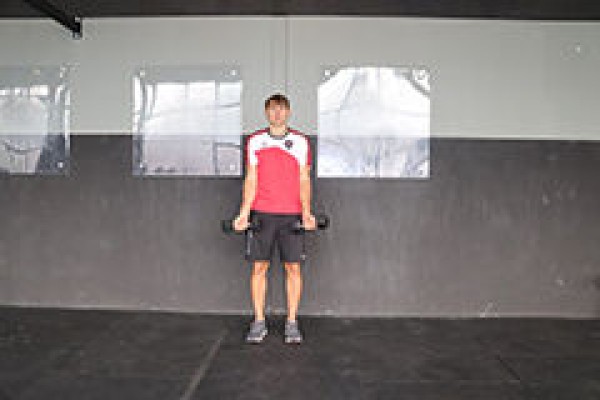
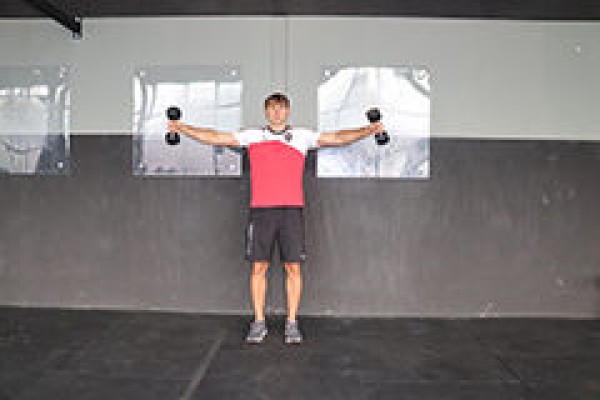
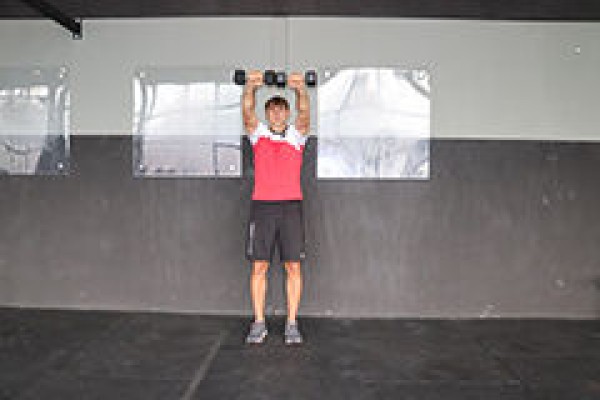
Standing upright, hold two dumbbells at the side of your body with your arms hanging down, grasp the dumbbells with an underhand grip (palms facing forwards), raise your practically straight arms upwards in a circular motion so that your almost closed arms are pointing diagonally upwards in front of your head (first raise the dumbbells sideways before bringing your arms together slightly above head height at about shoulder height). While raising the dumbbells, turn your arms in so that the backs of your hands are pointing upwards in the end position. Then move your arms back to the starting position in the reverse sequence of movements.
Attention:
Keep your shoulders lowered and your back straight; always keep your arms under tension (do not let them hang completely or bring them fully together).
Lighten:
Without/less weight.
Harden:
More weight or additional weight (on the arms).
2 dumbbells
2 weight cuffs ► Make the exercise more difficult (additional weight)
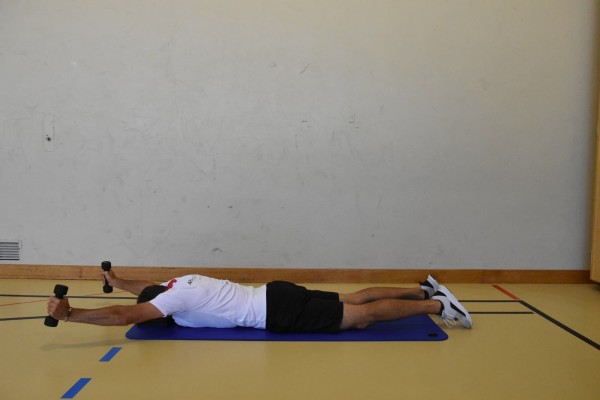
Move the arms forwards and backwards in a prone position ► W-extension / W-raise / W-Y-extension
Power
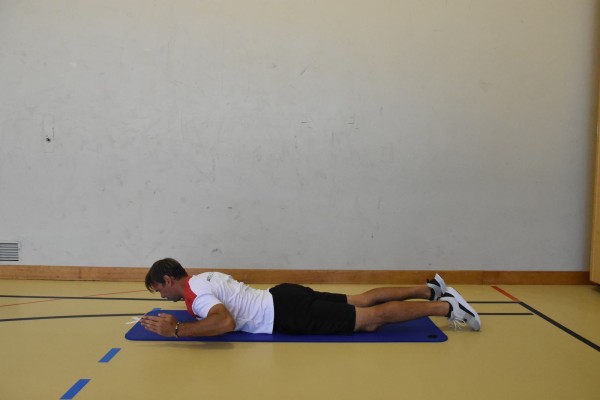

Lying on your stomach with your upper body slightly raised, feet shoulder-width apart, arms bent beside your body (hands at head height - palms facing inwards or downwards - W position), stretch your arms out diagonally forwards as an extension of your body and bend them back to the starting position.
Attention:
Do not lower your upper body and arms completely.
Lighten:
Lower your upper body/arms after each repetition or every now and then.
Harden:
Additional weight on the arms/in the hands.
Note:
The position of the hands is important for the target muscles and the position of the joints.
Palms facing down (pronated grip) = muscle activation: emphasizes the upper trapezius and the external rotators of the shoulder (e.g., infraspinatus, teres minor) / shoulder position: shoulders are more externally rotated / advantage: good posture correction, strengthens the back of the shoulders / disadvantage: can be uncomfortable or restrictive if you have shoulder problems.
Palms facing each other (neutral grip) = muscle activation: activates the middle trapezius, rhomboids, and rear deltoid muscles more strongly / shoulder position: less external rotation, easier on the joints / advantage: often more comfortable for the shoulder joints, better control / disadvantage: less targeted external rotation if that is the goal.
When to choose which: Shoulder health/rehab = neutral (palms facing each other)/focus on external rotators = pronated (palms facing down)/improve posture = both options are useful/keep movement pain-free = neutral is preferable.
Conclusion: The hand position during the W extension influences which parts of the shoulder muscles are used more and how stressful the movement is for the shoulder joints. Both variants are useful – depending on the goal or how it feels, both can be used (or even alternated during training).
Variation I:
Alternately raise one arm (instead of both at the same time).
Variation II:
Position on a flat bench or an incline bench.
2 weight cuffs/weight balls/dumbbells ► Make the exercise more difficult (additional weight)
Move the arms forwards and backwards in a prone position ► W-extension / W-raise / W-Y-extension
Power
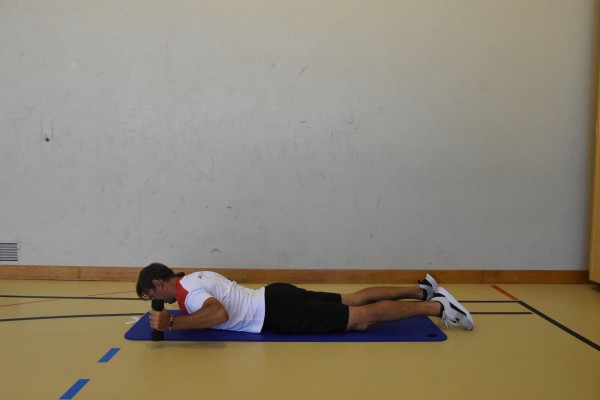
Lying on your stomach with your upper body slightly raised, feet shoulder-width apart, arms bent beside your body (hands at head height - palms facing inwards or downwards - W position), hold a (light) dumbbell in each hand, stretch your arms out diagonally forwards as an extension of your body and bend them back to the starting position.
Attention:
Do not lower your upper body and arms completely.
Lighten:
Lower your upper body/arms after each repetition or every now and then.
Harden:
Additional weight on the arms/in the hands.
Note:
The position of the hands is important for the target muscles and the position of the joints.
Palms facing down (pronated grip) = muscle activation: emphasizes the upper trapezius and the external rotators of the shoulder (e.g., infraspinatus, teres minor) / shoulder position: shoulders are more externally rotated / advantage: good posture correction, strengthens the back of the shoulders / disadvantage: can be uncomfortable or restrictive if you have shoulder problems.
Palms facing each other (neutral grip) = muscle activation: activates the middle trapezius, rhomboids, and rear deltoid muscles more strongly / shoulder position: less external rotation, easier on the joints / advantage: often more comfortable for the shoulder joints, better control / disadvantage: less targeted external rotation if that is the goal.
When to choose which: Shoulder health/rehab = neutral (palms facing each other)/focus on external rotators = pronated (palms facing down)/improve posture = both options are useful/keep movement pain-free = neutral is preferable.
Conclusion: The hand position during the W extension influences which parts of the shoulder muscles are used more and how stressful the movement is for the shoulder joints. Both variants are useful – depending on the goal or how it feels, both can be used (or even alternated during training).
Variation I:
Alternately raise one arm (instead of both at the same time).
Variation II:
Position on a flat bench or an incline bench.
2 weight cuffs/weight balls/dumbbells
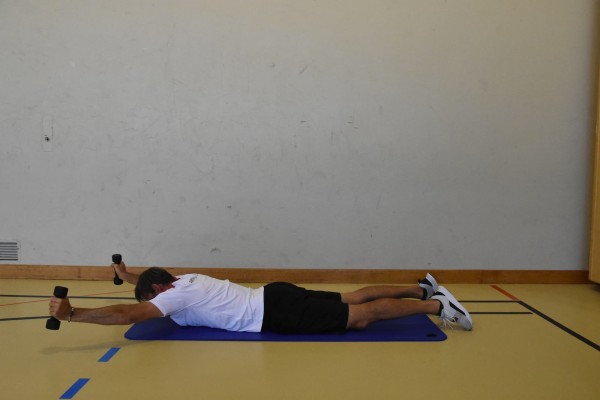
Move the arms forwards and backwards in a prone position ► W-extension / W-raise / W-Y-extension
Power

Lying on your stomach with your forehead resting on a folded cloth, feet shoulder-width apart, arms bent beside your body (hands at head height - palms facing inwards or downwards - W position), hold a (light) dumbbell in each hand, stretch your arms out diagonally forwards as an extension of your body and bend them back to the starting position.
Attention:
Do not lower your upper body and arms completely.
Lighten:
Lower your upper body/arms after each repetition or every now and then.
Harden:
Additional weight on the arms/in the hands.
Note:
The position of the hands is important for the target muscles and the position of the joints.
Palms facing down (pronated grip) = muscle activation: emphasizes the upper trapezius and the external rotators of the shoulder (e.g., infraspinatus, teres minor) / shoulder position: shoulders are more externally rotated / advantage: good posture correction, strengthens the back of the shoulders / disadvantage: can be uncomfortable or restrictive if you have shoulder problems.
Palms facing each other (neutral grip) = muscle activation: activates the middle trapezius, rhomboids, and rear deltoid muscles more strongly / shoulder position: less external rotation, easier on the joints / advantage: often more comfortable for the shoulder joints, better control / disadvantage: less targeted external rotation if that is the goal.
When to choose which: Shoulder health/rehab = neutral (palms facing each other)/focus on external rotators = pronated (palms facing down)/improve posture = both options are useful/keep movement pain-free = neutral is preferable.
Conclusion: The hand position during the W extension influences which parts of the shoulder muscles are used more and how stressful the movement is for the shoulder joints. Both variants are useful – depending on the goal or how it feels, both can be used (or even alternated during training).
Variation I:
Alternately raise one arm (instead of both at the same time).
Variation II:
Position on a flat bench or an incline bench.
2 weight cuffs/weight balls/dumbbells
Move the arms forwards and backwards in a prone position ► W-extension / W-raise / W-Y-extension
Power

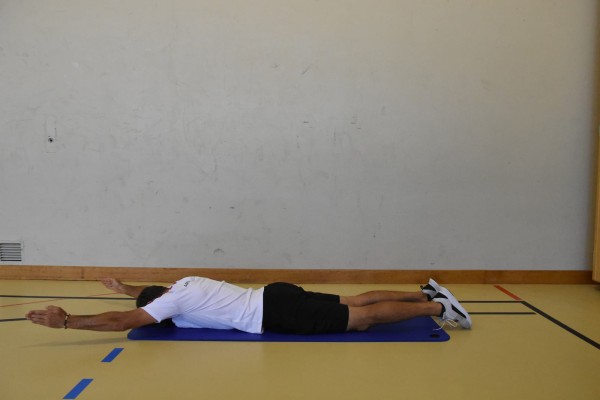
Lying on your stomach with your forehead resting on a folded cloth, feet shoulder-width apart, arms bent beside your body (hands at head height - palms facing inwards or downwards - W position), stretch your arms out diagonally forwards as an extension of your body and bend them back to the starting position.
Attention:
Do not lower your upper body and arms completely.
Lighten:
Lower your upper body/arms after each repetition or every now and then.
Harden:
Additional weight on the arms/in the hands.
Note:
The position of the hands is important for the target muscles and the position of the joints.
Palms facing down (pronated grip) = muscle activation: emphasizes the upper trapezius and the external rotators of the shoulder (e.g., infraspinatus, teres minor) / shoulder position: shoulders are more externally rotated / advantage: good posture correction, strengthens the back of the shoulders / disadvantage: can be uncomfortable or restrictive if you have shoulder problems.
Palms facing each other (neutral grip) = muscle activation: activates the middle trapezius, rhomboids, and rear deltoid muscles more strongly / shoulder position: less external rotation, easier on the joints / advantage: often more comfortable for the shoulder joints, better control / disadvantage: less targeted external rotation if that is the goal.
When to choose which: Shoulder health/rehab = neutral (palms facing each other)/focus on external rotators = pronated (palms facing down)/improve posture = both options are useful/keep movement pain-free = neutral is preferable.
Conclusion: The hand position during the W extension influences which parts of the shoulder muscles are used more and how stressful the movement is for the shoulder joints. Both variants are useful – depending on the goal or how it feels, both can be used (or even alternated during training).
Variation I:
Alternately raise one arm (instead of both at the same time).
Variation II:
Position on a flat bench or an incline bench.
2 weight cuffs/weight balls/dumbbells ► Make the exercise more difficult (additional weight)
Number run
Basic training
Group work
Groups of 4 (possibly integrate new group formation)
Form groups of four and number the participants within the group. The participants run behind each other in single file with a certain distance between them and at a normal basic pace (number one at the very back, number four at the very front). Number one catches up with number two, then number two catches up with number three, before number three catches up with number four. The number four now runs back to the number one before catching up and replacing the person in front starts all over again. According to the time specified by the sports director, the participants continue to move at the basic pace and the respective pace changes without interruption.
Variant I:
Change the distance of the participants.
Variant II:
Change the basic pace.
Variant III:
Change the group size (3-8 participants).
Variant IV:
The number one picks up the number two. The pair catches up with number three together, number three now takes over from number one, etc.
Intensity level: 3 (medium)
HFmax: 80-90%
Speaking rule: speak in complete sentences
Note: the exercise form is suitable for tempo and intensity changes
No material required
Number run
Basic training
Group work
Groups of 4 (possibly integrate new group formation)
Form groups of four and number the participants within the group. The participants run behind each other in single file at a certain distance and at a normal basic pace (number four at the very back, number one at the very front). Number four overtakes all the other participants and continues to run at a faster pace until the distance to the person behind (number one) is approximately the same as the distance between the other runners. The number three then starts to overtake the runners in front (possibly with a shout from the new leader). According to the time set by the sports leader, the participants continue to move at the basic pace and the respective pace changes without interruption.
Variant I:
Change the distance of the participants.
Variant II:
Change the basic pace.
Variant III:
Change the group size (3-8 participants).
Intensity level: 3 (medium)
HFmax: 80-90%
Speaking rule: speak in complete sentences
No material required
Move upper leg forwards in lateral forearm support (left) ► knee raise lateral pillar bridge / side bridge
Power
Individual work
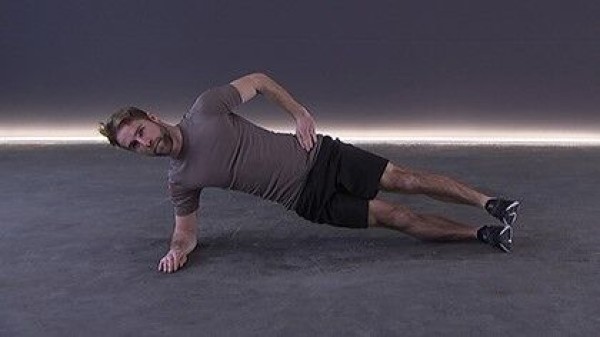
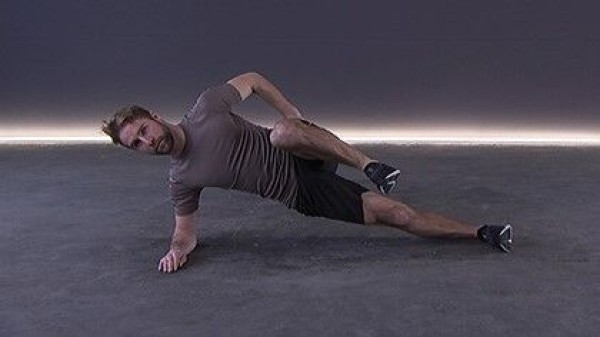
Side support on the (left) forearm, push the thigh of the upper leg straight out forwards (lower leg parallel, thigh bent at approx. 90 degrees to the body/leg) and return to the starting position.
Attention:
Head, torso, hips and knees practically form a line (pelvis does not tilt backwards or forwards), keep the shoulder above the elbow.
Lighten:
Knee on the floor; move your leg less forwards; just hold the position.
Harden:
Additional weight (for the free leg or on the hip); unstable support (possible for both the arm and the leg).
1 weight cuff/weight vest/weight disc/sandbag ► making the exercise more difficult (additional weight)
1 ball/1-2 balance cushions/1 balance board ► making the exercise more difficult (unstable surface)
Move upper leg forwards in lateral forearm support (right) ► knee raise lateral pillar bridge / side bridge
Power
Individual work
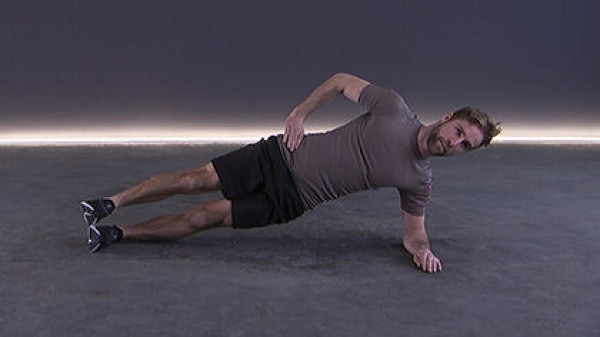
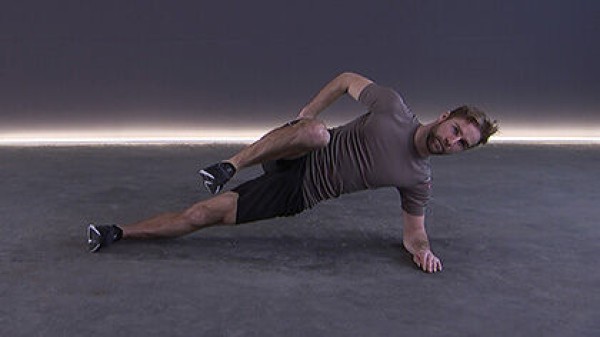
Side support on the (right) forearm, push the thigh of the upper leg straight out forwards (lower leg parallel, thigh bent at approx. 90 degrees to the body/leg) and return to the starting position.
Attention:
Head, torso, hips and knees practically form a line (pelvis does not tilt backwards or forwards), keep the shoulder above the elbow.
Lighten:
Knee on the floor; move your leg less forwards; just hold the position.
Harden:
Additional weight (for the free leg or on the hip); unstable support (possible for both the arm and the leg).
1 weight cuff/weight vest/weight disc/sandbag ► making the exercise more difficult (additional weight)
1 ball/1-2 balance cushions/1 balance board ► making the exercise more difficult (unstable surface)