Exercises (1800)
Intervalltraining (lang): 6-8 x 1000 (intensiv)
Interval training
Single run or in strength groups, with the pacemaker controlling the time
Exercise duration: 1000 metres
Break: 2-3 minutes (easy running)
Repeats: 6-8 times
Intensity level: 4 (hard)
Max HR: 90-95% (intensive interval method)
Rule of speech: speak in full sentences / short exchanges
On the basis of good basic training, the training form ideally follows with extensive interval units before moving on to the intensive variant. Intensive interval training is ultimately used by ambitious runners to work on their basic speed. The heart rate range is 90-95% of the maximum heart rate. The training takes place at or above the anaerobic threshold, i.e. in the "red zone". This requires the activation of fast-twitch muscle fibres and improves maximum oxygen uptake, lactate tolerance and pace hardness. The pace is fast (at competition speed or slightly below) and the breaks between efforts are longer than in the extensive form (suitable as training for shorter competitions such as 5km or 10km runs).
Interval training can be completed both on a track and off-road. The advantage of running on the track is that the runner always has control over the distance and the current running pace, which can promote the development of a sense of speed.
In interval training, it is important that the participants/groups try to cover approximately the same distance in the specified time for each interval or to complete a specified distance in approximately the same time. The various options for this type of training are as follows:
- Loop track: To ensure that the participants have enough space available for the run, they can be spread out on the loop track at the start. Using a stopwatch, each runner measures their own time for the specified distance. After the interval, the participants continue at a relaxed trot and start the next run after the break time has elapsed (variant: break on the spot). The participants moving at a relaxed trot must ensure that they do not hinder the runners who are in an exertion phase.
- Course: The defined course to be completed is marked. Participants start and stop their time independently (staggered start possible). The participants continue to move at a relaxed trot during the breaks, but make sure that they are back at one of the two possible starting positions at the end of the break time (variant: break in place). The sports leader defines the running routes for the outward and return routes to avoid collisions.
Variant: it is also possible to complete a shorter route several times until the desired distance is reached. Here too, it is important to pay attention to the running directions so that there are no collisions. The breaks are carried out as described above, except that in this form the start/finish is always in the same place. - Longer distance loop: A marker is placed on the route after every 1 kilometre (load) (e.g. balloon, route tape, wooden wedge). The participants keep moving after the interval (relaxed trotting), but make sure that they are back at the last marker at the end of the break time in order to start the next run. Participants who are in the recovery phase should be considerate so that they do not hinder the active runners. Ideally, the participants should be back at the starting point after the last interval (6 intervals = 6 km running distance, 8 intervals = 8 km running distance), otherwise additional teaching time must be calculated for the return shift.
Distance markers (signs with metres)
1 signalling instrument (e.g. whistle)
FTA evaluation (group formation)
Per participant:
1 heart rate monitor
For sports leader or per participant/group:
1 stopwatch
Interval training (long): 8 x 2 (extensive or intensive)
Interval training
Single run or in strength groups, with the pacemaker controlling the time
Exercise duration: 2 minutes
Pause: 1-3 minutes (easy running)
Repeats: 8 times
Intensity level: 3 (medium) / 4 (hard)
Max HR: 80-90% (extensive interval method) / 90-95% (intensive interval method)
Rule of speech: speak in full sentences / short exchanges
Both beginners to running training and experienced runners benefit from the extensive interval method. Ideally, you should choose the extensive variant before the intensive interval units, but the runner should already have a good basic training programme. The breaks between the workouts are relatively short and the running pace is somewhat slower than during intensive interval training (80-90% HRmax). It is important that the heart rate does not fall below 120 beats per minute so that the body does not slow down too much. Extensive interval training takes place slightly below the anaerobic threshold and aims to increase aerobic performance (ideal training for longer competitions such as half marathons or marathons). Intensive interval training is used by ambitious runners to work on their basic speed. The heart rate range is 90-95% of the maximum heart rate. The training takes place at or above the anaerobic threshold, i.e. in the "red zone". This requires the activation of fast-twitch muscle fibres and improves maximum oxygen uptake, lactate tolerance and pace hardness. The pace is fast (at competition speed or slightly below) and the breaks between efforts are longer than with the intensive form (suitable as training for shorter competitions such as 5km or 10km runs).
Interval training can be completed both on a track and off-road. Running on the track has the advantage that the runner always has control over the distance and the current running pace, which can promote the development of a sense of speed.
In interval training, it is important that the participants/groups try to cover approximately the same distance in the specified time for each interval or to complete a specified distance in approximately the same time. The various options for this type of training are as follows:
- Loop track: To ensure that the participants have enough space available for the run, they can be spread out on the loop track at the start. The load starts from the same starting point for each individual runner for each repetition. During the breaks, the participants return to their starting point. The participants can check/calculate the distance travelled after each interval (comparison with the previous run). The sports director has all participants in view and can therefore start or stop the intervals with a signal.
Variant: run in the opposite direction for all straight repetitions instead of returning to the starting point during the break (goal: reaching the starting point). - Distance of at least 600 metres: Distances are marked with signs (e.g. from 200m every 25-50m). Each participant receives a stop/pulse watch, runs the course independently and memorises the distance covered (it is possible for participants to start in stages, whereby the running routes must be determined in order to avoid collisions). After the break time has elapsed, the participants run the same distance back to the starting point. During the breaks, the participants wait in place or continue running at a relaxed trot, but return to the starting point in good time (end of the previous interval). If the course allows, the sports director can give the start/stop signal for all participants (no staggering possible).
Variant: If you only have a short course available, you must turn around at the end of the course and continue running in the opposite direction (define running routes to avoid collisions) until the end of the exercise time. At the next interval, the participants run the distance they ran before in the opposite direction back to the starting point (comparison with the previous run). - Longer distance circuit: The distances are marked with signs (every 25-50m). Each participant receives a stop/pulse watch, runs the course independently and calculates the distance covered (no staggered start of the participants necessary). During the breaks, the participants wait in place or continue running at a relaxed trot until the end of the break time. At each interval, the participants must calculate the distance travelled based on the start/end point of the interval (comparison with the previous run). After the last interval, all runners return to the starting point, which takes additional time. Ideally, the running distance corresponds approximately to the distance that can be covered in the time available in order to generate as little additional displacement time as possible.
Distance markers (signs with metres)
1 signalling instrument (e.g. whistle)
FTA evaluation (group formation)
Per participant:
1 heart rate monitor
For sports leader or per participant/group:
1 stopwatch
Interval training (long): 8-10 x 800 (intensive)
Interval training
Single run or in strength groups, with the pacemaker controlling the time
Exercise duration: 800 metres
Break: 2-3 minutes (easy running)
Repeats: 8-10 times
Intensity level: 4 (hard)
Max HR: 90-95% (intensive interval method)
Rule of speech: speak in full sentences / short exchanges
On the basis of good basic training, the training form ideally follows with extensive interval units before moving on to the intensive variant. Intensive interval training is ultimately used by ambitious runners to work on their basic speed. The heart rate range is 90-95% of the maximum heart rate. The training takes place at or above the anaerobic threshold, i.e. in the "red zone". This requires the activation of fast-twitch muscle fibres and improves maximum oxygen uptake, lactate tolerance and pace hardness. The pace is fast (at competition speed or slightly below) and the breaks between efforts are longer than in the extensive form (suitable as training for shorter competitions such as 5km or 10km runs).
Interval training can be completed both on a track and off-road. The advantage of running on the track is that the runner always has control over the distance and the current running pace, which can promote the development of a sense of speed.
In interval training, it is important that the participants/groups try to cover approximately the same distance in the specified time for each interval or to complete a specified distance in approximately the same time. The various options for this type of training are as follows:
- Loop track: To ensure that the participants have enough space available for the run, they can be spread out on the loop track at the start. Using a stopwatch, each runner measures their own time for the specified distance. After the interval, the participants continue at a relaxed trot and start the next run after the break time has elapsed (variant: break on the spot). The participants moving at a relaxed trot must ensure that they do not hinder the runners who are in an exertion phase.
- Course: The defined course to be completed is marked. Participants start and stop their time independently (staggered start possible). The participants continue to move at a relaxed trot during the breaks, but make sure that they are back at one of the two possible starting positions at the end of the break time (variant: break in place). The sports leader defines the running routes for the outward and return routes to avoid collisions.
Variant: it is also possible to complete a shorter route several times until the desired distance is reached. Here too, it is important to pay attention to the running directions so that there are no collisions. The breaks are carried out as described above, except that in this form the start/finish is always in the same place. - Longer-distance circuit: A marker is placed on the course after every 800 metres (load) (e.g. balloon, route tape, wooden wedge). The participants keep moving after the interval (relaxed trotting), but make sure that they are back at the last marker at the end of the break time in order to start the next run. The participants who are in the recovery phase take care not to hinder the active runners. Ideally, the participants should be approximately back at the starting point after the last interval (8 intervals = 6.4 km running distance, 10 intervals = 8 km running distance), otherwise additional teaching time must be calculated for the return shift.
Distance markers (signs with metres)
1 signalling instrument (e.g. whistle)
FTA evaluation (group formation)
Per participant:
1 heart rate monitor
For sports leader or per participant/group:
1 stopwatch
Interval training (medium-playful): Number run
Interval training
Group work
Groups of 4 (integrate new group formation)
Form groups of four and number the participants within the group. The participants run behind each other in single file at a certain distance (approx. 50 metres) and at a normal basic pace (number four at the very back, number one at the very front). The number four overtakes all the other participants and continues to run at an increased pace until the distance to the person behind (number one) is approximately the same as the distance between the other runners. The number three then starts to overtake the runners in front (possibly with a shout from the new leader). The exercise is continued until the participants have returned to the same order in the single file as at the start of the exercise (number 1 at the front, number 4 at the back). If several passes are desired, the participants can pause in place after a complete pass or continue at a relaxed trot in order to then start the next overtaking manoeuvres (possibly forming new groups).
Variant I:
Change the distance of the participants.
Variant II:
Change the basic pace.
Variant III:
Change the size of the group (3-8 participants).
Exercise duration: 3 x approx. 200m + additional distance for participants at basic pace
Break: 1-3 minutes (easy trot or wait in place)
Repetitions: 2-4 runs
Intensity level: 3 (medium) / 4 (hard)
Hmax: 80-90% (extensive interval method) / 90-95% (intensive interval method)
Rule of speech: speak in full sentences / short exchanges
Both beginners to running training and experienced runners will benefit from the extensive interval method. Ideally, you should choose the extensive variant before the intensive interval units, but the runner should already have a good basic training programme. The breaks between the workouts are relatively short and the running pace is somewhat slower than during intensive interval training (80-90% HRmax). It is important that the heart rate does not fall below 120 beats per minute so that the body does not slow down too much. Extensive interval training takes place slightly below the anaerobic threshold and aims to increase aerobic performance (ideal training for longer competitions such as half marathons or marathons). Intensive interval training is used by ambitious runners to work on their basic speed. The heart rate range is 90-95% of the maximum heart rate. The training takes place at or above the anaerobic threshold, i.e. in the "red zone". This requires the activation of fast-twitch muscle fibres and improves maximum oxygen uptake, lactate tolerance and pace hardness. The pace is fast (at competition speed or slightly below) and the breaks between efforts are longer than in the intensive form (suitable as training for shorter competitions such as 5km or 10km runs).
No material required
Interval training (medium): 10 x 300 (extensive)
Interval training
Single run or in strength groups, with the pacemaker controlling the time
Exercise duration: 300 metres
Pause: 1-2 minutes (easy running)
Repeats: 10 times
Intensity level: 3 (medium)
Max HR: 80-90% (extensive interval method)
Rule of thumb: speak in full sentences
Both beginners and experienced runners benefit from the extensive interval method. Ideally, you should choose the extensive variant before the intensive interval units, but the runner should already have a good basic training programme. The breaks between the workouts are relatively short and the running pace is somewhat slower than during intensive interval training (80-90% HRmax). It is important that the heart rate does not fall below 120 beats per minute so that the body does not slow down too much. Extensive interval training takes place slightly below the anaerobic threshold and the aim is to increase aerobic performance (ideal training for longer competitions such as half marathons or marathons).
Interval training can be completed both on a track and off-road. The advantage of running on the track is that the runner always has control over the distance and the current running pace, which can promote the development of a sense of speed.
In interval training, it is important that the participants/groups try to cover roughly the same distance in the specified time for each interval or to complete a specified distance in roughly the same time. The various options for this type of training are as follows:
- Loop track: To ensure that the participants have enough space available for the run, they can be spread out on the loop track at the start. Using a stopwatch, each runner measures their own time for the specified distance. After the interval, the participants continue at a relaxed trot and start the next run after the break time has elapsed (variant: break on the spot). The participants moving at a relaxed trot must ensure that they do not hinder the runners who are in an exertion phase.
- Course: The defined course to be completed is marked. Participants start and stop their time independently (staggered start possible). The participants continue to move at a relaxed trot during the breaks, but make sure that they are back at one of the two possible starting positions at the end of the break time (variant: break in place). The sports leader defines the running routes for the outward and return routes to avoid collisions.
Variant: it is also possible to complete a shorter route several times until the desired distance is reached. Here too, it is important to pay attention to the running directions so that there are no collisions. The breaks are carried out as described above, except that in this form the start/finish is always in the same place. - Longer-distance circuit: A marker is placed on the course after every 300 metres (load) (e.g. balloon, route tape, wooden wedge). The participants keep moving after the interval (relaxed trotting), but make sure that they are back at the last marker at the end of the break time in order to start the next run. The participants who are in the recovery phase take care not to hinder the active runners. Ideally, the participants should be approximately back at the starting point after the last interval (10 intervals = 3 km running distance), otherwise additional teaching time must be calculated for the return journey.
Distance markers (e.g. marker cones or route tape)
FTA evaluation (group formation)
Per participant:
1 heart rate monitor
Per participant/group:
1 stopwatch
Interval training (medium): 10-12 x 400 (intensive)
Interval training
Single run or in strength groups, with the pacemaker controlling the time
Exercise duration: 400 metres
Break: 2-3 minutes (easy running)
Repeats: 10-12 times
Intensity level: 4 (hard)
Max HR: 90-95% (intensive interval method)
Rule of speech: speak in full sentences / short exchanges
On the basis of good basic training, the training form ideally follows with extensive interval units before moving on to the intensive variant. Intensive interval training is ultimately used by ambitious runners to work on their basic speed. The heart rate range is 90-95% of the maximum heart rate. The training takes place at or above the anaerobic threshold, i.e. in the "red zone". This requires the activation of fast-twitch muscle fibres and improves maximum oxygen uptake, lactate tolerance and pace hardness. The pace is fast (at competition speed or slightly below) and the breaks between efforts are longer than in the extensive form (suitable as training for shorter competitions such as 5km or 10km runs).
Interval training can be completed both on a track and off-road. The advantage of running on the track is that the runner always has control over the distance and the current running pace, which can promote the development of a sense of speed.
In interval training, it is important that the participants/groups try to cover approximately the same distance in the specified time for each interval or to complete a specified distance in approximately the same time. The various options for this type of training are as follows:
- Loop track: To ensure that the participants have enough space available for the run, they can be spread out on the loop track at the start. Using a stopwatch, each runner measures their own time for the specified distance. After the interval, the participants continue at a relaxed trot and start the next run after the break time has elapsed (variant: break on the spot). The participants moving at a relaxed trot must ensure that they do not hinder the runners who are in an exertion phase.
- Course: The defined course to be completed is marked. Participants start and stop their time independently (staggered start possible). The participants continue to move at a relaxed trot during the breaks, but make sure that they are back at one of the two possible starting positions at the end of the break time (variant: break in place). The sports leader defines the running routes for the outward and return routes to avoid collisions.
Variant: it is also possible to complete a shorter route several times until the desired distance is reached. Here too, it is important to pay attention to the running directions so that there are no collisions. The breaks are carried out as described above, except that in this form the start/finish is always in the same place. - Longer-distance circuit: A marker is placed on the course after every 400 metres (load) (e.g. balloon, route tape, wooden wedge). The participants keep moving after the interval (relaxed trotting), but make sure that they are back at the last marker at the end of the break time in order to start the next run. The participants who are in the recovery phase take care not to hinder the active runners. Ideally, the participants should be approximately back at the starting point after the last interval (10 intervals = 4 km running distance, 12 intervals = 4.8 km running distance), otherwise additional teaching time must be calculated for the return shift.
Distance markers (signs with metres)
1 signalling instrument (e.g. whistle)
FTA evaluation (group formation)
Per participant:
1 heart rate monitor
For sports leader or per participant/group:
1 stopwatch
Interval training (medium): 4-8 x 1 (extensive or intensive)
Interval training
Single run or in strength groups, with the pacemaker controlling the time
Exercise duration: 1 minute
Pause: 1-2 minutes
Repetitions: 4-8 times
Intensity level: 3 (medium) / 4 (hard)
Max HR: 80-90% (extensive interval method) / 90-95% (intensive interval method)
Rule of speech: speak in full sentences / short exchanges
Both beginners to running training and experienced runners benefit from the extensive interval method. Ideally, you should choose the extensive variant before the intensive interval units, but the runner should already have a good basic training programme. The breaks between the workouts are relatively short and the running pace is somewhat slower than during intensive interval training (80-90% HRmax). It is important that the heart rate does not fall below 120 beats per minute so that the body does not slow down too much. Extensive interval training takes place slightly below the anaerobic threshold and aims to increase aerobic performance (ideal training for longer competitions such as half marathons or marathons). Intensive interval training is used by ambitious runners to work on their basic speed. The heart rate range is 90-95% of the maximum heart rate. The training takes place at or above the anaerobic threshold, i.e. in the "red zone". This requires the activation of fast-twitch muscle fibres and improves maximum oxygen uptake, lactate tolerance and pace hardness. The pace is fast (at competition speed or slightly below) and the breaks between efforts are longer than with the intensive form (suitable as training for shorter competitions such as 5km or 10km runs).
Interval training can be completed both on a track and off-road. Running on the track has the advantage that the runner always has control over the distance and the current running pace, which can promote the development of a sense of speed.
In interval training, it is important that the participants/groups try to cover approximately the same distance in the specified time for each interval or to complete a specified distance in approximately the same time. The various options for this type of training are as follows:
- Loop track: To ensure that the participants have enough space available for the run, they can be spread out on the loop track at the start. The load starts from the same starting point for each individual runner for each repetition. During the breaks, the participants return to their starting point. The participants can check/calculate the distance travelled after each interval (comparison with the previous run). The sports director has all participants in view and can therefore start or stop the intervals with a signal.
Variant: run in the opposite direction during the straight repetitions instead of returning to the starting point during the breaks (goal: reaching the starting point). - Distance of at least 500 metres: Distances are marked with signs (every 25-50m). Each participant receives a stop/pulse watch, runs the course independently and memorises the distance covered (it is possible to stagger the start of the participants, whereby the running routes must be determined in order to avoid collisions). After the break time has elapsed, the participants run the same distance back to the starting point. During the breaks, the participants wait in place or continue running at a relaxed trot, but return to the starting point in good time (end of the previous interval). If the course allows, the sports director can give the start/stop signal for all participants (no staggering possible).
Variant: If you only have a short course available, you must turn around at the end of the course and continue running in the opposite direction (define running routes) until the end of the exercise time. At the next interval, the participants run the distance they ran before in the opposite direction back to the starting point (comparison with the previous run). - Longer distance circuit: The distances are marked with signs (every 25-50m). Each participant receives a stop/pulse watch, runs the course independently and calculates the distance covered (no staggered start of the participants necessary). During the breaks, the participants wait in place or continue running at a relaxed trot until the end of the break time. At each interval, the participants must calculate the distance travelled based on the start/end point of the interval (comparison with the previous run). After the last interval, all runners return to the starting point, which takes additional time. Ideally, the running distance corresponds approximately to the distance that can be covered in the time available in order to generate as little additional displacement time as possible.
Distance markers (signs with metres)
1 signalling instrument (e.g. whistle)
FTA evaluation (group formation)
Per participant:
1 heart rate monitor
For sports leader or per participant/group:
1 stopwatch
Interval training (medium): 6-8 x 300 (extensive or intensive)
Interval training
Single run or run in strength groups, with the pacemaker controlling the time
Intensity level: 300 metres
Pause variant I: 1-3 minutes (relaxed running or on the spot)
Pause variant II: 200 metres at a relaxed trot
Repeats: 6-8 times
Intensity level: 3 (medium) / 4 (hard)
Hmax: 80-90% (extensive interval method) / 90-95% (intensive interval method)
Rule of speech: speak in full sentences / short exchanges
Both beginners to running training and experienced runners will benefit from the extensive interval method. Ideally, you should choose the extensive variant before the intensive interval units, but the runner should already have a good basic training programme. The breaks between the workouts are relatively short and the running pace is somewhat slower than during intensive interval training (80-90% HRmax). It is important that the heart rate does not fall below 120 beats per minute so that the body does not slow down too much. Extensive interval training takes place slightly below the anaerobic threshold and aims to increase aerobic performance (ideal training for longer competitions such as half marathons or marathons). Intensive interval training is used by ambitious runners to work on their basic speed. The heart rate range is 90-95% of the maximum heart rate. The training takes place at or above the anaerobic threshold, i.e. in the "red zone". This requires the activation of fast-twitch muscle fibres and improves maximum oxygen uptake, lactate tolerance and pace hardness. The pace is fast (at competition speed or slightly below) and the breaks between efforts are longer than with the intensive form (suitable as training for shorter competitions such as 5km or 10km runs).
Interval training can be completed both on a track and off-road. Running on the track has the advantage that the runner always has control over the distance and the current running pace, which can promote the development of a sense of speed.
In interval training, it is important that the participants/groups try to cover approximately the same distance in the specified time for each interval or to complete a specified distance in approximately the same time. The various options for this type of training are as follows:
- Loop track: To ensure that the participants have enough space available for the run, they can be spread out on the loop track at the start. Using a stopwatch, each runner measures their own time for the specified distance. After the interval, the participants decide for themselves whether they want to stay where they are or continue at a relaxed trot. The next interval starts after 1-3 minutes (extensive 1-2 minutes, intensive 2-3 minutes) or 200 metres (keep the selected recovery form for training). Participants moving at a relaxed trot must ensure that they do not hinder the runners who are in an exertion phase.
- Course: The defined course to be completed is marked. Participants start and stop their time independently (staggered start possible). If the participants pause at the end of the course, it must be clearly defined on which side they will run back at the next interval (avoid collisions). If the participants move at a relaxed trot during the breaks, it is important to ensure that they are back at one of the two possible starting positions after the break time (2 minutes) has elapsed (break variant II not suitable).
Variant: it is also possible to complete a shorter distance several times until the desired distance is reached. It is important to pay attention to the running directions to avoid collisions. The breaks are carried out as described above, except that in this form the start/finish is always at the same place. - Longer-distance circuit: A marker is placed on the course after every 300 metres (exertion) and then after 200 metres (break) (e.g. balloon, route tape, wooden wedge). Variant I for the breaks is not suitable (however, if the participants only take breaks on the spot, only sections of 300 metres could be marked). Ideally, the participants should be approximately back at the starting point after the last interval so as not to lose additional time for the return leg (6 intervals = 1.8 km, 8 intervals = 2.4 km).
Distance markers (e.g. marker cones or route tape)
FTA evaluation (group formation)
Per participant:
1 heart rate monitor
Per participant/group:
1 stopwatch
Interval training (medium): 8 x 400 (extensive)
Interval training
Single run or in strength groups, with the pacemaker controlling the time
Exercise duration: 400 metres
Pause: 1-2 minutes (easy running)
Repeats: 8 times
Intensity level: 3 (medium)
Max HR: 80-90% (extensive interval method)
Rule of thumb: speak in full sentences
Both beginners and experienced runners benefit from the extensive interval method. Ideally, you should choose the extensive variant before the intensive interval units, but the runner should already have a good basic training programme. The breaks between the workouts are relatively short and the running pace is somewhat slower than during intensive interval training (80-90% HRmax). It is important that the heart rate does not fall below 120 beats per minute so that the body does not slow down too much. Extensive interval training takes place slightly below the anaerobic threshold and the aim is to increase aerobic performance (ideal training for longer competitions such as half marathons or marathons).
Interval training can be completed both on a track and off-road. The advantage of running on the track is that the runner always has control over the distance and the current running pace, which can promote the development of a sense of speed.
In interval training, it is important that the participants/groups try to cover roughly the same distance in the specified time for each interval or to complete a specified distance in roughly the same time. The various options for this type of training are as follows:
- Loop track: To ensure that the participants have enough space available for the run, they can be spread out on the loop track at the start. Using a stopwatch, each runner measures their own time for the specified distance. After the interval, the participants continue at a relaxed trot and start the next run after the break time has elapsed (variant: break on the spot). The participants moving at a relaxed trot must ensure that they do not hinder the runners who are in an exertion phase.
- Course: The defined course to be completed is marked. Participants start and stop their time independently (staggered start possible). The participants continue to move at a relaxed trot during the breaks, but make sure that they are back at one of the two possible starting positions at the end of the break time (variant: break in place). The sports leader defines the running routes for the outward and return routes to avoid collisions.
Variant: it is also possible to complete a shorter route several times until the desired distance is reached. Here too, it is important to pay attention to the running directions so that there are no collisions. The breaks are carried out as described above, except that in this form the start/finish is always in the same place. - Longer-distance circuit: A marker is placed on the course after every 400 metres (load) (e.g. balloon, route tape, wooden wedge). The participants keep moving after the interval (relaxed trotting), but make sure that they are back at the last marker at the end of the break time in order to start the next run. The participants who are in the recovery phase take care not to hinder the active runners. Ideally, the participants should be approximately back at the starting point after the last interval (8 intervals = 3.2 km running distance), otherwise additional teaching time must be taken into account for the return journey.
Distance markers (e.g. marker cones or route tape)
FTA evaluation (group formation)
Per participant:
1 heart rate monitor
Per participant/group:
1 stopwatch
Interval training (medium): Mountain running
Interval training
Single run or run in strength groups, with the pacemaker controlling the time
Fast and short runs up hills are of course particularly suitable for preparing for a mountain run, but are also valuable for running on flat terrain. This is because hill sprints strengthen the running-specific muscles and also make you faster, as a sprint activates the rapidly contracting muscle fibres and improves the capacity of the neuromuscular system. It also increases stride length and trains good body tension and arm work. Stronger leg muscles take the strain off the knee, hip and ankle joints, which helps to prevent injuries.
Logically, the difficulty of hill/mountain runs lies primarily in the incline, as an incline of just a few per cent is enough to make even an experienced runner's legs burn within a few seconds and push the cardiopulmonary system to its maximum level. Sprints of 10-20 seconds are generally ideal and ensure rapid exhaustion, but longer units can also be completed as training.
Exercise duration: 45-60 seconds running up a hill
Break: 1-3 minutes
Repeats: 4-10 times
Intensity level: 3 (medium) / 4 (hard)
Hmax: 80-90% (extensive interval method) / 90-95% (intensive interval method)
Rule of speech: speak in full sentences / short exchanges of words
For the exertion, the participants/groups run up the hill/mountain (possibly staggered start from place groups). staggered start for reasons of space), during the break they have time to return to the starting position (adjust the intensity of the load and the recovery phase to the training goal). After the first interval, the participants/groups memorise how far they have climbed the hill/mountain in the specified time, as they will try to cover the same distance in each subsequent session (it is always important to cover the same distance per running session during interval training). There are the following options for timekeeping:
- each participant receives a stopwatch/pulse clock and completes their training sessions independently;
- the sports leader starts and stops the time for the participants/groups (staggering makes sense, keep track of the break times);
- it is started in strength groups, with the pacemaker checking the time using the stopwatch/pulse clock.
Variant:
If the course is not long enough to fully utilise the time, you can turn around at the end of the hill and return to the start to tackle the hill again. This means you memorise the number of runs plus the distance completed up to the end of the interval.
1 signalling instrument (e.g. whistle)
Evaluation FTA (group formation)
Per participant:
1 heart rate monitor
For sports leader or per participant/group:
1 stopwatch
Interval training (medium): Skipping rope
Interval training
Together in the group, in small groups or each participant independently
Exercise duration: 60-90 seconds of jumping rope
Pause: 30-60 seconds resting in place or walking around at a leisurely pace
Repeats: 4-8 times
Intensity level: 3-4 (medium-hard)
Hmax: 80-95%
Rule of speech: speak in full sentences - short exchanges
The participants jump rope during the specified time without interruption if possible (technique free). The intensity of the jumping is adjusted according to the target. The skipping takes place in a group, with the sports instructor responsible for ensuring that the load and break times are adhered to (small groups with a group leader are also possible), or each participant carries out the interval units independently.
Variant:
Integrate variations of rope jumping (specified by the sports instructor, e.g. a special technique every 10 jumps): running in place, running in place with knee lifts, two-footed jumps, double rope turns, crossed arms, backwards rope jumping, etc.
Per participant:
1 skipping rope
1 heart rate monitor
For sports leaders or per participant/group:
1 stopwatch
Interval training (medium): Stair run
Interval training
Individual run
(possibly also run in strength groups depending on the size of the stairs, with the pace maker controlling the time)
Stair running is a gentle, effective and therefore ideal strength and endurance workout for runners, which also improves coordination, concentration and running technique. Above all, training on the stairs can improve the short forefoot strike, which is particularly beneficial for so-called heel runners. Training on the stairs can be very varied and playful, but can also be used for interval training with short and intensive sessions. Stairs that are as long (and wide) as possible simplify the type of exercise.
Exercise duration: 45-60 seconds running up a flight of stairs
Break: 1-3 minutes
Repeats: 4-8 times
Intensity level: 3 (medium) / 4 (hard)
Hmax: 80-90% (extensive interval method) / 90-95% (intensive interval method)
Rule of speech: speak in full sentences / short exchanges of words
For the workload, the participants/groups run up the stairs (possibly staggered start from place level). staggered start for reasons of space), during the break they have time to return to the starting position (agree on running directions so that the participants do not get in each other's way). After the first interval, the participants/groups memorise how far they have climbed the stairs in the specified time, as they will try to cover the same distance in each subsequent session (it is always important to cover the same distance per running session during interval training). For this type of exercise, however, the length of the staircase is usually not sufficient to fully utilise the time, so you can turn around at the end of the staircase and return to the start to tackle the staircase again. This means that you memorise the number of runs plus the distance covered until the end of the interval. Depending on the training goal, the sports instructor adjusts the intensity of the exercise and the recovery phase.
There are the following options for climbing the stairs:
- in a sprint - free technique (any number of steps per stride); Climb the stairs as quickly as possible while still concentrating on the steps (short ground contact time, not touching down with the entire foot)
- two-step run
- put one leg alternately on each step
- step on each step with both legs
- one-leg jumps (determine/vary the number of steps)
- double jumps (determine/vary number of steps)
- squat jumps
- side jumps
To stop the time, you have the following options:
- each participant receives a stopwatch/pulse clock and completes their training sessions independently;
- the sports director starts and stops the time for the participants/groups (staggering makes sense, keep an overview with the break times);
- it is started in strength groups, with the pace maker checking the time using the stopwatch/pulse clock.
1 signalling instrument (e.g. whistle)
Evaluation FTA (group formation)
Per participant:
1 heart rate monitor
For sports leader or per participant/group:
1 stopwatch
Juggler
Light-Contact
Partner work
The participant tries to keep 3 juggling scarves in the air for as long as possible. The participant is in double cover and pulls the scarves upwards by crossing their arms over the scarves.
6 juggling cloths (3 per participant)
Beetle turning
Fighting and roughhousing games
Partner work
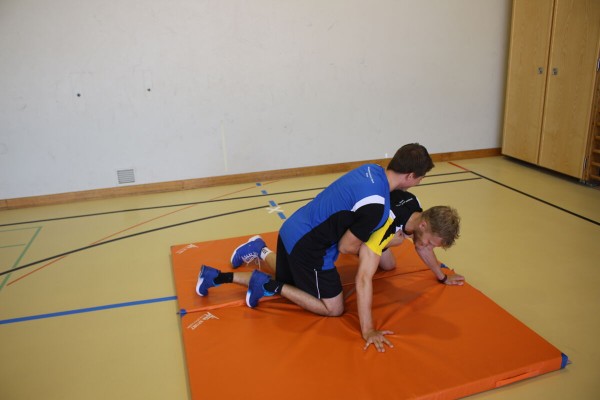
One participant is in a four-foot stance in the centre of a mat/turf area. His opponent tries to turn him onto his back. Switch roles after each (successful) attempt.
Variant:
Time the participant until the attempt is successful or the opponent has a specific time limit for their attempt.
2-4 soft mats (small) ►Indoor version
2 tent sheets ►Outdoor version
1 stopwatch ►Variation of the exercise
Indoor post set-up:
Using soft mats to form a rectangular field of mats.
Squat jump in push-up position
Power
Individual work
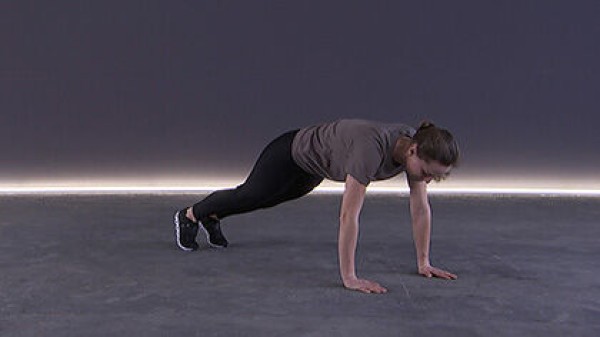

Push-up position (high support, face/look down), bend your legs during the jump (bring your knees between your arms) and stretch back out to the starting position for the next jump.
Attention:
Keep your upper body stable in the starting position (tense your stomach).
Lighten:
Just hold the basic position (push-up position); smaller jumps (bring your knees less forwards).
Harden:
Additional weight (on the legs); unstable base (for the arms).
2 weight cuffs ► to make the exercise more difficult (additional weight)
1 balance cushion/balance board ► to make the exercise more difficult (unstable surface)
Climbing on the rope
Power
Individual work
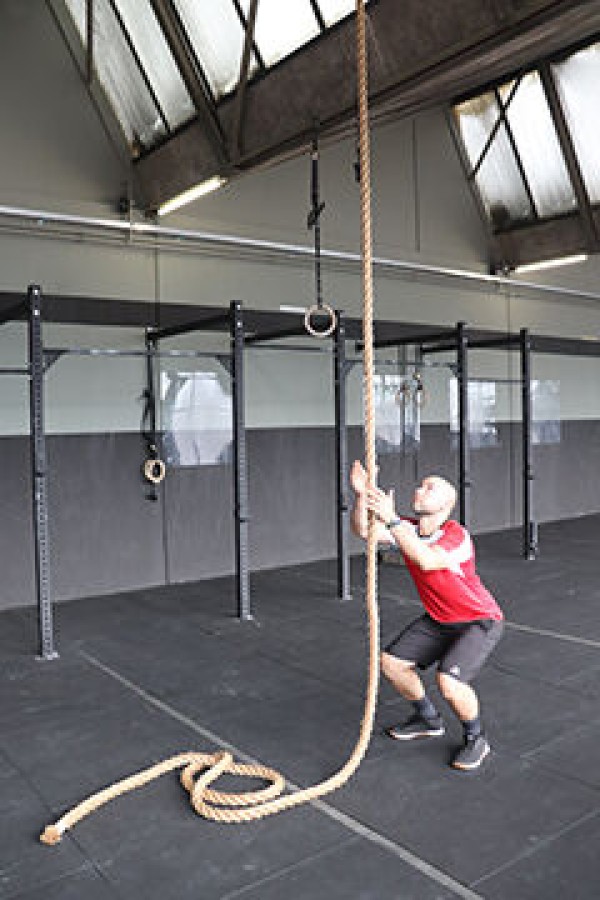
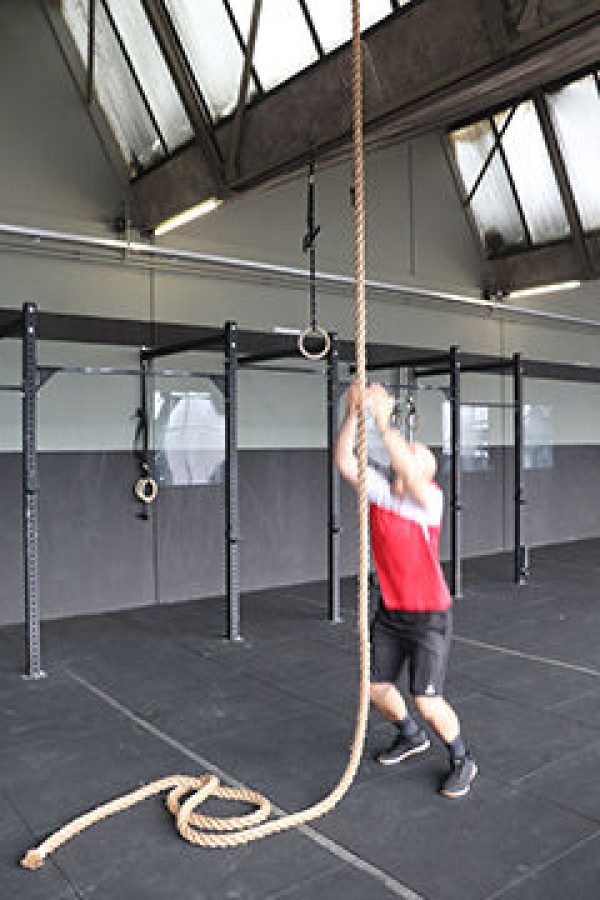
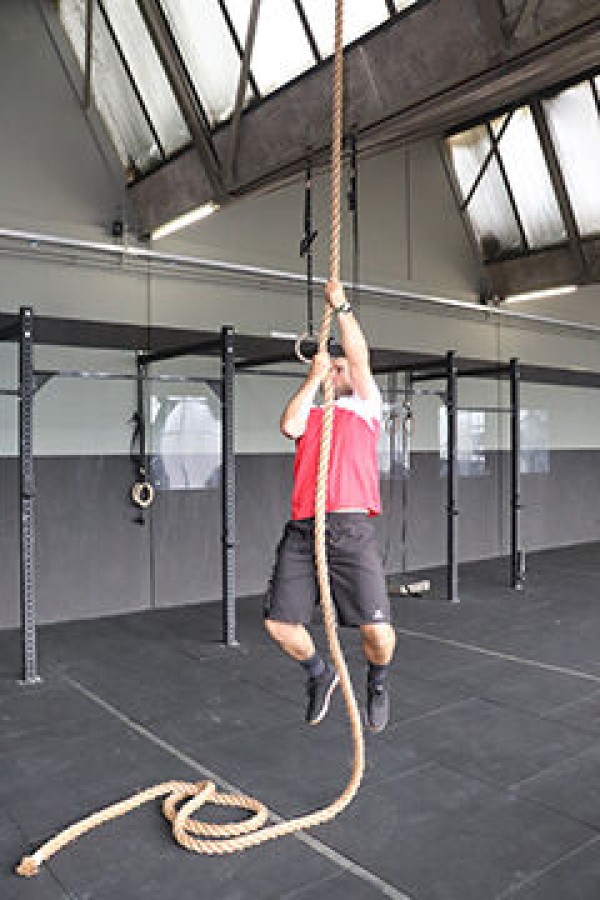
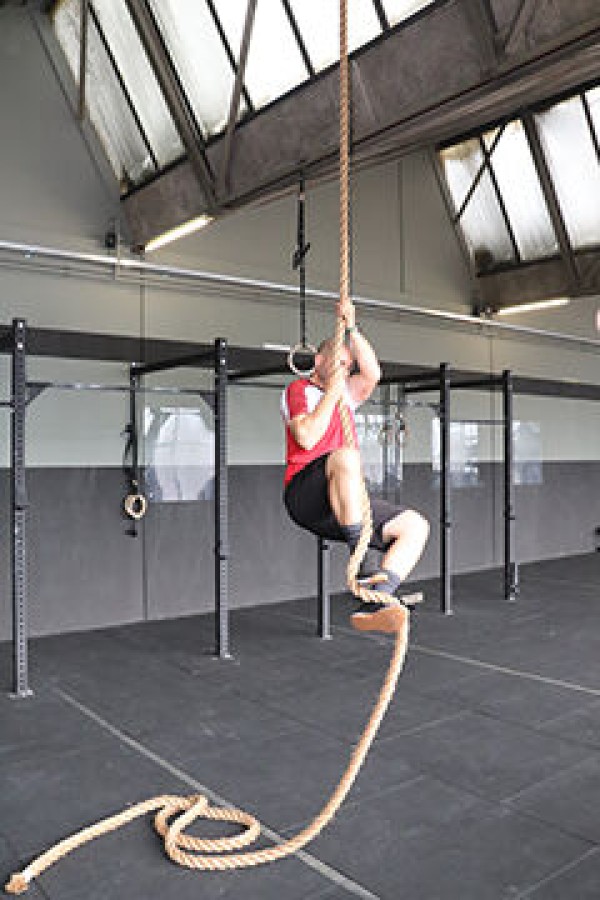
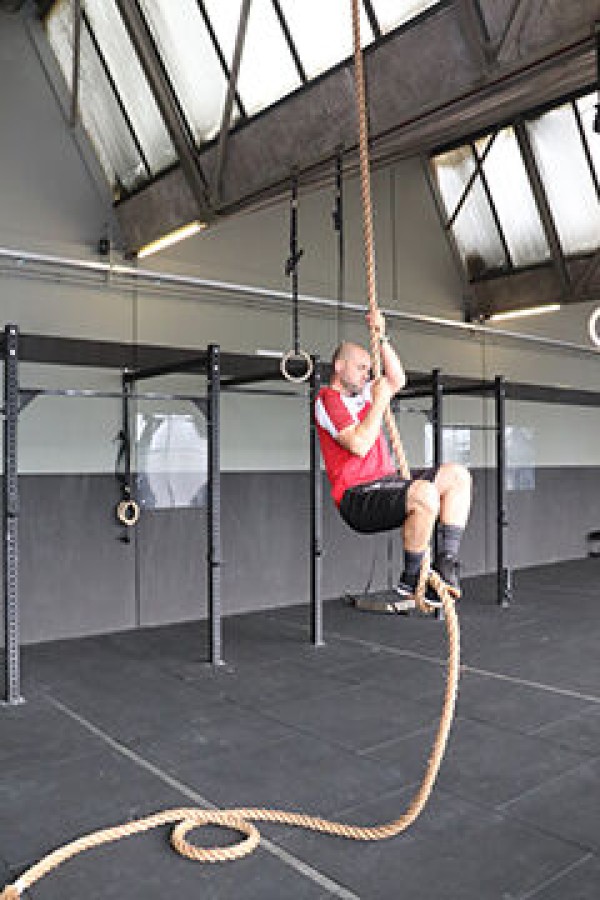
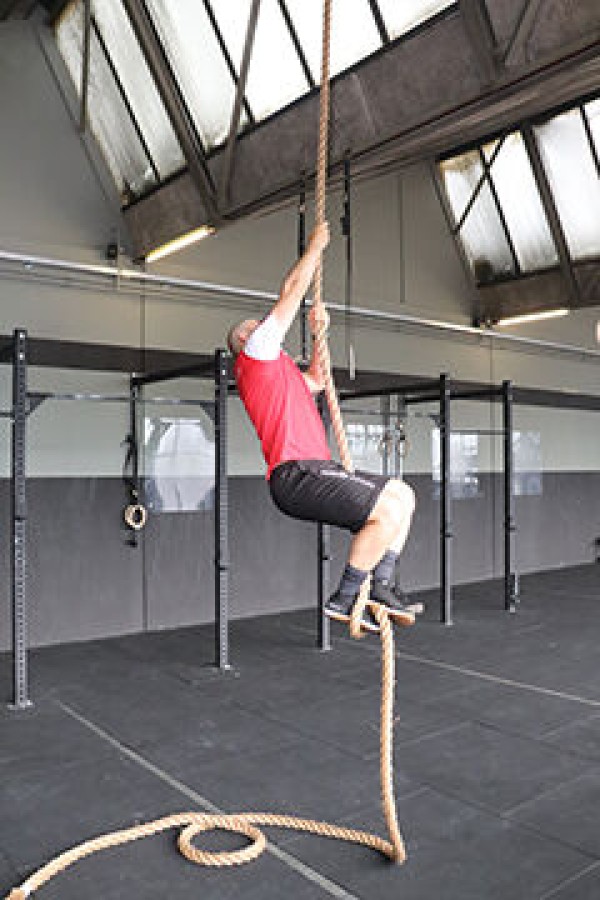
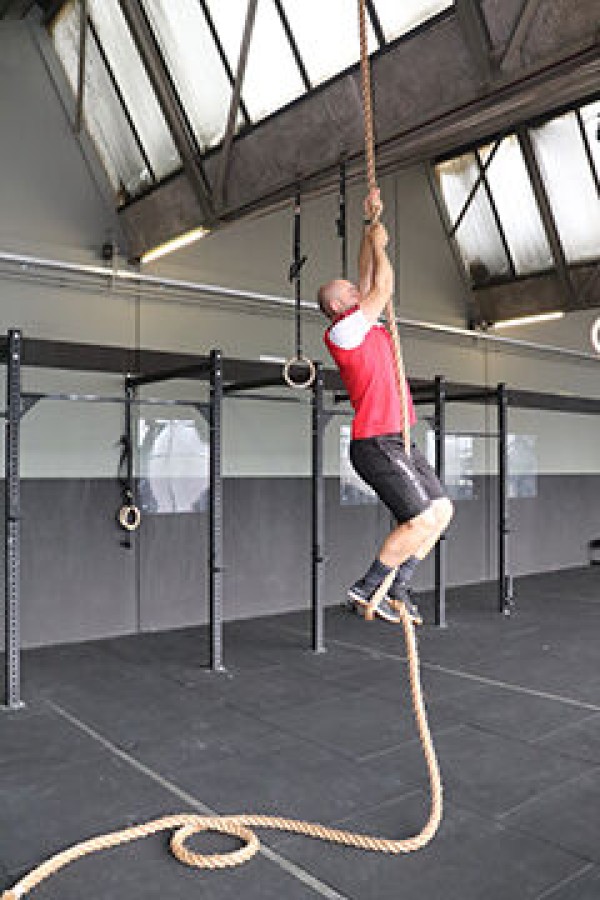
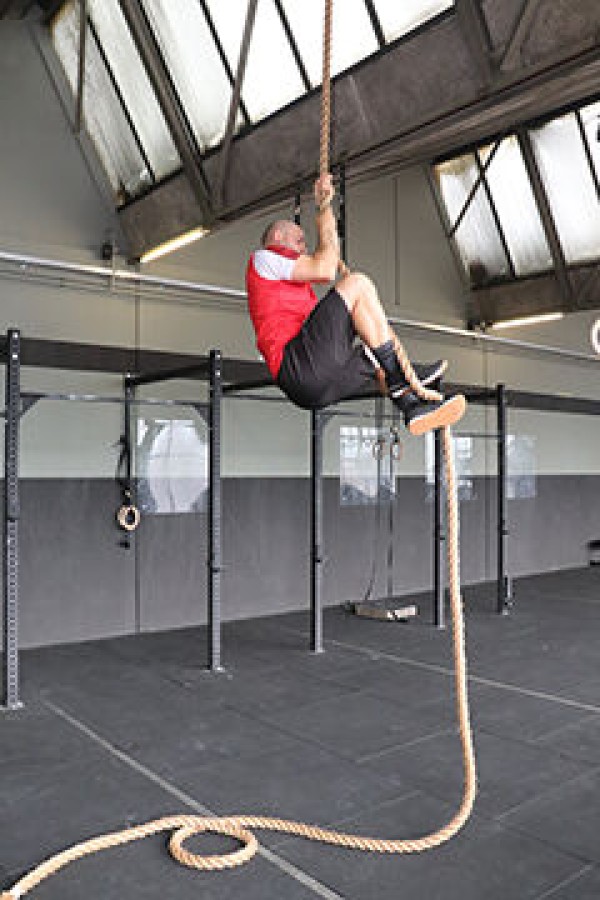
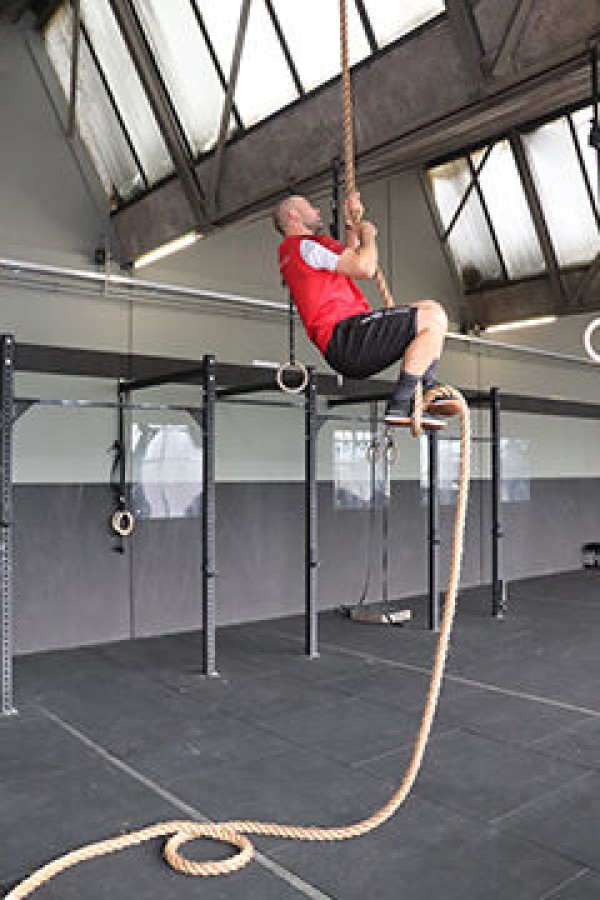
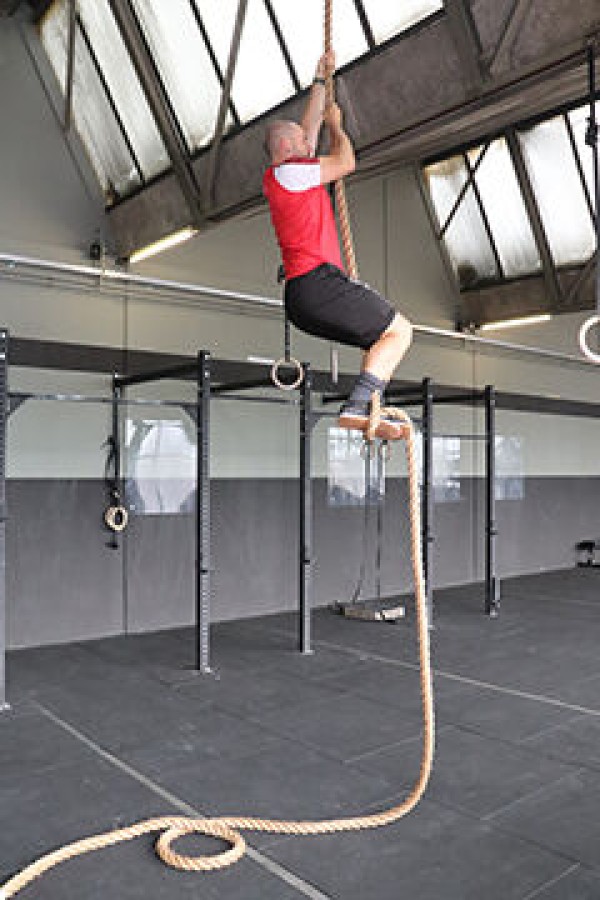
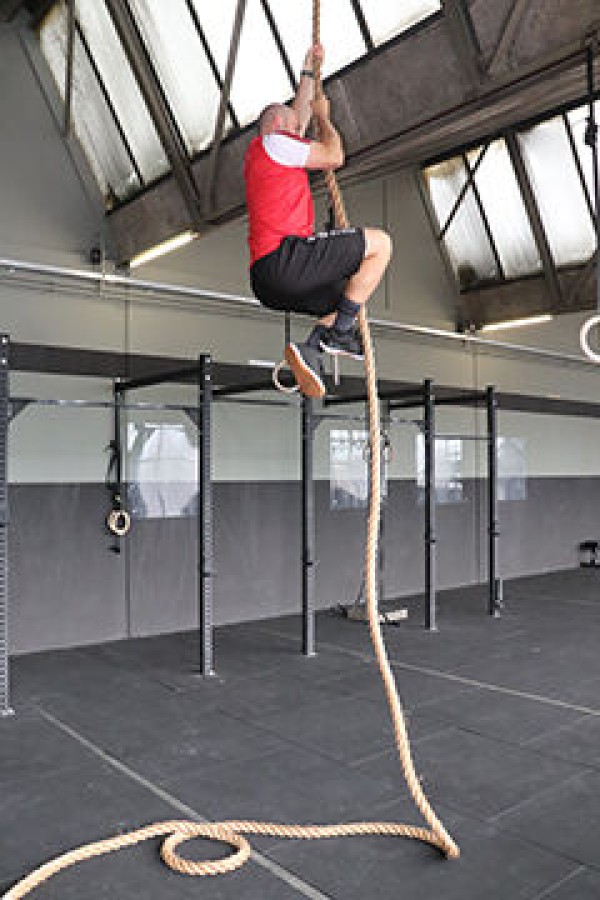
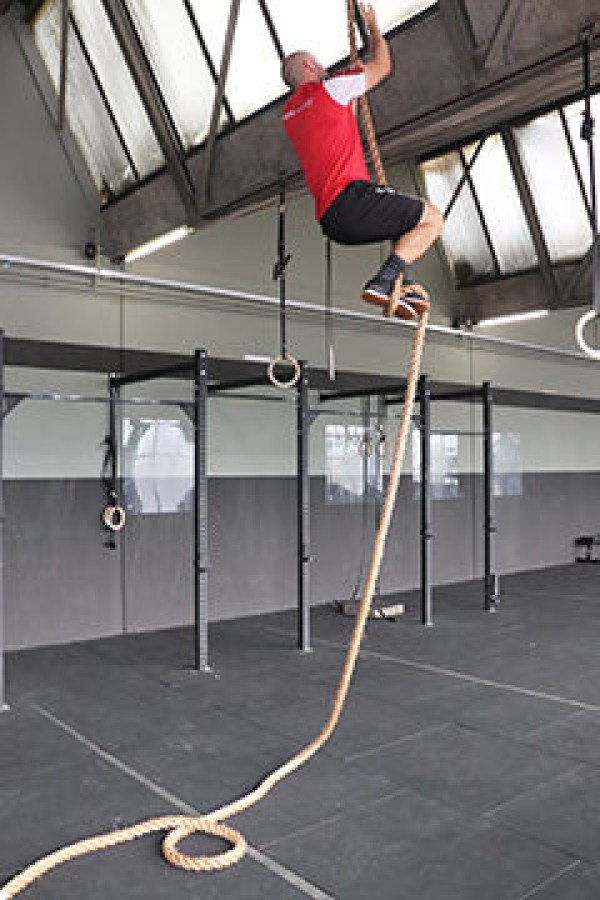
The rope is climbed up to the mark, with the S-wrap and J-hook techniques being the most common climbing methods. In the S-wrap technique, you grab the rope with your hands (close together) as high up as possible, keeping the rope between your thighs. The rope is then wrapped around the weak leg. The rope practically runs once around the calf and finally over the foot further down (S-shape). With the other (strong) foot, step on the rope that has been placed on the weak foot and lock it. Support yourself with the tips of your toes to grab the rope again with your hands (one after the other), preferably at the highest point. Now let go of the rope with the foot clamp grip and pull your legs upwards so that your knees and elbows are almost at the same height. The rope can then be locked again with the feet as described above. With the J-hook technique, you stand next to the rope at the start. Here too, you then grab the rope as high as possible. The hands are close together, which stabilises the entire body. Now pull your leg up to your chest, with the rope running to the left of your body. With the right
foot, grab the rope under the left foot and place it on the left foot to secure it. This creates an angle of over 90 degrees in the rope (J-shape). Once the rope is fixed to the foot, reach up again with your hands one at a time and the process starts all over again (you can switch sides).
Harden:
Additional weight (on the legs and/or arms).
1 climbing rope
2-4 weight cuffs/1 weight waistcoat ► Make the exercise more difficult (additional weight)
Knee touch
Fighting and roughhousing games
Partner work
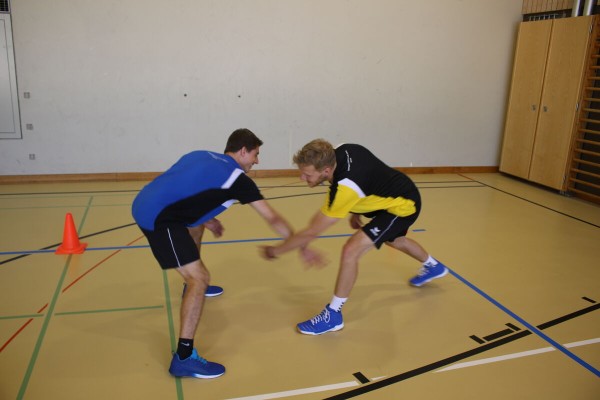
Two participants stand opposite each other in a defined area (e.g. the centre circle of the basketball court or a zone marked with cones) and try to touch their opponent's knees with their hands. Who scores more points?
4 marking cones/caps (optional) ►Playing field marking
Post setup:
Define a square-shaped field using cones.
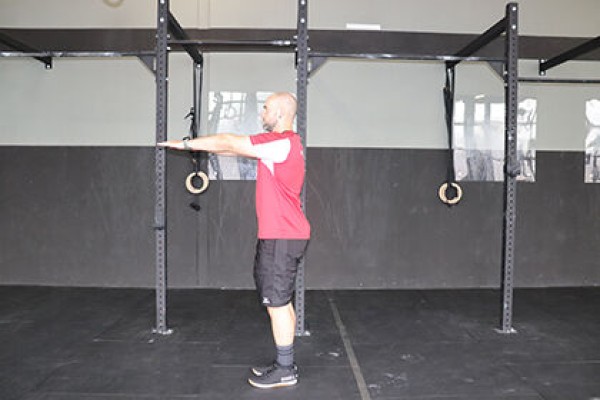
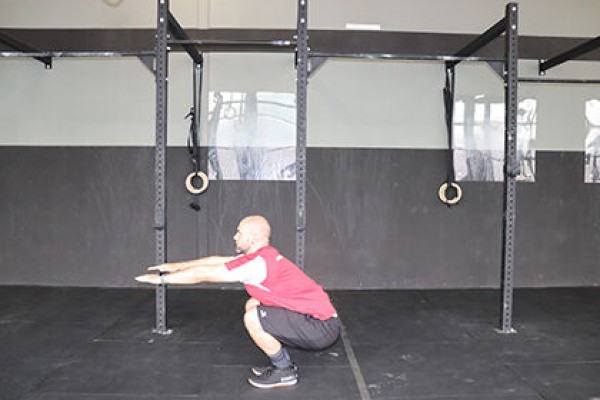
Kniebeuge ► air squat
Power
Individual work
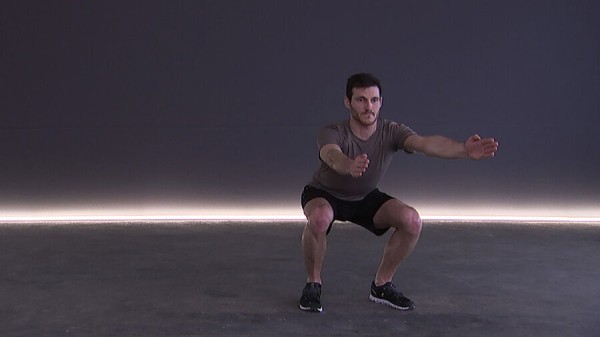
Stand with your feet shoulder-width apart, bend your knees to approximately a right angle at the knee joints (buttocks approximately at knee height), arms supported on your hips or in front of you at chest height, hold the position (deep squat).
Attention:
Move your buttocks backwards, not your knees forwards. Keep your knees behind your toes. Keep your back straight at all times; a support for your heels makes the exercise easier.
Lighten:
Do not lower your buttocks too low (greater angle at the knees).
Harden:
Hold additional weight (on your shoulders, in front of you or with your arms hanging in your hands); unstable support.
1 soft mat (small)/raised surface ► make the exercise easier (position)
1 weight vest/(medicine) ball/weight disc/sandbag/2 dumbbells ► make the exercise more difficult (additional weight)
1 balance cushion/balance board ► make the exercise more difficult (unstable surface)
Squat ► back squat
Power
Individual work
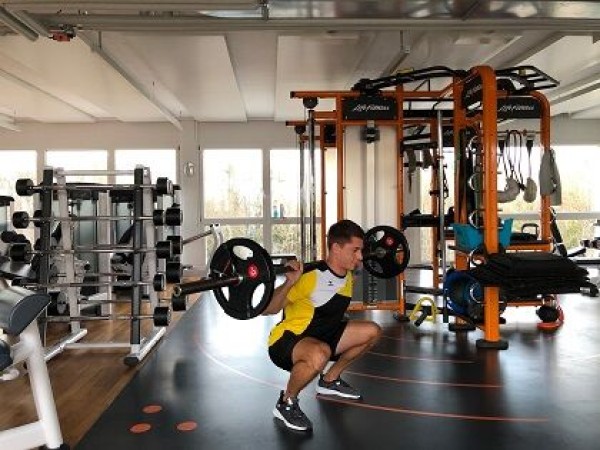
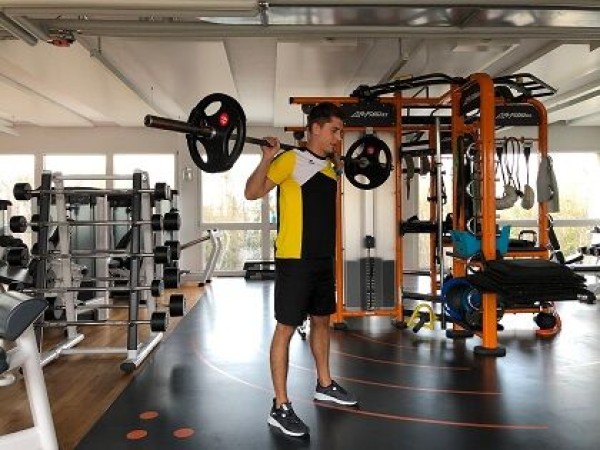
From an upright, shoulder-width stance with the barbell on your back, bend your knees and lower your buttocks as far as possible without losing stability in your back. Then push the weight back up to the starting position in a controlled manner (straighten your legs).
Starting position:
- Feet about shoulder-width apart, feet pointing slightly outwards
- Barbell placed on the upper back
- Abdominal and gluteal muscles tensed
- Gaze (always) straight ahead in a neutral position
Finishing position:
- Knees bent
- Buttocks back, not knees brought forward (sitting backwards)
- Back straight
Attention:
Distribute weight over the whole foot, push knees outwards (no tipping inwards). A support for the heels makes the exercise easier
1 Langhantel
Squat ► dumbbell squat
Power
Individual work
Stand shoulder-width apart, grasp weights (dumbbells/kettlebells) with one hand each, arms bent so that the elbows are practically at shoulder height and pointing forwards (hold dumbbells/kettlebells next to the respective ear). Bend your knees to approximately a right angle at the knee joints (buttocks at about knee height) and stretch back to the starting position.
Attention:
Move your buttocks backwards, not your knees forwards. Keep your knees behind your toes. Keep your back straight at all times (tense your core), distribute your weight over your entire foot, push your knees outwards (do not tilt them inwards). A support for the heels makes the exercise easier.
Lighten:
Do not lower the buttocks too low (greater angle in the knees); lighter or no weight.
Harden:
Stable support.
2 dumbbells
1 soft mat (small)/raised base ► make the exercise easier (position)
1 balance cushion/balance board ► make the exercise more difficult (unstable base)
Squat ► feet together squat
Power
Individual work
Stand upright with closed legs (feet together), arms pointing diagonally backwards and downwards. Bend your knees to approximately a right angle at the knee joints (buttocks at about knee height) and at the same time move your arms forwards (pointing diagonally downwards at the front). Then straighten your legs back to the starting position and move your arms behind your body again.
Attention:
Push your buttocks backwards, not your knees forwards. Keep your back straight at all times (keep your torso tensed), distribute your weight over your entire foot, keep your knees together during the exercise.
Lighten:
Do not lower your buttocks too low (greater angle in the knees); more support from the arms (momentum).
Harden:
Arms supported on the hips or crossed behind the head; hold additional weight (on the shoulders or with hanging arms in the hands).
1 weight vest/barbell/sandbag/fighting backpack/2 dumbbells ► Make the exercise more difficult (additional weight)
Squad ► front squat
Power
Individual work
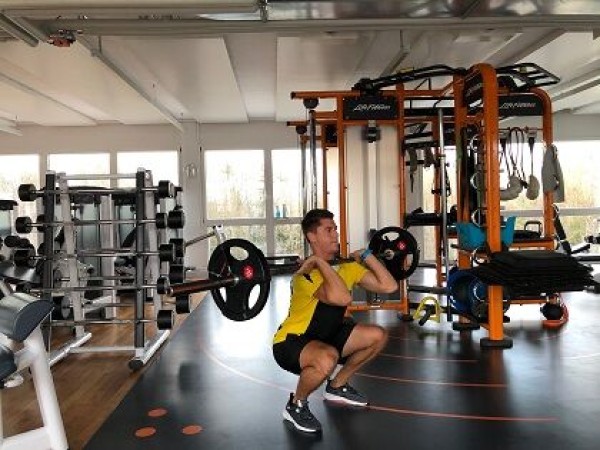
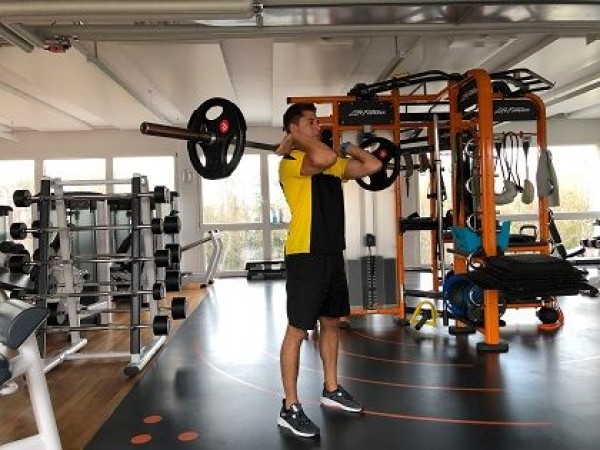
From an upright shoulder-width stance with the barbell placed on your shoulders in the front position, bend your knees and lower your buttocks as far as possible without losing stability in your back. Then push the weight back up to the starting position in a controlled manner (straighten your legs).
Starting position:
- Feet about shoulder-width apart, feet pointing slightly outwards
- Barbell rests on the shoulders
- Abdominal and gluteal muscles are tensed
- Look (always) straight ahead in a neutral position
Finishing position:
- Knees bent
- Buttocks back, not knees brought forward (sitting backwards)
- Back straight
Attention:
Distribute weight over the whole foot, push knees outwards (no tipping inwards). A support for the heels makes the exercise easier
1 Langhantel
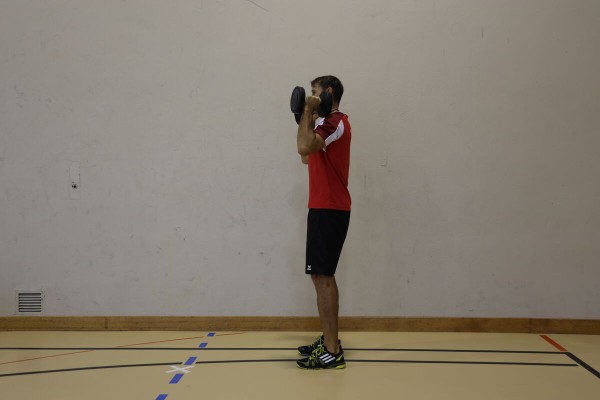
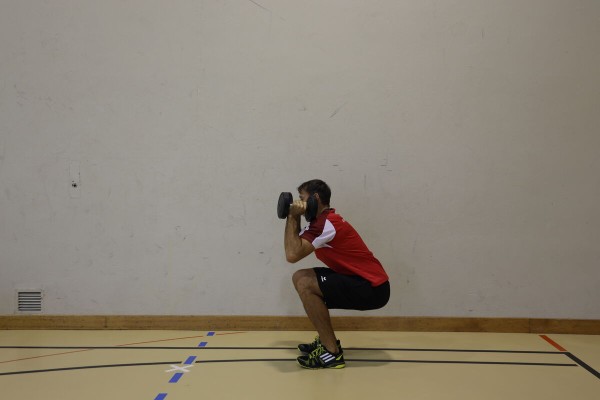
Squat ► goblet squat
Power
Individual work
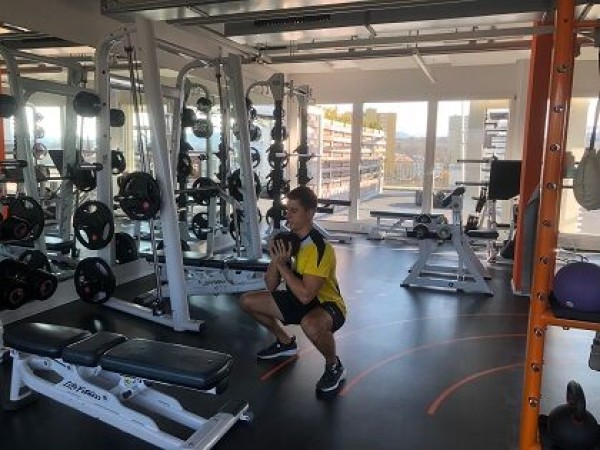
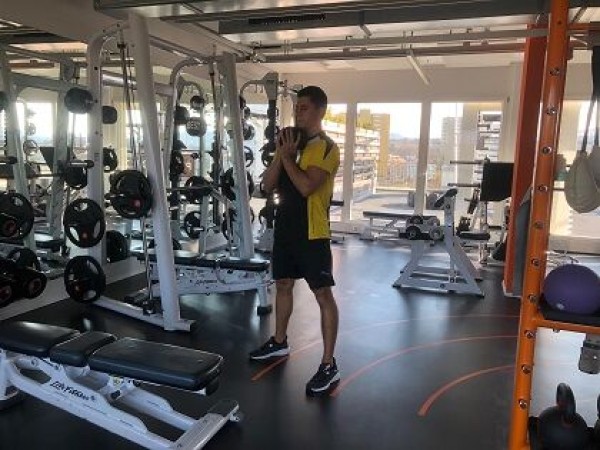
From an upright, shoulder-width stance with the weight (dumbbell or kettlebell) in your hands in the front position, bend your knees and lower your buttocks as far as possible without losing stability in your back. Then push the weight back up to the starting position in a controlled manner (straighten your legs).
Starting position:
- Feet about shoulder-width apart, feet pointing slightly outwards
- Hold the weight in front of your chest with both hands
- Tense your abdominal and gluteal muscles
- Look straight ahead (always) in a neutral position
Finishing position:
- Knees bent
- Buttocks back, not knees brought forward (sitting backwards)
- Back stretched
Attention:
Distribute weight over the whole foot, push knees outwards (no tipping inwards). A pad for the heels makes the exercise easier
1 dumbbell/kettlebell
Squat ► overhead squat
Power
Individual work
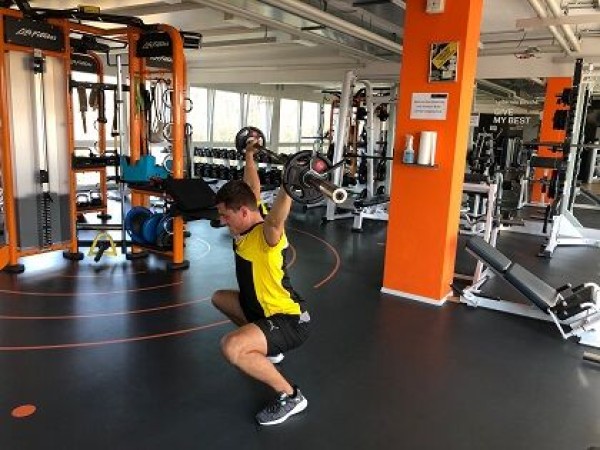
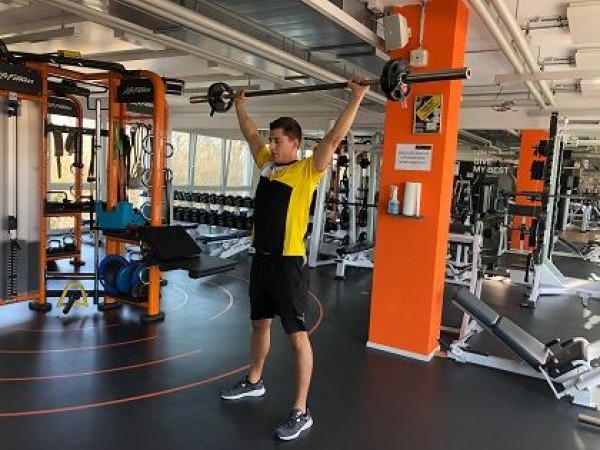
Stand upright (slightly wider than shoulder width) with the barbell overhead (arms almost straight in a V-position and held high), bend your knees and lower your buttocks as far as possible without losing stability in your back. Then push the weight back up in a controlled manner to the starting position in the standing position (straighten your legs).
Starting position:
- Stand upright, legs slightly wider than shoulder-width apart, feet pointing slightly outwards
- Barbell overhead, arms almost straight and held high (V-position)
- Abdominal and gluteal muscles are tensed
- Look straight ahead (always) in a neutral position
Finishing position:
- Knees bent
- Buttocks back, not knees forward (sitting backwards)
- Back remains straight
Attention:
This exercise requires extremely high levels of mobility and stability, which is why it is only suitable for advanced exercisers. Distribute the weight over the entire foot, push the knee outwards (do not tilt inwards).
1 Langhantel
Squat ► squat
Power
Partner work
1 trainee & 1 helper ► Note change of position
(= double the time required; for lesson planner see Organisation Kraft: Info button Execution)
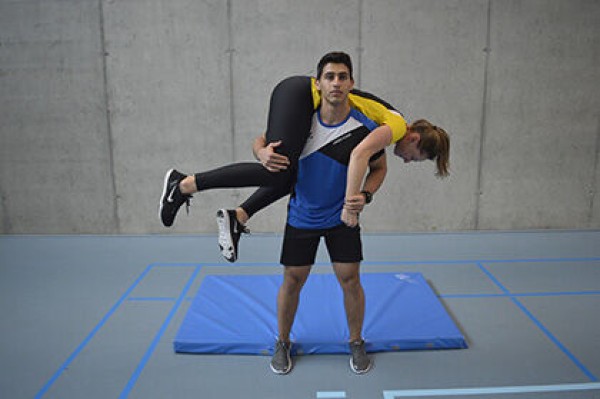
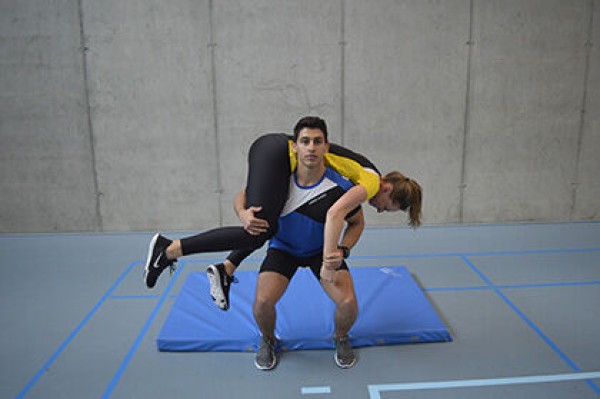
Exerciser: Holds their partner on their shoulders with their feet hip-width apart (e.g. Gamstrage grip), bend their knees to approximately a right angle in the knee joints, return to standing position.
Partner: Forms the weight/balance for the active participant (form binomials with approximately the same body stature).
Attention:
Knees always remain behind the toes and centred over the feet (do not tilt inwards). Distribute the pressure over the entire foot (heels always touch the floor; a support for the heels makes it easier to exercise/maintain the correct position).
Lighten:
Do not lower your body too low (greater angle in the knees).
Harden:
Additional weight.
1 soft mat (small) ► Make the exercise easier (position)
1 weight waistcoat ► Make the exercise more difficult (additional weight)