Exercises (1559)
Push-up position
Power
Individual work
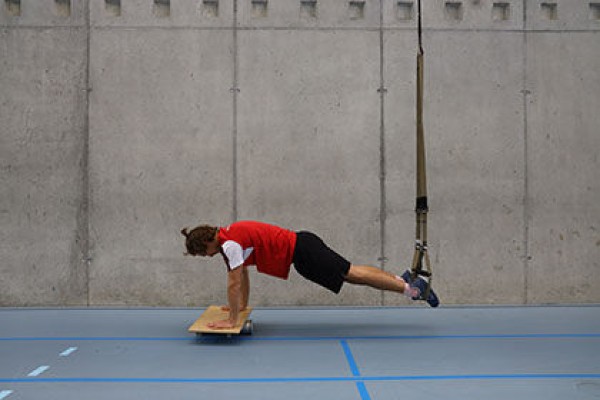
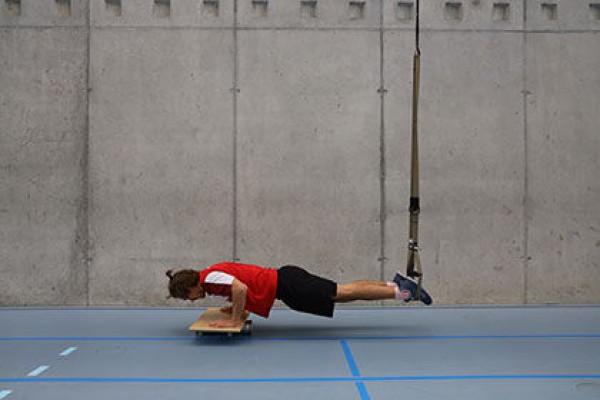
Progression I:
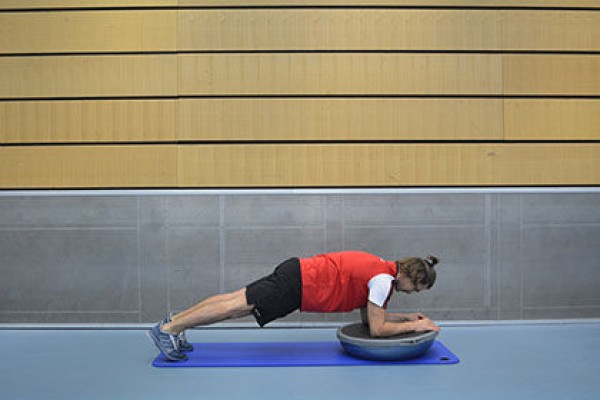
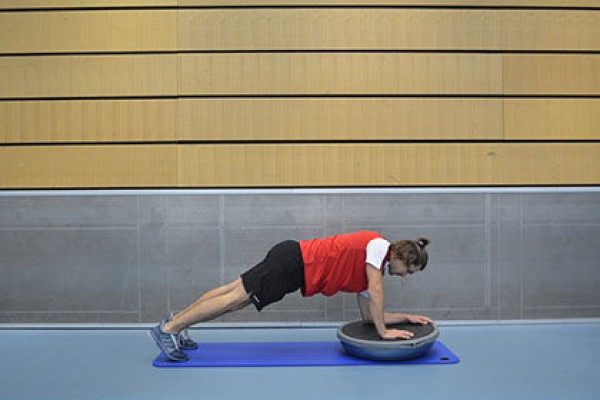
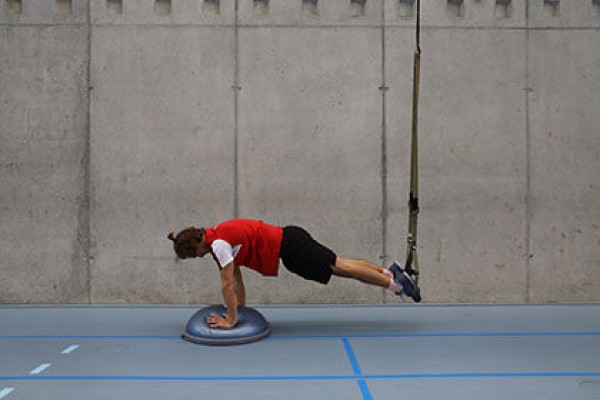
Adjust the sling trainer to mid-lower leg length (standing), support position with outstretched arms on the balance board with the feet vertically under the attachment point in the slings, hold position.
Progression II:
Integrate push-ups.
Caution:
Keep body tension, do not let hips sag, back straight, hands under shoulders (for both progressions).
1 sling trainer
1 balance board
Push-up position
Power
Individual work
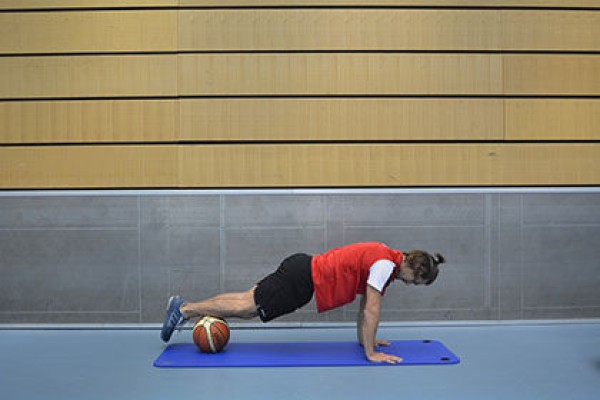
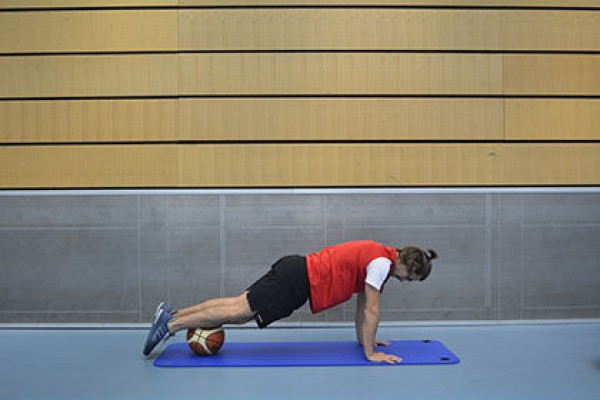
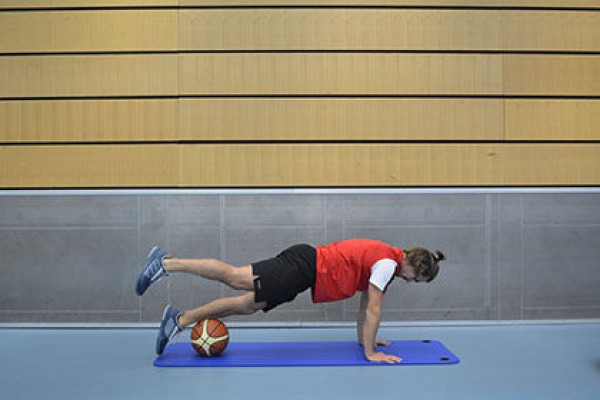
Push-up position, legs (shins) placed on the exercise ball, alternately lift one leg slightly and return to the starting position.
Attention:
Head, shoulders, buttocks and feet form a line, no hollow back, actively tense the torso. To prevent the ball from rolling away, you can lean it against a wall.
Lighten the load:
Support yourself in place (without lifting and lowering your legs); exercise ball closer to your hips.
Lighten the load:
Additional weight (on your back); unstable support for your arms.
1 exercise ball
1 medicine ball/helmet/balance hemisphere
1 weight vest/weight disc/sandbag ►Make the exercise more difficult (additional weight)
Push-up position ► hand over push up position
Power
Partner work
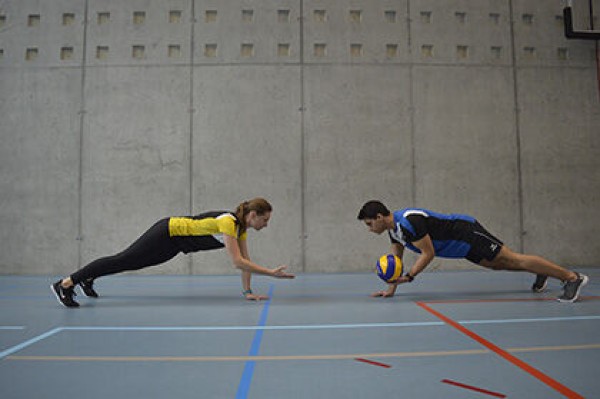
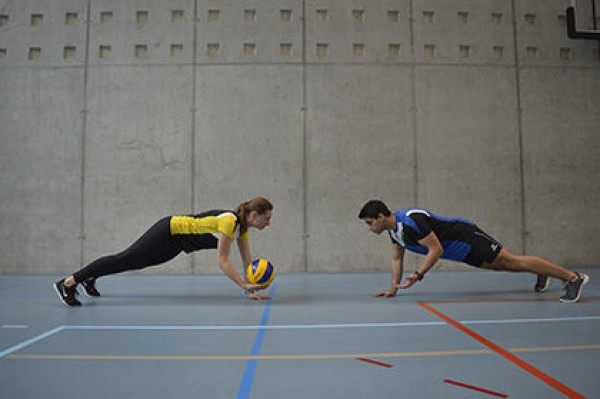
Both participants stand at a distance of approx. 1 metre from each other in a frontal push-up position with their feet wide apart. The partners pass a ball back and forth (straight or crosswise) without it touching the floor. From time to time or after each pass, the participants change supporting hand.
Attention:
Keep the trunk stable and do not let it sag (constant tension).
Lighten:
Roll the ball on the floor to the partner; lighter ball.
Harden:
Heavier ball; additional weight (on the back).
1 weight ball
1 ball (e.g. volleyball/football/basketball) ► Make the exercise easier
1 weight ball/medicine ball ► Make the exercise more difficult (additional weight)
1 weight vest/weight disc/sandbag ► Make the exercise more difficult (additional weight)
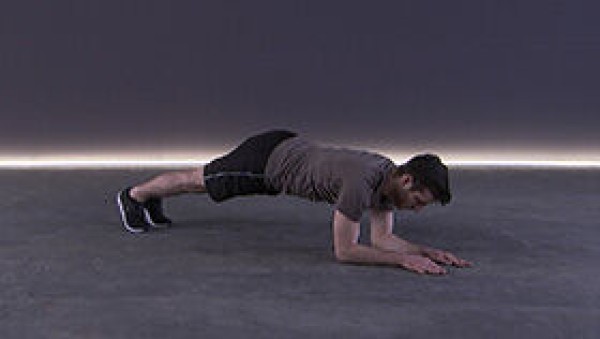
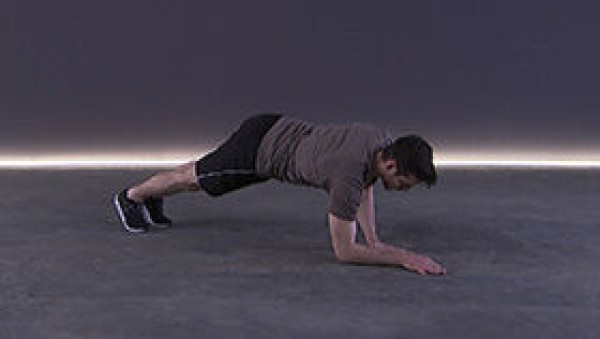
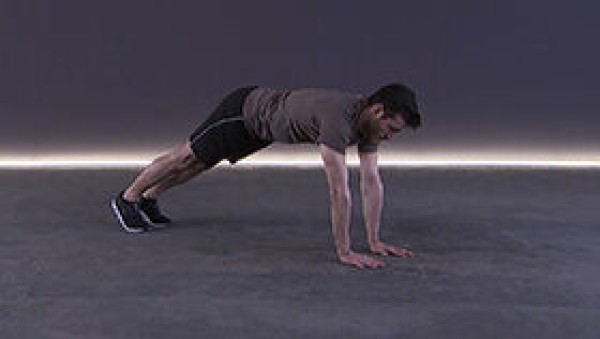
Push-up position high
Power
Individual work
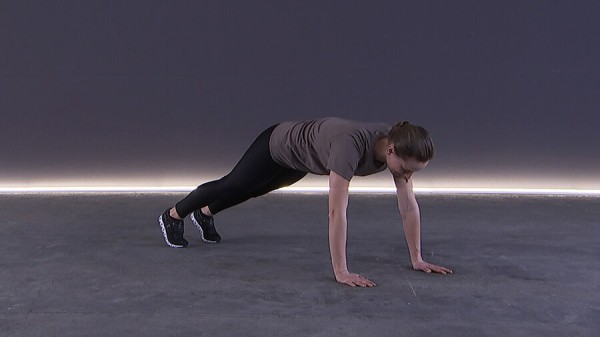
High push-up position (support), hold position.
Attention:
No hollow back, elbows bent approx. 45° from upper body ("A" shape with arms), shoulders are fixed and pulled down towards hips.
Lighten:
Place knees on floor (feet in high position); support arms on raised surface.
Harden:
Additional weight (on your back); place your legs on a raised surface; unstable surface for your arms and/or legs; hold a low push-up position.
Variant I:
Vary the position of the hands/arms (e.g.: wide, narrow, together).
Variant II:
Alternate touching the opposite shoulder with your hand.
1 weight vest/weight disc/sandbag ► Make the exercise more difficult (additional weight)
1 ball/1-2 balance cushion/balance board ► Make the exercise more difficult (unstable base)
1 raised base ► Make the exercise easier or more difficult (position)
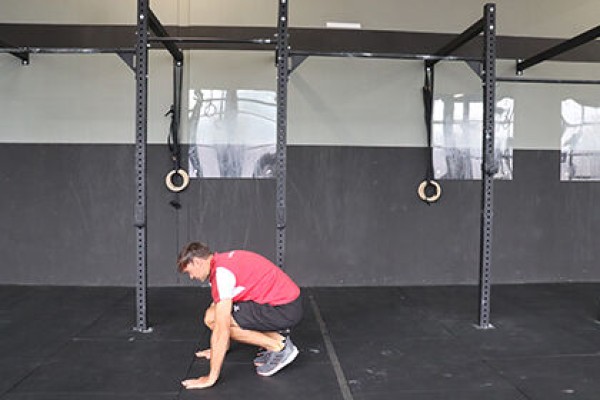
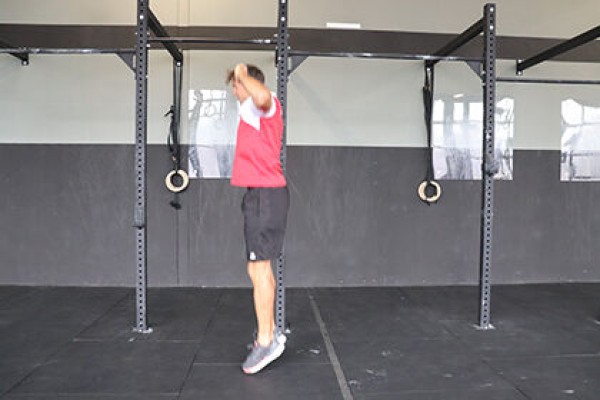
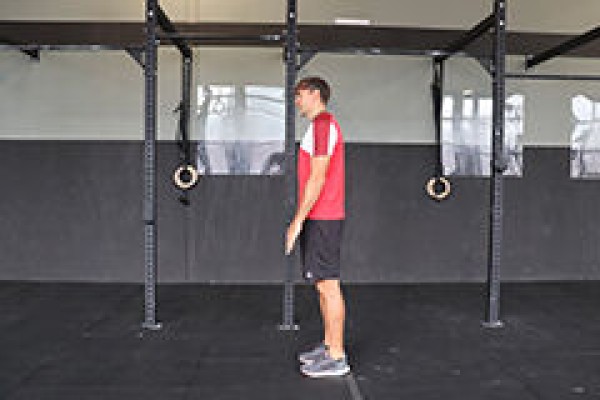
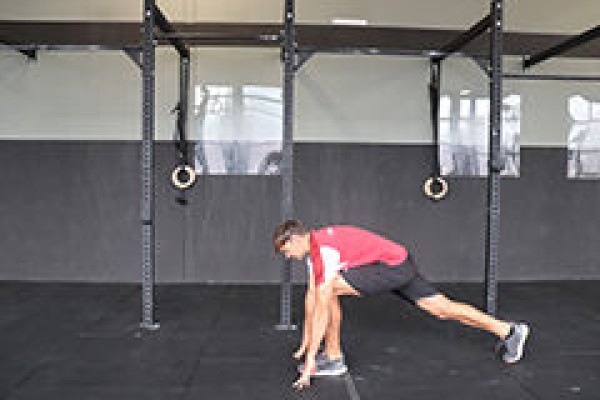
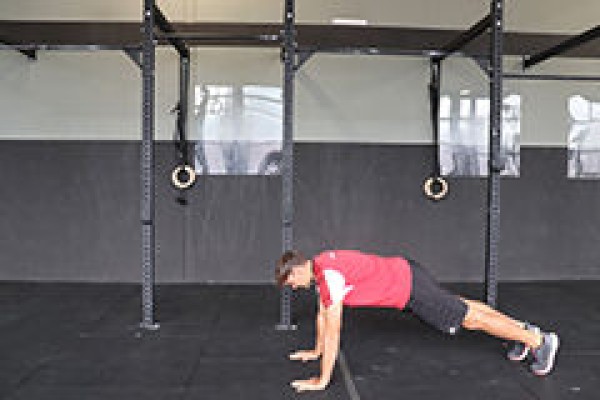
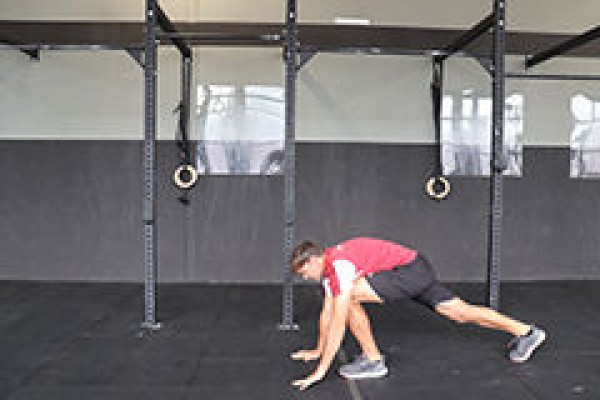
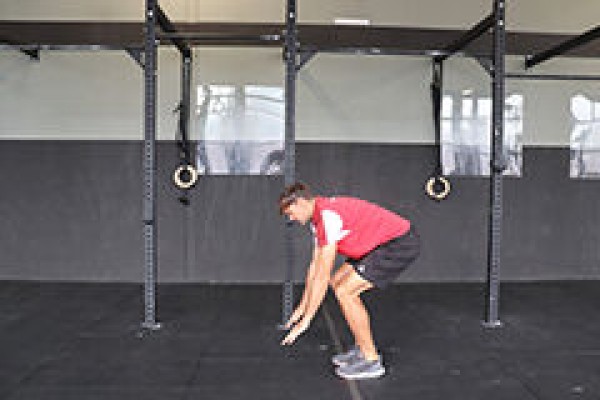
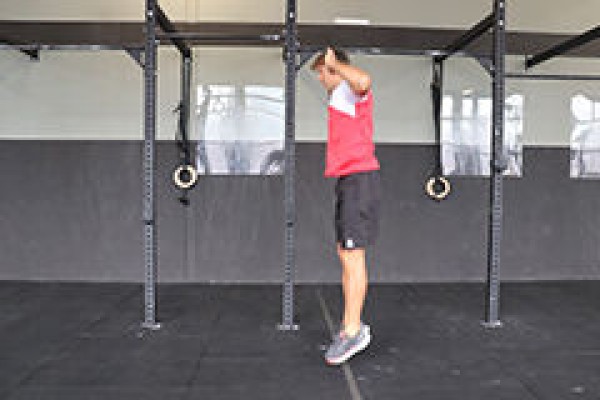
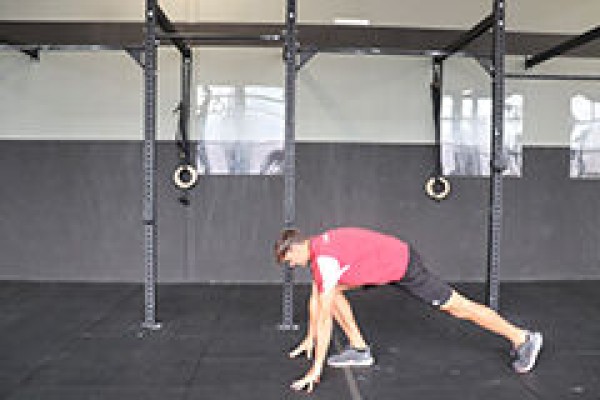
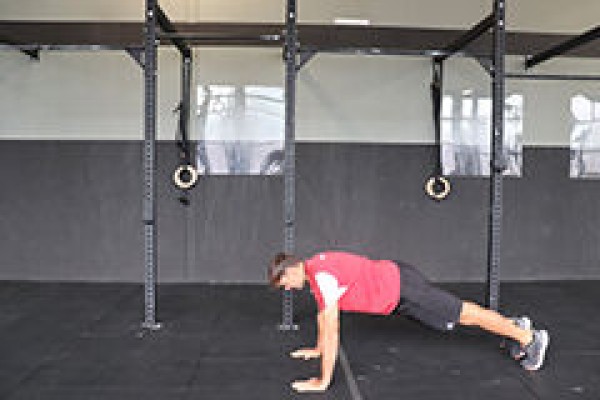
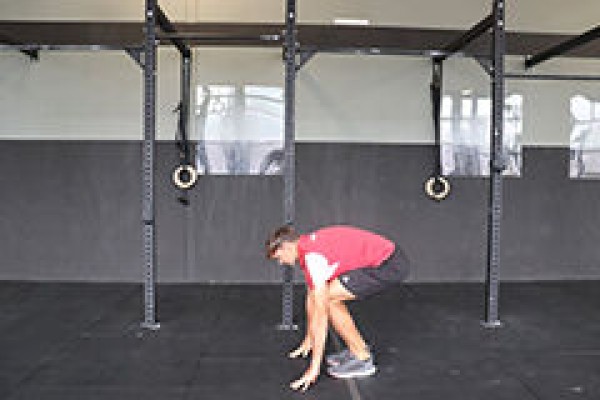
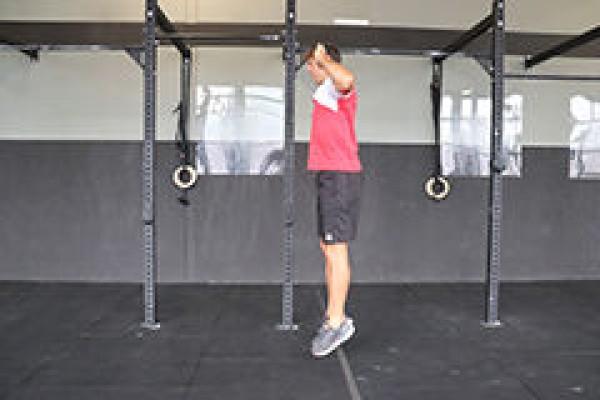
Alternating push-up position and upright standing position ► jump back
Power
Individual work
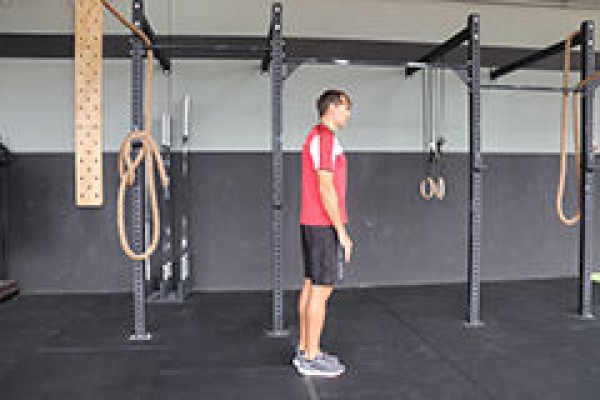
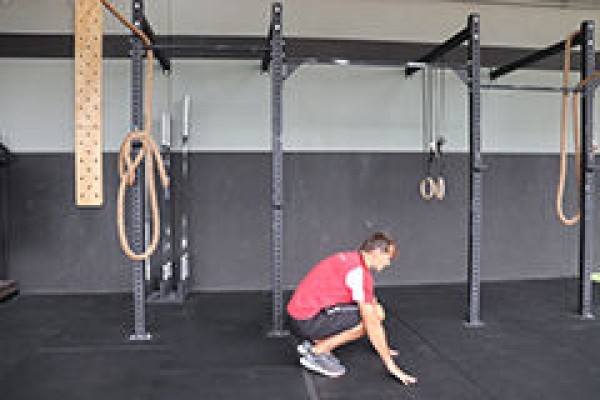
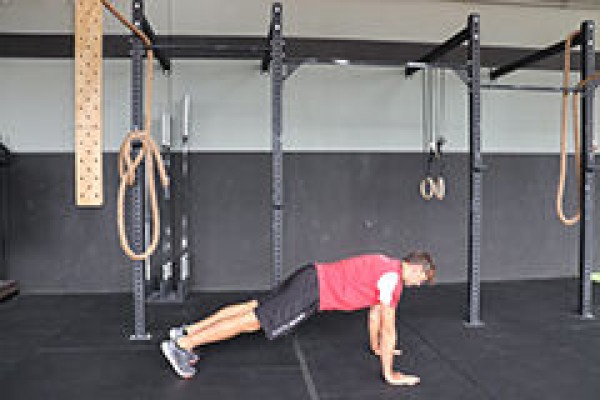
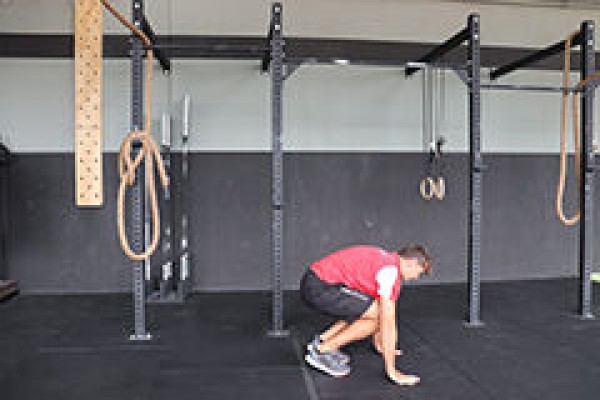
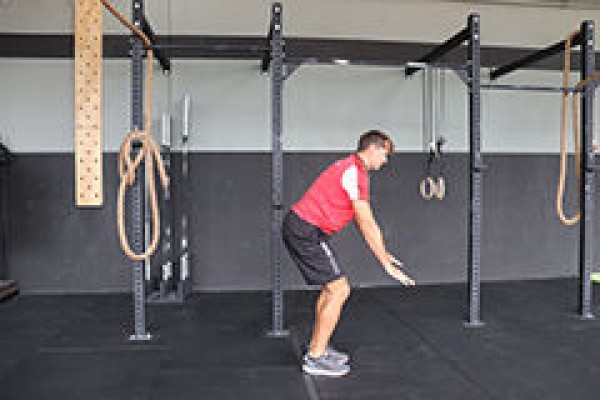
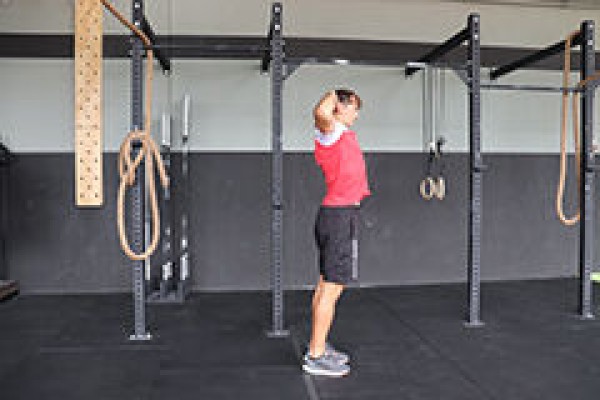
From a standing position, bend your legs, place your hands in front of your feet and jump backwards with both legs at the same time to get into a push-up position. Then jump back forwards with both legs to the starting position of the legs, from this squatting position straighten back up to standing. Cross your arms behind your head and push your pelvis forwards (hollow back) before returning to the starting position in an upright position to start the exercise again.
Attention:
No hollow back in the push-up position (body tension).
Lighten:
Lower intensity between the individual exercises.
Harden:
Additional weight (on the legs).
2 weight cuffs/1 weight waistcoat ► Make the exercise more difficult (additional weight)
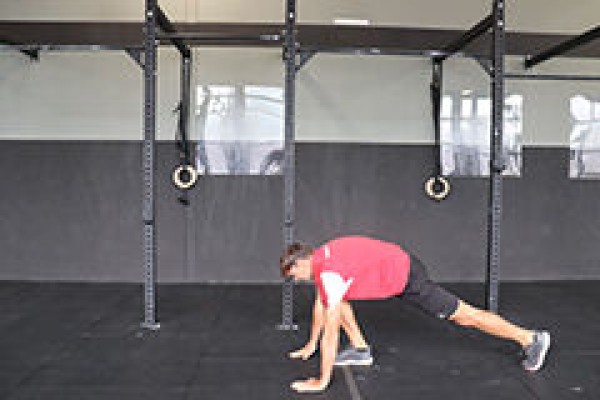
Push-up position and jump to the side alternating ► burpee & box jump over / side jump
Power
Individual work
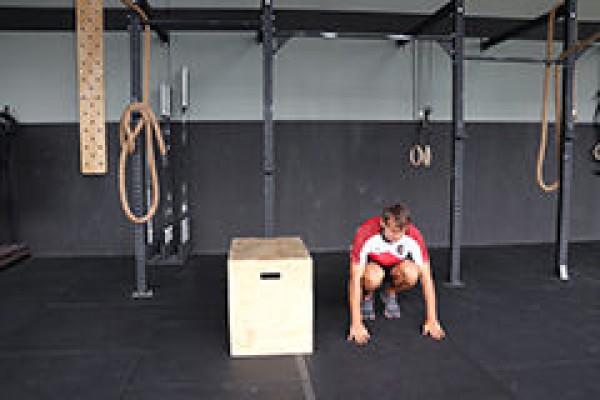

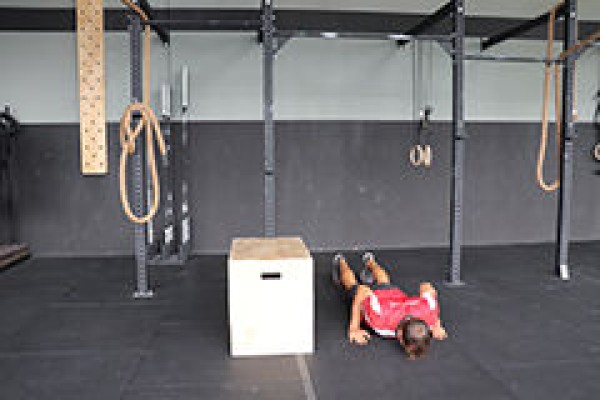
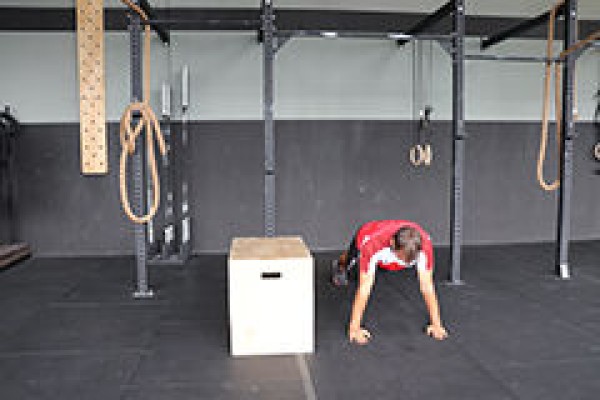
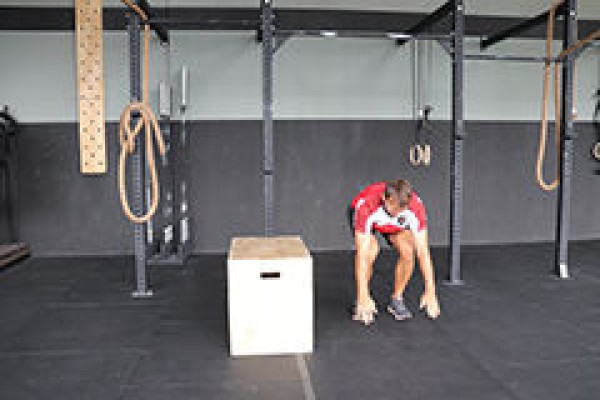

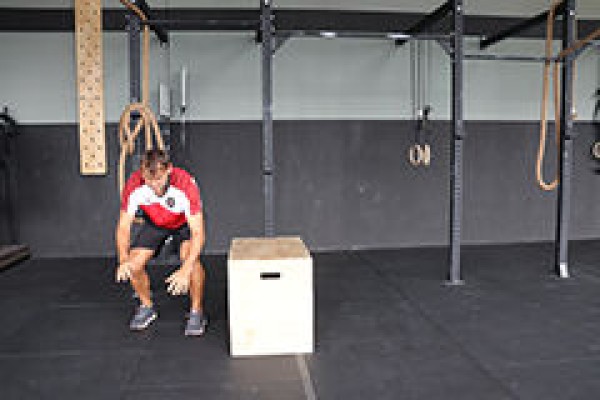

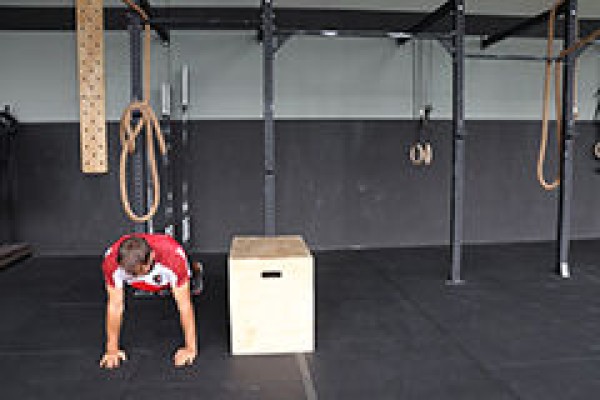
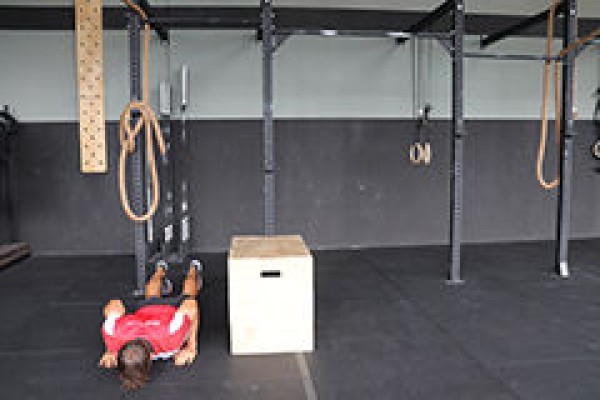
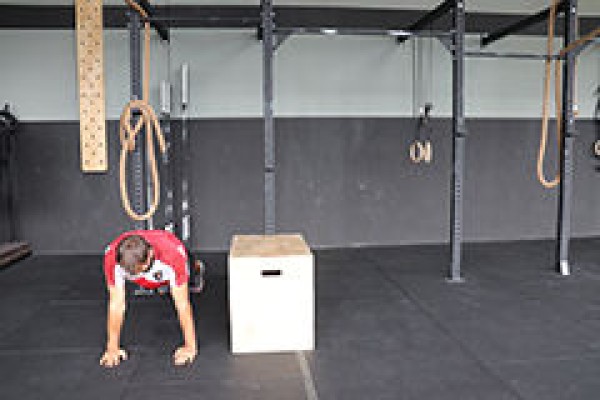
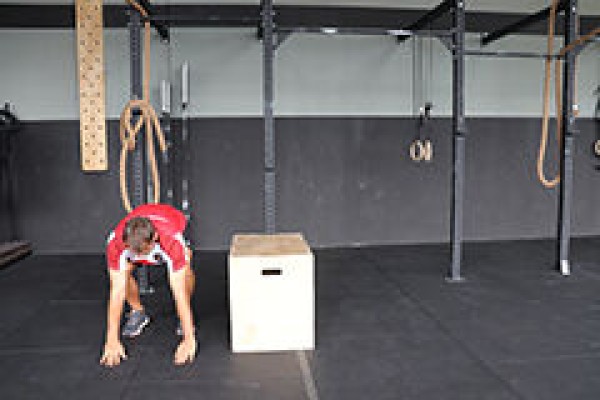
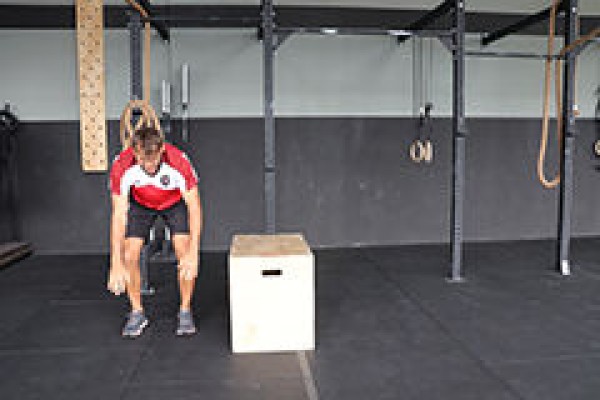
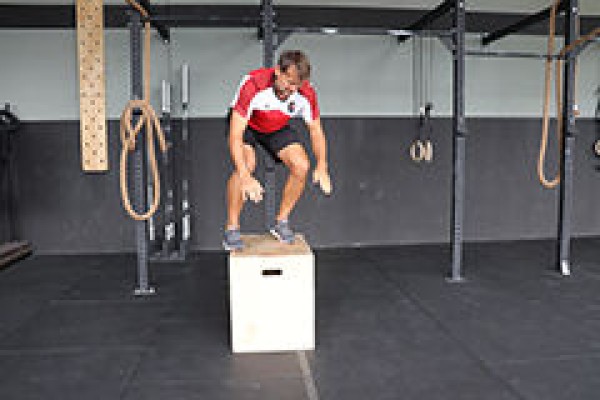
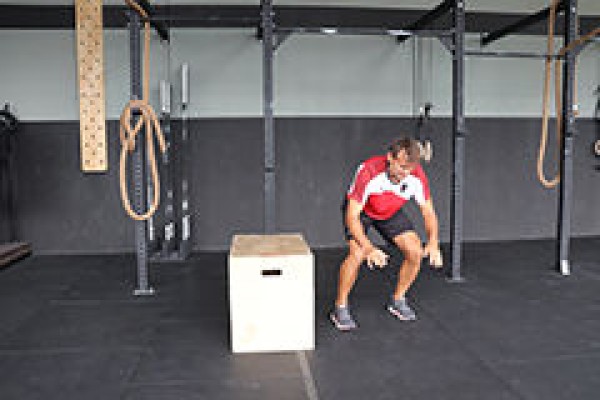
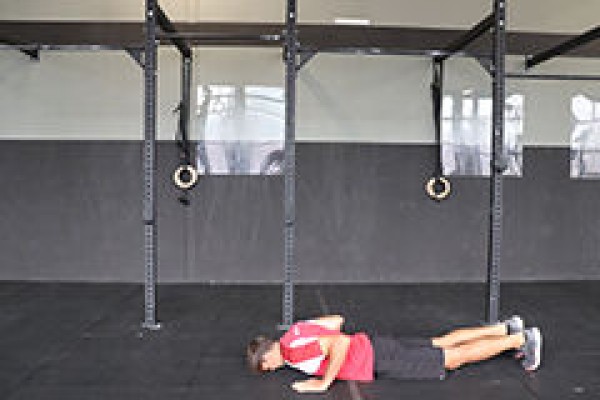
Stand upright and stand next to a raised object (plyo box or vaulting box element incl. top). From a standing position, bend your legs and place your hands next to your feet to get into a squat position. Support yourself with your hands, jump backwards with both legs to get into the push-up position. Bend your arms to fully lower your upper body (prone position). From the prone position, push back into the push-up position with both arms and jump back into the squat position. From the squat position, powerfully push your legs off the floor to perform a sideways jump onto the raised object (use the momentum of your arms). Without straightening the upper body and stretching the legs (again in the squat position), immediately jump again to the other side of the raised object. After landing (no need to stand upright), restart the exercise sequence from the squat position and then jump back to the starting position.
Attention:
Land as softly as possible on the box and then immediately jump again.
Lighten:
Lower intensity between each execution; lower height to jump over.
Harden:
Additional weight; higher object to jump over.
Variation:
Frontal jumps up and down from the object.
1 flat bench/plyo box/swivel box
2-4 weight cuffs/1 weight waistcoat ► Make the exercise more difficult (additional weight)
Push-up position and stretch jump alternating ► half burpee
Power
Individual work
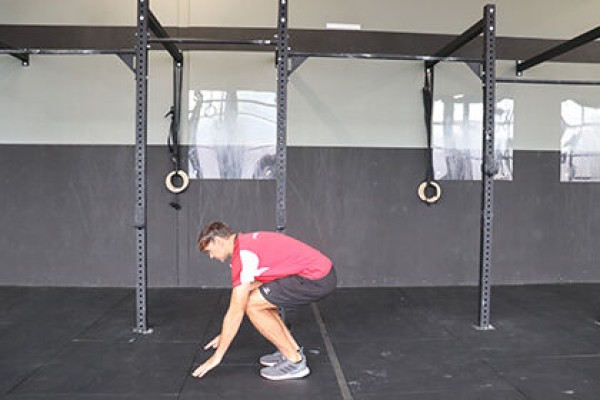
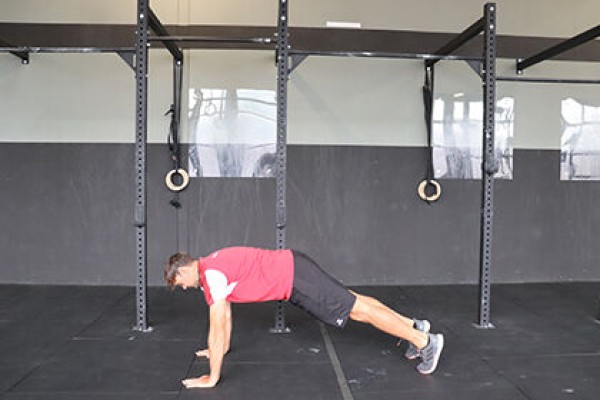
From a standing position, bend your legs, place your hands in front of your feet and jump backwards with both legs at the same time to get into a push-up position. Then jump back forwards with both legs to the starting position of the legs, perform a stretch jump from this crouching position (optionally cross your arms briefly behind your head during the flight phase) and land back in the starting position to begin the exercise again.
Attention:
No hollow back in the push-up position (body tension).
Lighten:
Lower intensity between the individual exercises; lower height during the stretch jump (or only straighten the upper body).
Harden:
Additional weight.
2-4 weight cuffs/1 weight waistcoat ► Make the exercise more difficult (additional weight)
Alternating push-up position and stretch jump ► scaled burpee
Power
Individual work

From a standing position, bend your legs and place your hands next to (in front of) your feet to assume the squat position. Support yourself with your hands and alternately move one leg backwards to reach the push-up position. Bend your arms to fully lower your upper body (prone position). From the prone position, use both arms to push yourself back into the push-up position, then alternately move one leg back into the squat position. From this squatting position, perform a stretch jump (optionally cross your arms briefly behind your head during the flight phase) and land back in the starting position to begin the exercise again (change which leg is moved backwards or forwards first for each exercise).
Attention:
No hollow back in the push-up position (body tension).
Lighten:
Lower intensity between the individual exercises; lower height during the stretch jump (or only straighten the upper body).
Harden:
Additional weight.
2-4 weight cuffs/1 weight waistcoat ► Make the exercise more difficult (additional weight)
Deep push-up position
Power
Individual work
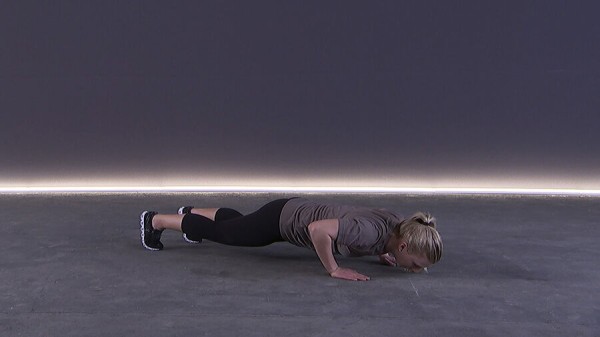
Deep push-up position, hold position.
Attention:
No hollow back, elbows bent approx. 45° from upper body ("A" shape with arms), shoulders are fixed and pulled down towards hips.
Lighten:
Place knees on floor (feet in high position); lower upper body less (arms barely bent); support arms on raised surface.
Harden:
Additional weight (on the back); place legs on a raised surface; unstable surface for the arms and/or legs.
Variant:
Vary the position of the hands/arms (e.g.: wide, narrow, together).
1 weight vest/weight disc/sandbag ► Make the exercise more difficult (additional weight)
1 ball/1-2 balance cushion/balance board ► Make the exercise more difficult (unstable surface)
1 raised surface Make the exercise easier or ► Make the exercise more difficult (position)
Push-up position and forearm support alternating ► push up position & elbow plank / push up position & front plank / push up position to elbow plank / push up position to front plank
Power
Individual work
Switch from the push-up position to the forearm support and back (bend and stretch one arm at a time).
Attention:
Head, torso, hips and knees practically form a line (do not stretch your buttocks upwards or let them sag, tense your stomach).
Lighten:
Knees on the floor.
Harden:
Additional weight (on the back); unstable base for the legs.
1 weight vest/weight disc/sandbag ► to make the exercise more difficult (additional weight)
1 ball/balance cushion/balance board ► to make the exercise more difficult (unstable surface)
Liegestützposition und Unterarmstütz alternierend ► push up position & elbow plank / push up position & front plank / push up position to elbow plank / push up position to front plank
Power
Individual work
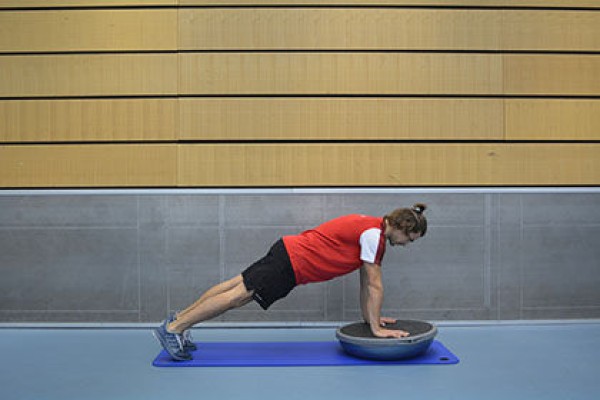
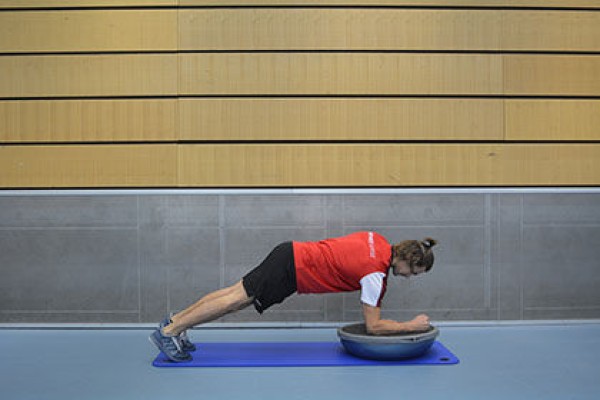
Switch from the push-up position to the forearm support and back (bend and stretch one arm at a time), placing the hands or forearms on a balance ball.
Attention:
Head, torso, hips and knees practically form a line (do not stretch your buttocks upwards or let them sag, tense your stomach).
Lighten:
Perform the exercise without the balancing hemisphere; knees on the floor.
Harden:
Additional weight (on the back); unstable base for the legs.
1 balance hemisphere
1 weight vest/weight disc/sandbag ► to make the exercise more difficult (additional weight)
1 ball/balance cushion/balance board ► to make the exercise more difficult (unstable base)
Liegestützposition und Unterarmstütz alternierend ► push up position & elbow plank / push up position & front plank / push up position to elbow plank / push up position to front plank
Power
Individual work
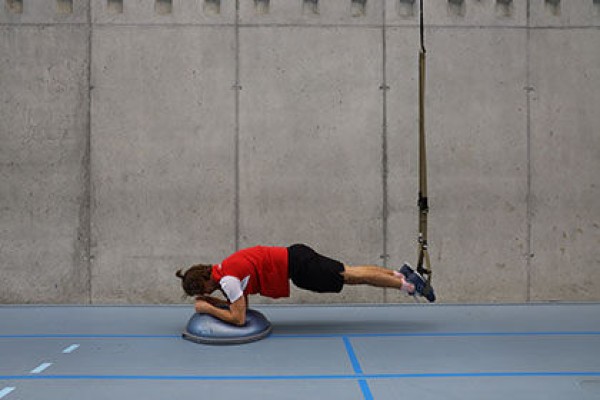
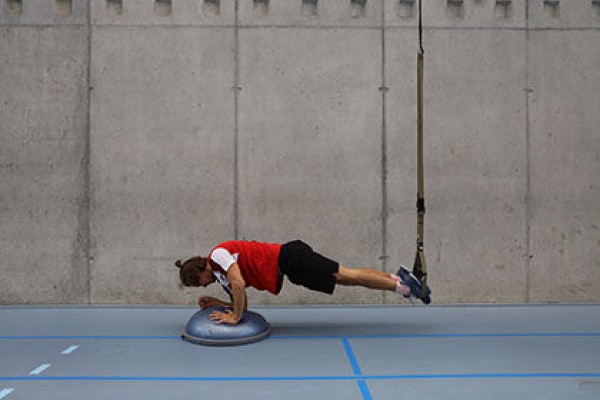
Switch from the push-up position to the forearm support and back (bend and stretch one arm at a time), with the hands or forearms placed on a balance hemisphere and the feet in the sling trainer (adjust the sling trainer to the length of the centre of the lower leg - while standing; feet vertically under the attachment point).
Attention:
Head, torso, hips and knees practically form a line (do not stretch your buttocks upwards or allow them to sag, tense your stomach).
Lighten:
Perform the exercise without the sling trainer and/or balance half-ball.
1 balance hemisphere
1 sling trainer
Move your arms upwards while standing
Power
Individual work
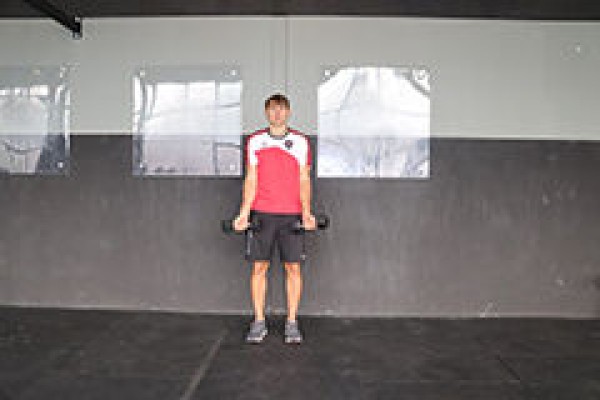
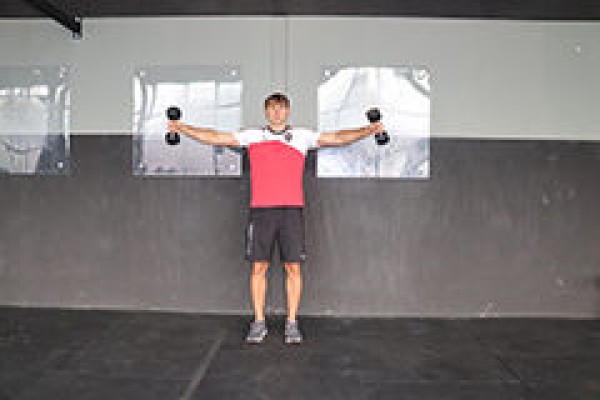
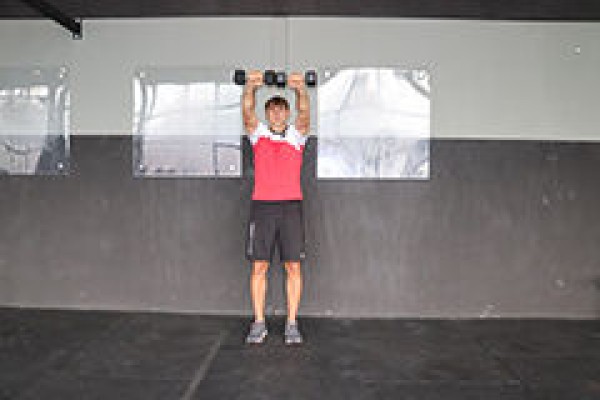
Standing upright, hold two dumbbells at the side of your body with your arms hanging down, grasp the dumbbells with an underhand grip (palms facing forwards), raise your practically straight arms upwards in a circular motion so that your almost closed arms are pointing diagonally upwards in front of your head (first raise the dumbbells sideways before bringing your arms together slightly above head height at about shoulder height). While raising the dumbbells, turn your arms in so that the backs of your hands are pointing upwards in the end position. Then move your arms back to the starting position in the reverse sequence of movements.
Attention:
Keep your shoulders lowered and your back straight; always keep your arms under tension (do not let them hang completely or bring them fully together).
Lighten:
Without/less weight.
Harden:
More weight or additional weight (on the arms).
2 dumbbells
2 weight cuffs ► Make the exercise more difficult (additional weight)
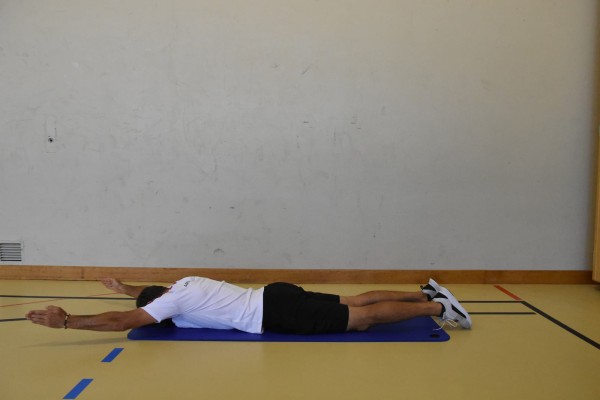
Move the arms forwards and backwards in a prone position ► W-extension / W-raise / W-Y-extension
Power
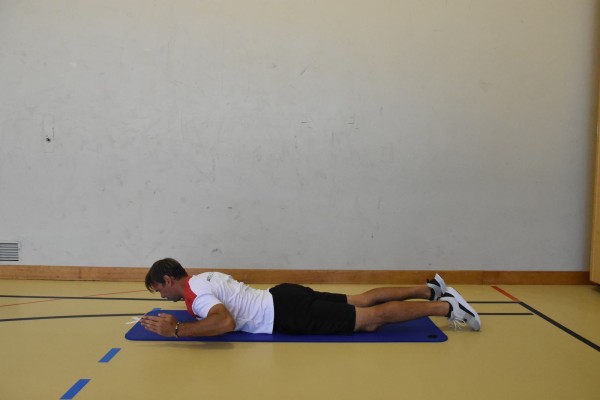

Lying on your stomach with your upper body slightly raised, feet shoulder-width apart, arms bent beside your body (hands at head height - palms facing inwards or downwards - W position), stretch your arms out diagonally forwards as an extension of your body and bend them back to the starting position.
Attention:
Do not lower your upper body and arms completely.
Lighten:
Lower your upper body/arms after each repetition or every now and then.
Harden:
Additional weight on the arms/in the hands.
Note:
The position of the hands is important for the target muscles and the position of the joints.
Palms facing down (pronated grip) = muscle activation: emphasizes the upper trapezius and the external rotators of the shoulder (e.g., infraspinatus, teres minor) / shoulder position: shoulders are more externally rotated / advantage: good posture correction, strengthens the back of the shoulders / disadvantage: can be uncomfortable or restrictive if you have shoulder problems.
Palms facing each other (neutral grip) = muscle activation: activates the middle trapezius, rhomboids, and rear deltoid muscles more strongly / shoulder position: less external rotation, easier on the joints / advantage: often more comfortable for the shoulder joints, better control / disadvantage: less targeted external rotation if that is the goal.
When to choose which: Shoulder health/rehab = neutral (palms facing each other)/focus on external rotators = pronated (palms facing down)/improve posture = both options are useful/keep movement pain-free = neutral is preferable.
Conclusion: The hand position during the W extension influences which parts of the shoulder muscles are used more and how stressful the movement is for the shoulder joints. Both variants are useful – depending on the goal or how it feels, both can be used (or even alternated during training).
Variation I:
Alternately raise one arm (instead of both at the same time).
Variation II:
Position on a flat bench or an incline bench.
2 weight cuffs/weight balls/dumbbells ► Make the exercise more difficult (additional weight)
Move the arms forwards and backwards in a prone position ► W-extension / W-raise / W-Y-extension
Power
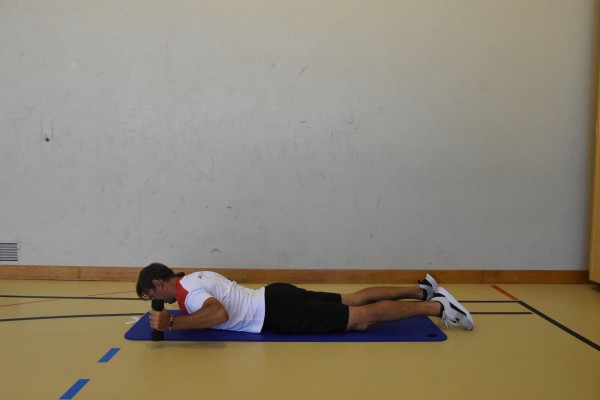
Lying on your stomach with your upper body slightly raised, feet shoulder-width apart, arms bent beside your body (hands at head height - palms facing inwards or downwards - W position), hold a (light) dumbbell in each hand, stretch your arms out diagonally forwards as an extension of your body and bend them back to the starting position.
Attention:
Do not lower your upper body and arms completely.
Lighten:
Lower your upper body/arms after each repetition or every now and then.
Harden:
Additional weight on the arms/in the hands.
Note:
The position of the hands is important for the target muscles and the position of the joints.
Palms facing down (pronated grip) = muscle activation: emphasizes the upper trapezius and the external rotators of the shoulder (e.g., infraspinatus, teres minor) / shoulder position: shoulders are more externally rotated / advantage: good posture correction, strengthens the back of the shoulders / disadvantage: can be uncomfortable or restrictive if you have shoulder problems.
Palms facing each other (neutral grip) = muscle activation: activates the middle trapezius, rhomboids, and rear deltoid muscles more strongly / shoulder position: less external rotation, easier on the joints / advantage: often more comfortable for the shoulder joints, better control / disadvantage: less targeted external rotation if that is the goal.
When to choose which: Shoulder health/rehab = neutral (palms facing each other)/focus on external rotators = pronated (palms facing down)/improve posture = both options are useful/keep movement pain-free = neutral is preferable.
Conclusion: The hand position during the W extension influences which parts of the shoulder muscles are used more and how stressful the movement is for the shoulder joints. Both variants are useful – depending on the goal or how it feels, both can be used (or even alternated during training).
Variation I:
Alternately raise one arm (instead of both at the same time).
Variation II:
Position on a flat bench or an incline bench.
2 weight cuffs/weight balls/dumbbells
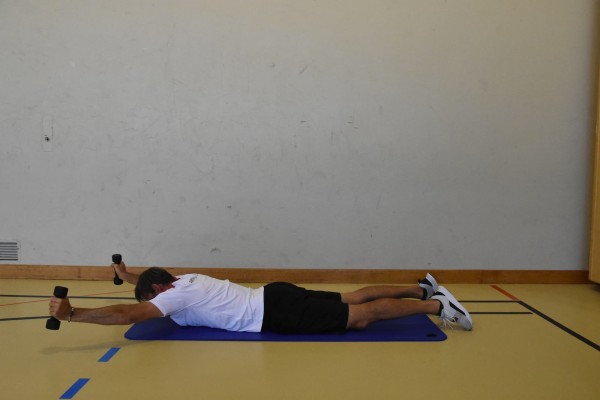
Move the arms forwards and backwards in a prone position ► W-extension / W-raise / W-Y-extension
Power

Lying on your stomach with your forehead resting on a folded cloth, feet shoulder-width apart, arms bent beside your body (hands at head height - palms facing inwards or downwards - W position), hold a (light) dumbbell in each hand, stretch your arms out diagonally forwards as an extension of your body and bend them back to the starting position.
Attention:
Do not lower your upper body and arms completely.
Lighten:
Lower your upper body/arms after each repetition or every now and then.
Harden:
Additional weight on the arms/in the hands.
Note:
The position of the hands is important for the target muscles and the position of the joints.
Palms facing down (pronated grip) = muscle activation: emphasizes the upper trapezius and the external rotators of the shoulder (e.g., infraspinatus, teres minor) / shoulder position: shoulders are more externally rotated / advantage: good posture correction, strengthens the back of the shoulders / disadvantage: can be uncomfortable or restrictive if you have shoulder problems.
Palms facing each other (neutral grip) = muscle activation: activates the middle trapezius, rhomboids, and rear deltoid muscles more strongly / shoulder position: less external rotation, easier on the joints / advantage: often more comfortable for the shoulder joints, better control / disadvantage: less targeted external rotation if that is the goal.
When to choose which: Shoulder health/rehab = neutral (palms facing each other)/focus on external rotators = pronated (palms facing down)/improve posture = both options are useful/keep movement pain-free = neutral is preferable.
Conclusion: The hand position during the W extension influences which parts of the shoulder muscles are used more and how stressful the movement is for the shoulder joints. Both variants are useful – depending on the goal or how it feels, both can be used (or even alternated during training).
Variation I:
Alternately raise one arm (instead of both at the same time).
Variation II:
Position on a flat bench or an incline bench.
2 weight cuffs/weight balls/dumbbells
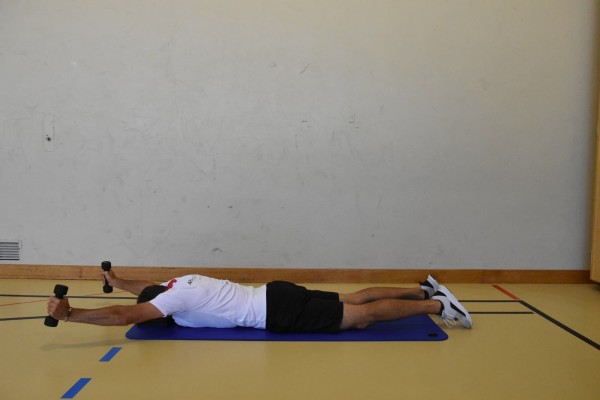
Move the arms forwards and backwards in a prone position ► W-extension / W-raise / W-Y-extension
Power

Lying on your stomach with your forehead resting on a folded cloth, feet shoulder-width apart, arms bent beside your body (hands at head height - palms facing inwards or downwards - W position), stretch your arms out diagonally forwards as an extension of your body and bend them back to the starting position.
Attention:
Do not lower your upper body and arms completely.
Lighten:
Lower your upper body/arms after each repetition or every now and then.
Harden:
Additional weight on the arms/in the hands.
Note:
The position of the hands is important for the target muscles and the position of the joints.
Palms facing down (pronated grip) = muscle activation: emphasizes the upper trapezius and the external rotators of the shoulder (e.g., infraspinatus, teres minor) / shoulder position: shoulders are more externally rotated / advantage: good posture correction, strengthens the back of the shoulders / disadvantage: can be uncomfortable or restrictive if you have shoulder problems.
Palms facing each other (neutral grip) = muscle activation: activates the middle trapezius, rhomboids, and rear deltoid muscles more strongly / shoulder position: less external rotation, easier on the joints / advantage: often more comfortable for the shoulder joints, better control / disadvantage: less targeted external rotation if that is the goal.
When to choose which: Shoulder health/rehab = neutral (palms facing each other)/focus on external rotators = pronated (palms facing down)/improve posture = both options are useful/keep movement pain-free = neutral is preferable.
Conclusion: The hand position during the W extension influences which parts of the shoulder muscles are used more and how stressful the movement is for the shoulder joints. Both variants are useful – depending on the goal or how it feels, both can be used (or even alternated during training).
Variation I:
Alternately raise one arm (instead of both at the same time).
Variation II:
Position on a flat bench or an incline bench.
2 weight cuffs/weight balls/dumbbells ► Make the exercise more difficult (additional weight)
Move upper leg forwards in lateral forearm support (left) ► knee raise lateral pillar bridge / side bridge
Power
Individual work
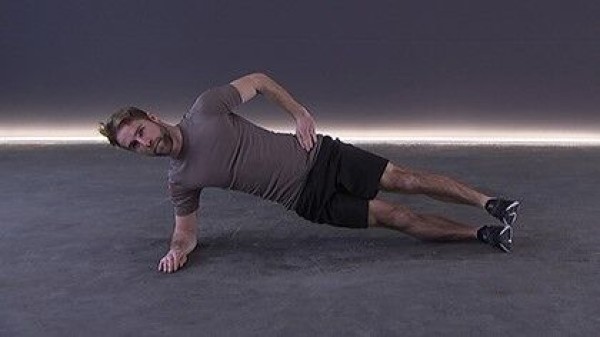
Side support on the (left) forearm, push the thigh of the upper leg straight out forwards (lower leg parallel, thigh bent at approx. 90 degrees to the body/leg) and return to the starting position.
Attention:
Head, torso, hips and knees practically form a line (pelvis does not tilt backwards or forwards), keep the shoulder above the elbow.
Lighten:
Knee on the floor; move your leg less forwards; just hold the position.
Harden:
Additional weight (for the free leg or on the hip); unstable support (possible for both the arm and the leg).
1 weight cuff/weight vest/weight disc/sandbag ► making the exercise more difficult (additional weight)
1 ball/1-2 balance cushions/1 balance board ► making the exercise more difficult (unstable surface)
Move upper leg forwards in lateral forearm support (right) ► knee raise lateral pillar bridge / side bridge
Power
Individual work
Side support on the (right) forearm, push the thigh of the upper leg straight out forwards (lower leg parallel, thigh bent at approx. 90 degrees to the body/leg) and return to the starting position.
Attention:
Head, torso, hips and knees practically form a line (pelvis does not tilt backwards or forwards), keep the shoulder above the elbow.
Lighten:
Knee on the floor; move your leg less forwards; just hold the position.
Harden:
Additional weight (for the free leg or on the hip); unstable support (possible for both the arm and the leg).
1 weight cuff/weight vest/weight disc/sandbag ► making the exercise more difficult (additional weight)
1 ball/1-2 balance cushions/1 balance board ► making the exercise more difficult (unstable surface)
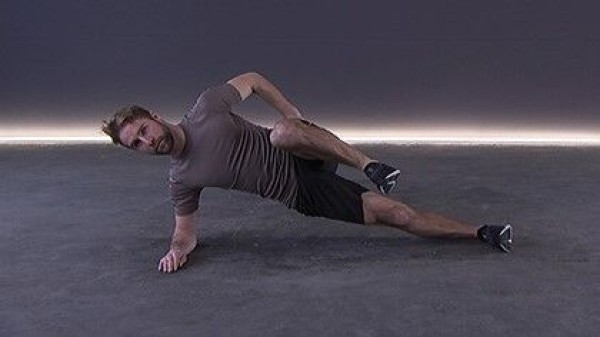
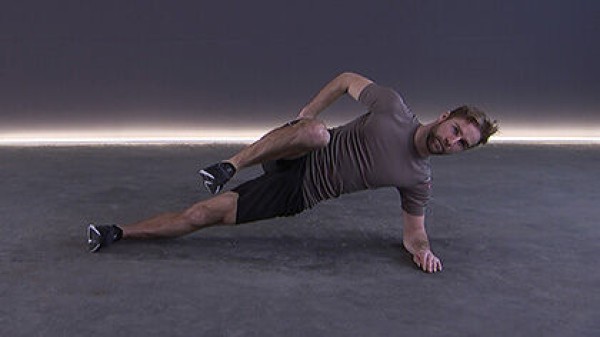
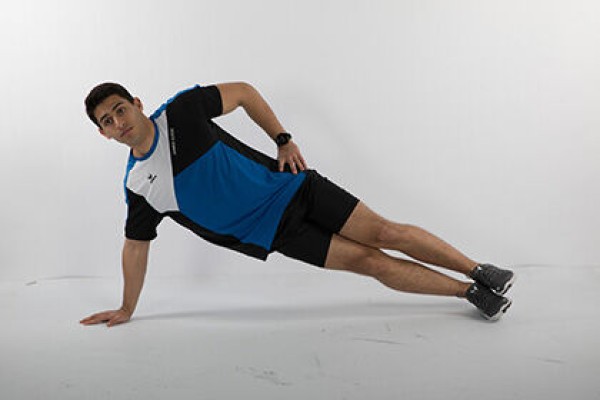
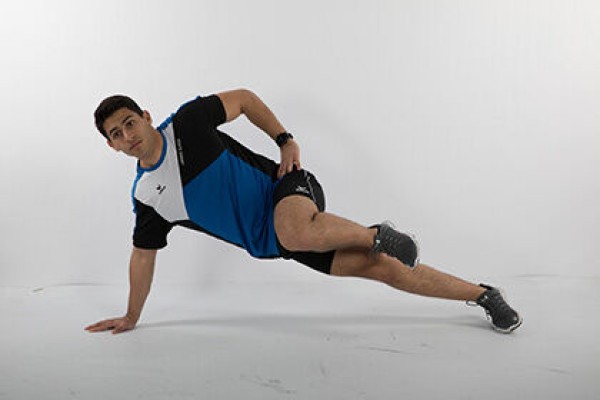
Move upper leg forwards in lateral support (left) ► knee raise lateral pillar bridge / side bridge
Power
Individual work
Lateral support with outstretched (left) arm, push the thigh of the upper leg straight out forwards (lower leg parallel, thigh bent at approx. 90 degrees to the body/leg) and return to the starting position.
Attention:
Head, torso, hips and knees practically form a line (pelvis does not tilt backwards or forwards), keep shoulder above elbow.
Lighten:
Knee on the floor; move your leg less forwards; just hold the position.
Harden:
Additional weight (for the free leg or on the hip); unstable support (possible for both the arm and the leg).
1 weight cuff/weight vest/weight disc/sandbag ► to make the exercise more difficult (additional weight)
1 ball/1-2 balance cushions ► to make the exercise more difficult (unstable surface)
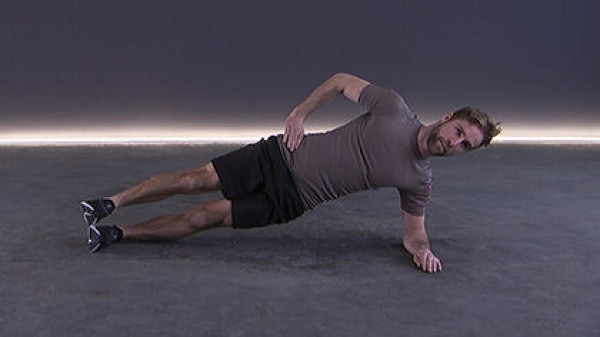
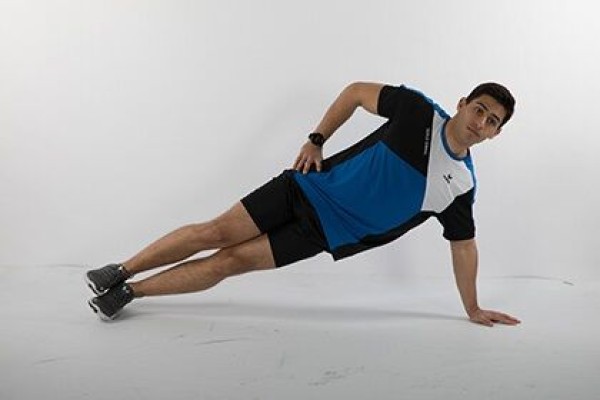
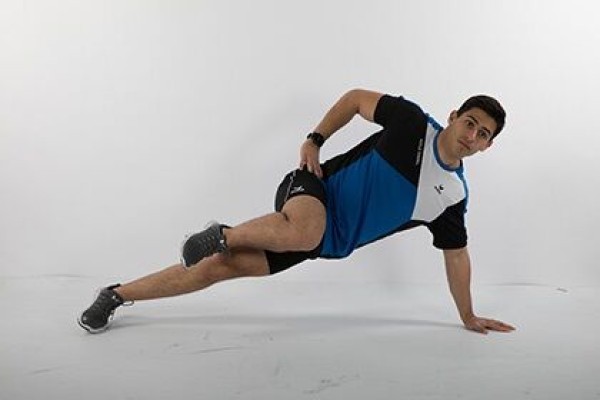
Move upper leg forwards in lateral support (right) ► knee raise lateral pillar bridge / side bridge
Power
Individual work
Lateral support with outstretched (right) arm, push the thigh of the upper leg straight out forwards (lower leg parallel, thigh bent at approx. 90 degrees to the body/leg) and return to the starting position.
Attention:
Head, torso, hips and knees practically form a line (pelvis does not tilt backwards or forwards), keep shoulder above elbow.
Lighten:
Knee on the floor; move your leg less forwards; just hold the position.
Harden:
Additional weight (for the free leg or on the hip); unstable support (possible for both the arm and the leg).
1 weight cuff/weight vest/weight disc/sandbag ► to make the exercise more difficult (additional weight)
1 ball/1-2 balance cushions ► to make the exercise more difficult (unstable surface)
Move upper body forwards and backwards in forearm support ► dynamic pillar bridge
Power
Individual work
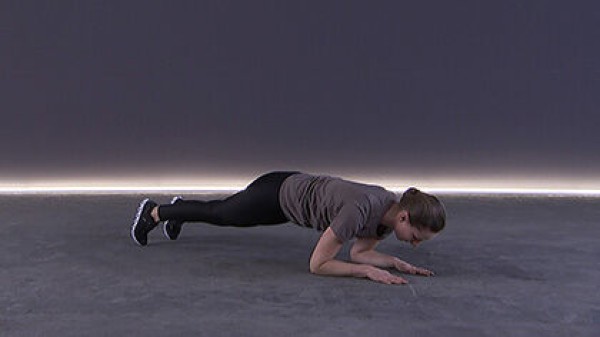
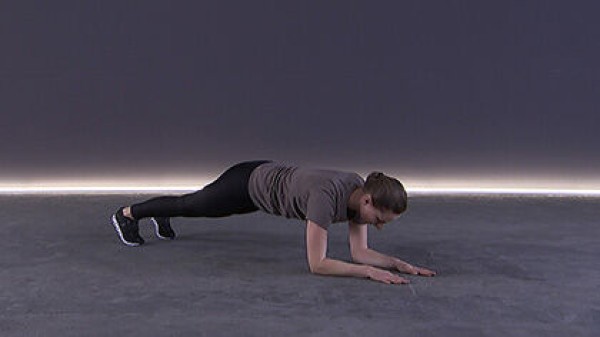
Underarm support (the outstretched legs and upper body practically form a line, the legs are supported on the tips of the toes and the upper body on the forearms, the forearms lie flat on the floor parallel to each other, the upper arms are vertical), move the upper body forwards and backwards by changing the angle between the forearm and upper arm.
Attention:
Head, torso, hips and knees practically form a line (do not stretch your buttocks upwards or let them sag, tense your stomach).
Lighten:
Knees on the floor (kneeling shift).
Harden:
Additional weight (on the back); unstable support for the legs and/or arms possible.
1 weight vest/weight disc/sandbag ► make the exercise more difficult (additional weight)
1 ball/1-2 balancing cushions/balance board ► make the exercise more difficult (unstable surface)
Pebble walk
Power
Individual work

Place 3 small stones on the floor; balance on two of these stones. Move the third free stone; switch to this stone with one foot. Repeat the process without losing your balance.
Lighten:
Without equipment;
Larger stones.
Harden:
With a backpack;
Smaller stones.
Material per participant: Tenue CNM
Additional material: 3 small stones
Pronation of the forearm in the sitting position (left)
Power
Individual work
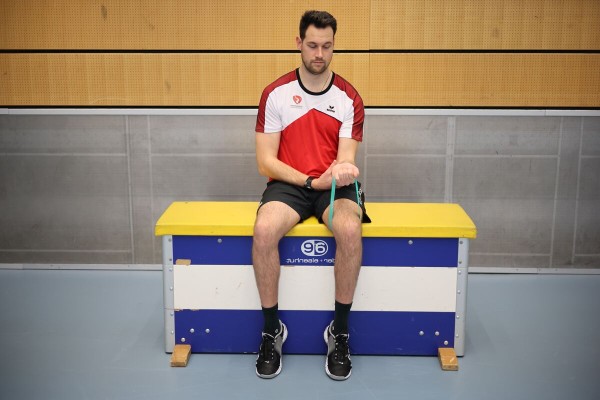
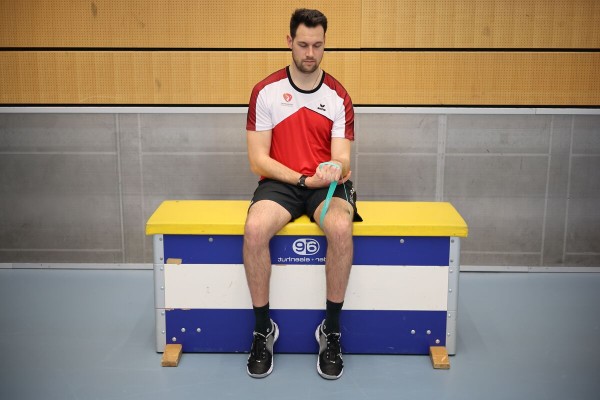
While seated, place an elasticated band around the (left) thigh and grasp the band with the (left) hand, with the back of the hand pointing downwards. The arm holding the band is bent so that the upper arm is against the body and the lower arm is pointing forwards (90 degree angle at the elbow joint). The other (right) arm fixes the training arm by holding the forearm at the elbow. From this position, rotate the arm inwards (pronation) so that the back of the hand is pointing upwards in the end position.
Attention:
The movement only takes place in the forearm, the upper arm remains stable.
Lighten:
Select a rubber band with less resistance.
Harden:
Select a rubber band with greater resistance.
1 mini-band
1 seating option (e.g. chair, plyo box or vaulting box)